
AB WHEEL ROLLOUT (STANDING)
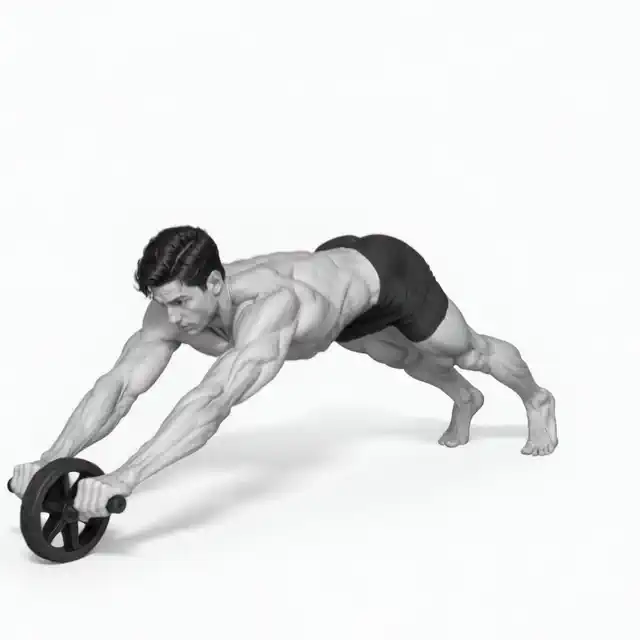
The standing AB rollout is not just a slightly farther knee version, it is a top-level anti-extension exercise that requires control of an extra-long lever from your feet to your hands.
Rolling out from a standing position, with the wheel on the floor and the body extended, significantly increases lever and return demands compared to knee support. Most require regressions with walls, uphill ramps, and high barbells rather than full-range floor exercises. With full control of your knee rollout, start the wheel with your hip hinge and roll only a short distance before your ribs and pelvis release.
- Primary muscles
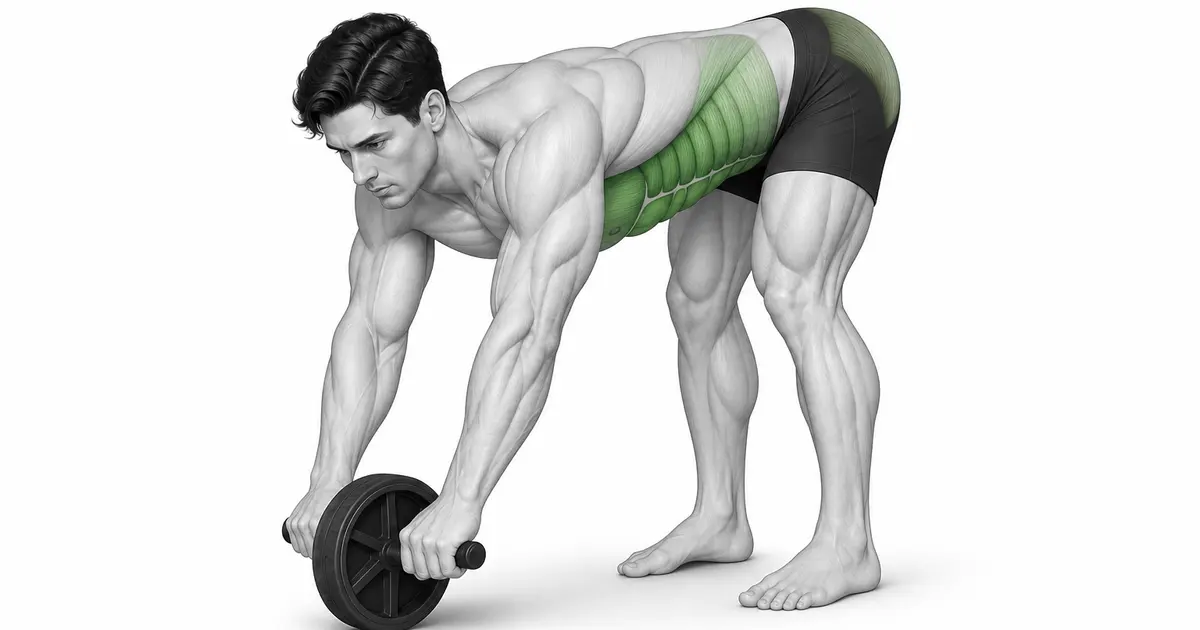
- Rectus abdominis · Transverse abdominis
- Secondary muscles
- Latissimus dorsi, serratus anterior, triceps, glutes, hamstrings
- Difficulty
- Intermediate
- Movement type
- Standing posture extra long lever full extension
How many knee rollouts do I have to do to get over it?
Do not decide based on the number of repetitions alone, but do at least 8 to 12 full range repetitions without sagging your back and then start with a high incline return.
STEP BY STEP
4 Steps for One Complete Rep
- 1
Check full knee range and regression device
You must be able to perform knee rollouts without sagging your back. Have a solid stopper, such as a wall, incline ramp, or high barbell.
- 2
Hip hinge keeps wheels safely on the ground
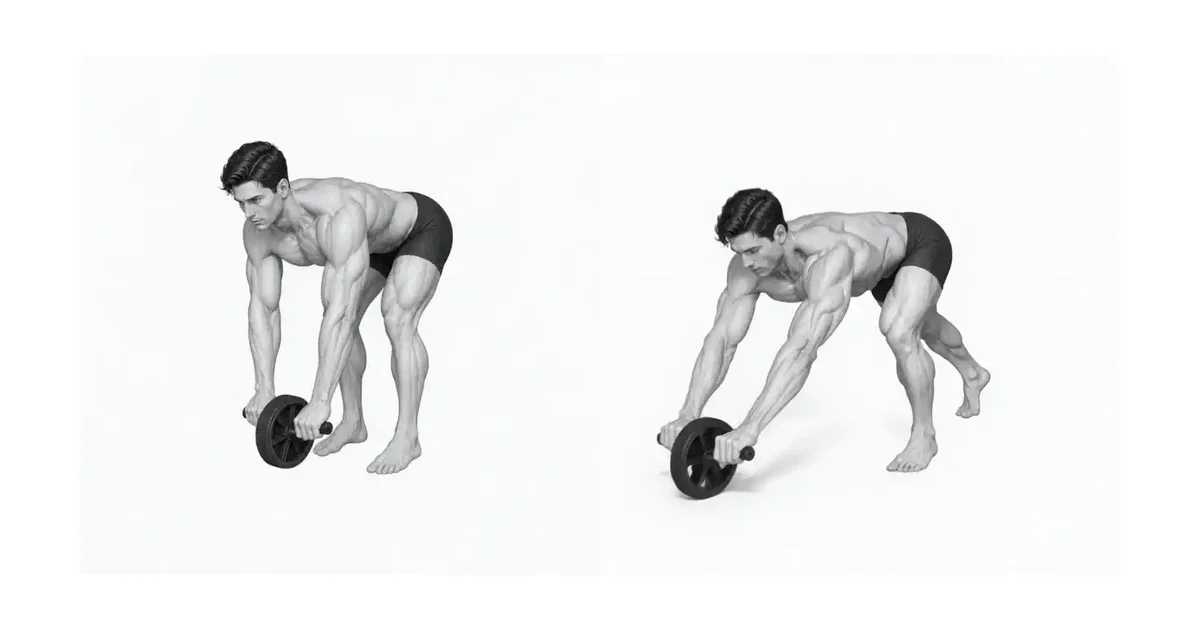
Place your feet hip-width apart, bend your knees slightly and send your pelvis backward. Hold the handle and place the wheel on the floor in front of your feet.
- 3
Roll forward with ribs and pelvis locked
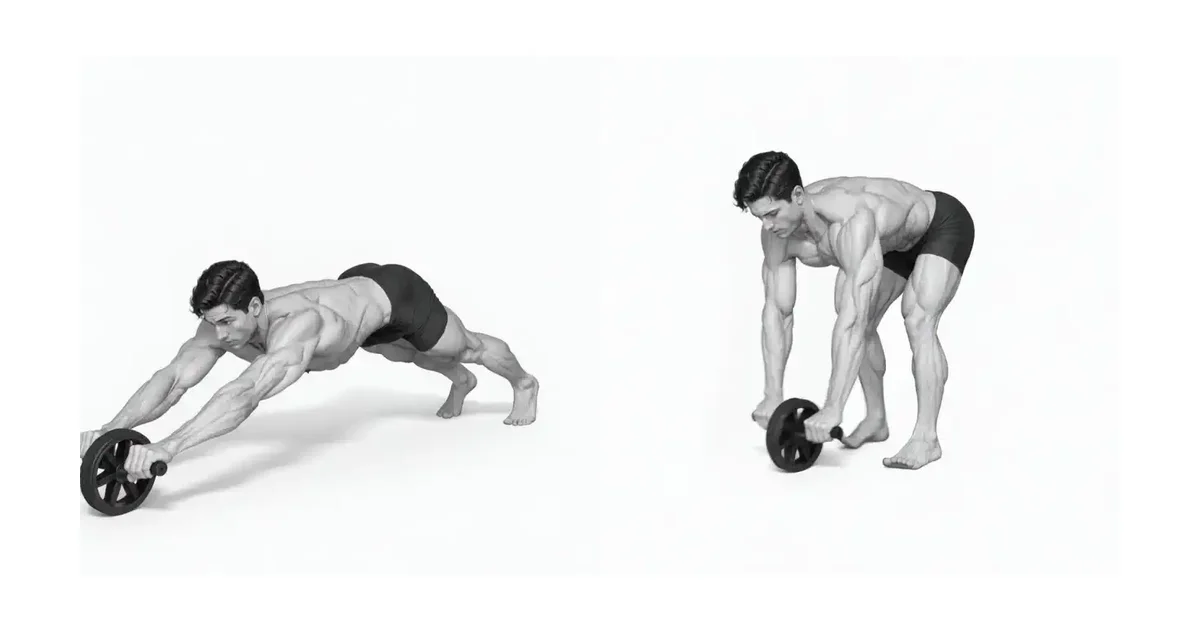
Press your feet into the floor, tighten your glutes and abdomen, and drive the wheel forward. Lengthen your body and stop just before your lower back sags or at the stopper.
- 4
Stand by pulling the wheel with your lats and abdomen
Press the wheel down to the floor, tighten your armpits, and pull it toward your body. Do not allow your hips to fall back first and then stand up with your hip hinge at the end.
USE A RAMP OR WALL
Climbs and walls precisely adjust range while maintaining full-body levers
High starting points or uphill slopes lower the demand as the wheels move further apart. Walls provide constant endpoints.
Make 5 to 8 controlled returns on the same return before attempting a full floor range.
Key point: Cue to use right away: “It lengthens as one body to the wall and returns to the same shape.”
NO PLACE TO FAIL
Failure to return to full range poses direct risk to face and back
Don't roll to the point of failure, be sure to use extra range and physical stoppers. Also leave room for your knees in front of your feet.
If your back begins to buckle, don't go any further and lower your knees to the floor to exit safely.
TROUBLESHOOTING
Fix the cause of a mistake, not just its appearance
Try it right away without full range of knee rollout
- What you see
- After just a few centimeters, your back will buckle and you will not be able to return.
- Likely cause
- Lever increase and safety requirements were underestimated.
- How to correct it
- Return to full knee range and high incline rollout and gradually lower.
Move your hips back and only move the wheel
- What you see
- The torso is barely elongated and the hips remain over the feet.
- Likely cause
- Hip hinge maintained to avoid anti-extension requirements.
- How to correct it
- Place a short target on the wall and allow your hips and shoulders to move forward together.
Rolls more even after bending the lower back
- What you see
- The stomach sags toward the floor and pressure is placed on the lower back when returning.
- Likely cause
- Distance target exceeds torso control.
- How to correct it
- Immediately kneel down and exit then use higher regression and shorter range.
REGRESSION & PROGRESSION
Match the difficulty before adding load
Increased load and strength
Increase intensity by gradually increasing weight or shortening rest periods.
Complex Variant Behavior
Increase the difficulty level by combining it with other exercises or adding unstable environments.
BEGINNER PROGRAM
A practical starting framework
Use low repetitions of 1-5 reps and long rest, and always leave room for failure. Work in small increments, recording slope height and wall distance.
Frequency
2-3 times a week
Appropriately place it in your whole body or relevant area routine.
Volume
3~5 sets, 8~15 times
Adjust the number of reps and sets according to your goals.
- Always put safety first and listen to your joint pain.
- Carry out the entire process within your control.
Frequently asked questions
Does using a wall reduce the effectiveness?
No. This is an important safety feature that limits failure distance and allows for consistent range progression.
What should I do if it does not return?
Do not forcibly pull your lower back, but immediately lower your knees to the floor to finish. Next time, shorten the range or increase the incline.


