
CLAMSHELL
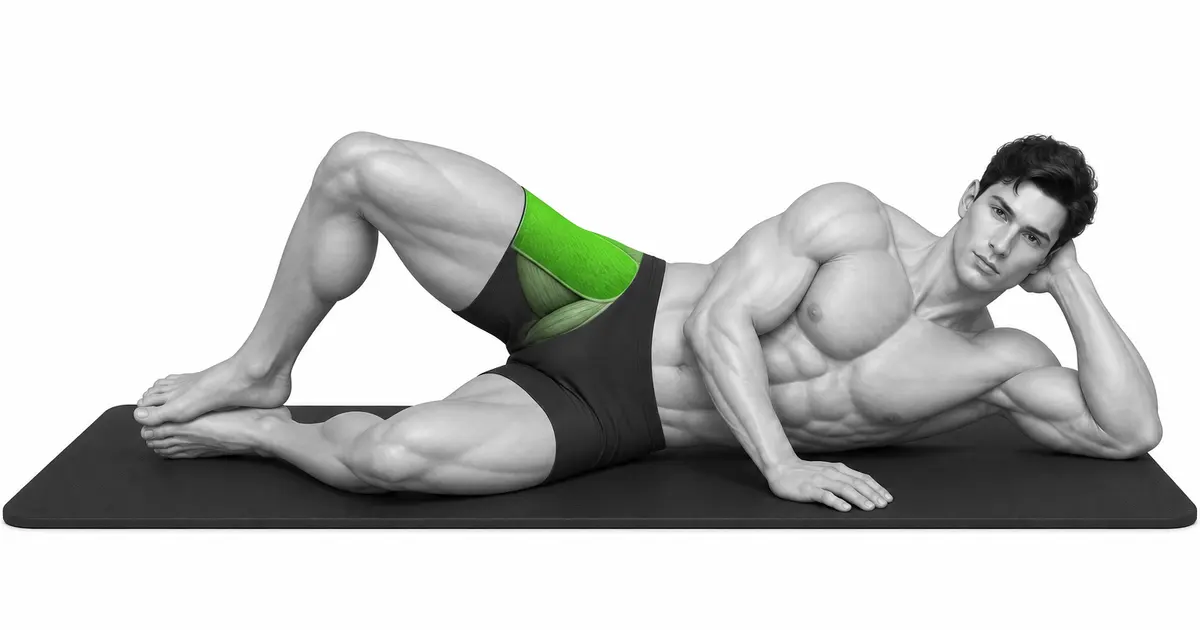
Clamshell is an exercise that uses the gluteus medius muscle by stacking the pelvis and opening only the upper hip joint, rather than opening the knees as much as possible.
You can train your gluteus medius and hip external rotators with a low load by lying on your side with your knees bent, your feet together, and your upper knees open. When you raise your knees high, your pelvis rolls back and your torso rotates to create range. Stack both hips vertically and move slowly in a small range while maintaining space next to your waist.
- Primary muscles
- Gluteus medius, gluteus minimus
- Secondary muscles
- Gluteus maximus, deep hip external rotators, core
- Difficulty
- Intermediate
- Movement type
- Side-lying hip abduction/external rotation
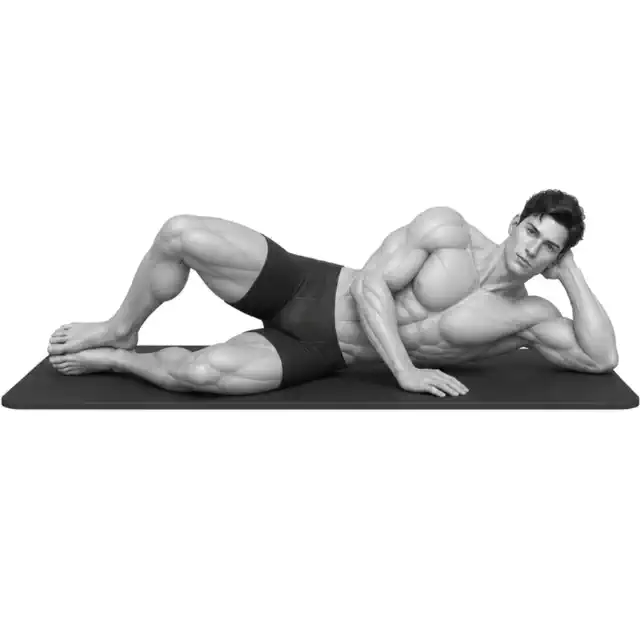
How high should I raise my knees?
Raise only to a height that prevents your pelvis from rolling backwards. A small range may be normal.
STEP BY STEP
4 Steps for One Complete Rep
- 1
Stacking shoulders and pelvis vertically
Lie on your side, support your head, and overlap both pelvic bones so that they face forward. Bend your knees at approximately 45 to 90 degrees and place your feet together.
- 2
Securing the abdomen and lower flanks
Keep your lower sides long so that your lower back does not sag to the floor. Place your top hand on your hip to feel the rotation.
- 3
Feet together and upper knees open
Exhale and open your upper knee toward the ceiling. Keep your heels together and stop just before your pelvis moves back.
- 4
Hold tension and close slowly
Pause 1 second at the top, then lower your knees over 2-3 seconds. Begin the next repetition before leaning fully on your lower knee.
STACK THE PELVIS
Knee height is only allowed until the pelvis rolls backwards
When the upper pelvis falls back, it looks like a hip movement, but in reality, the entire torso rotates. Secure your pelvis with your hands and feel the change.
Continuous tension on the side of the buttocks, even in a small range, is enough.
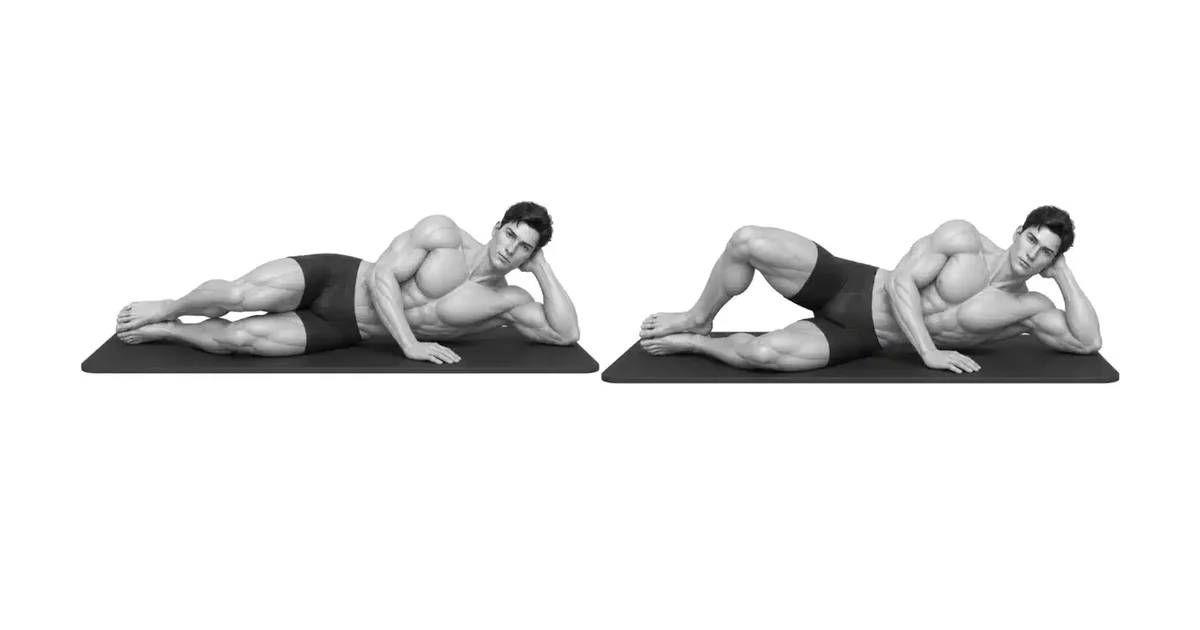
Key point: Cue to use right away: “Keep your feet together and your hips stacked on top of each other.”
BAND PLACEMENT
Place the band just above the knees and use only the strength that maintains pelvic fixation.
Place the band on the lower thigh, not directly over the knee joint. If it's too strong, your feet will drop and your pelvis will roll backwards.
Add a light band after performing at least 15 controlled exercises on your body.
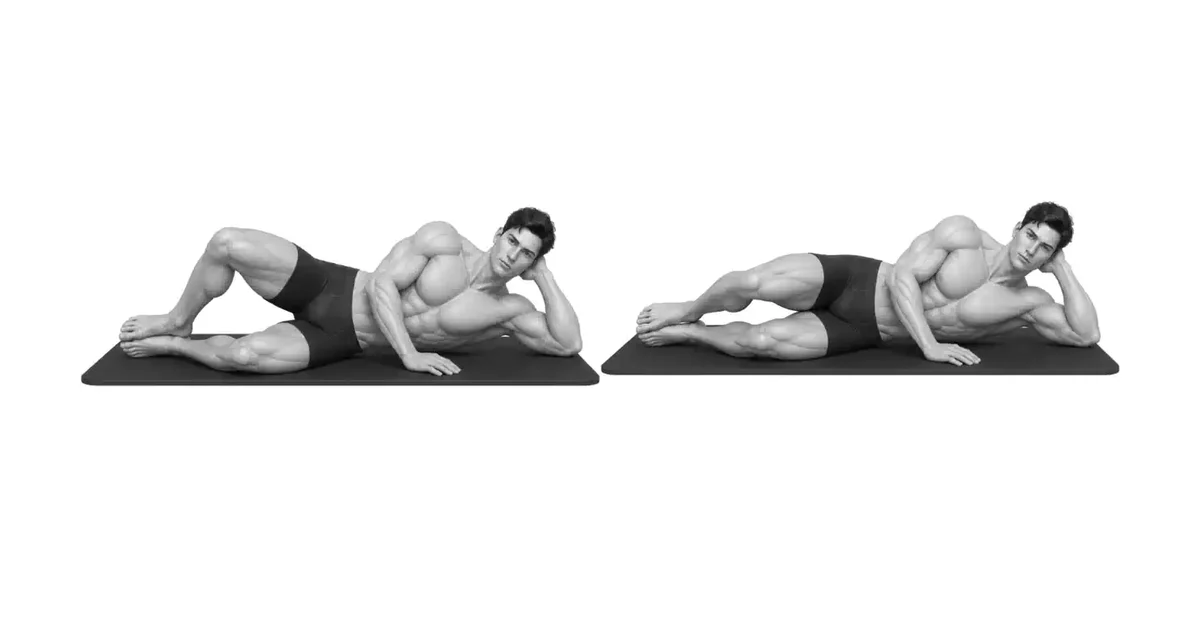
TROUBLESHOOTING
Fix the cause of a mistake, not just its appearance
Pelvis rolls backwards
- What you see
- Your belly button and upper pelvis are towards the ceiling and your knees are raised very high.
- Likely cause
- Prioritized knee height over hip range.
- How to correct it
- Reduce the range by placing your back close to the wall or steadying your pelvis with your hands.
Feet apart
- What you see
- The upper foot is lifted along with the knee, and the entire leg moves.
- Likely cause
- Compensate with hip abduction rather than external rotation, or the band is stronger.
- How to correct it
- Lightly attach the heel and remove the band to return to a small range.
The side of your back gets tired first
- What you see
- Tension is concentrated in the sides and lower back rather than the gluteus medius.
- Likely cause
- Let your torso droop towards the floor or lift your pelvis towards your waist.
- How to correct it
- Keep your sides long, fold your hips, and move your knees slowly.
REGRESSION & PROGRESSION
Match the difficulty before adding load
Isometric Clamshell
Hold for 10 to 20 seconds at the top of the small range.
Bare clamshell
Learn pelvic fixation and slow return.
Mini Band Clamshell
Maintains alignment and adds resistance.
Side flank clamshell
Increases torso and hip demands together.
BEGINNER PROGRAM
A practical starting framework
Can be used as a warm-up or rehabilitation aid, but is not a complete replacement for large lower body exercises. Use the same pelvic position and range for both left and right sides.
Count
12–20 times each
Top 1 second, return 2~3 seconds
Set
2–4 sets each
30–60 seconds recovery after both sides
Frequency
2–4 times a week
Maintain Quality with Low Load
- Once pelvic stability and lateral hip tension are maintained, add bands.
- If pelvic rotation, foot separation, or back fatigue occurs, lower the range and resistance.
- Prioritize slow return and top stop over number of iterations.
Frequently asked questions
Where do I put the band?
Place on the thigh just above the knee, not on the knee joint. Choose a light intensity that doesn't move your pelvis.
What if you feel it in front of your buttocks instead of on the sides?
Your pelvis may be tilted forward or your hips may be too bent. Straighten your knees slightly and stack your hips back to neutral.


