
HIP THRUST
Hip thrust is not an exercise where you bend your back and lift a bar, but rather an exercise where you lift your pelvis with your glutes and connect your torso and thighs.
You can strengthen your gluteus maximus by resting your upper back on a bench and lifting a barbell above your pelvis. However, if your feet are too far or too close together and you lift your ribs at the top, it puts a strain on your lower back or hamstrings. Protect your pelvis with the bar pad and control the position of your chin, ribs, and pelvis together.
- Primary muscles
- Gluteus maximus
- Secondary muscles
- Hamstrings, gluteus medius, adductors, core
- Difficulty
- Intermediate
- Movement type
- Hip extension
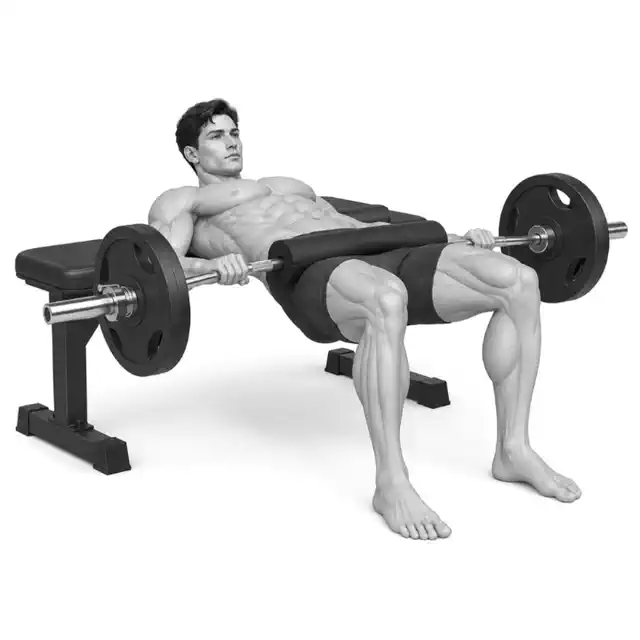
How high should I raise my hips at the top?
A point where your torso and thighs are close to one line and your glutes are contracted is sufficient. There is no need to bend your back any further to gain height.
STEP BY STEP
4 Steps for One Complete Rep
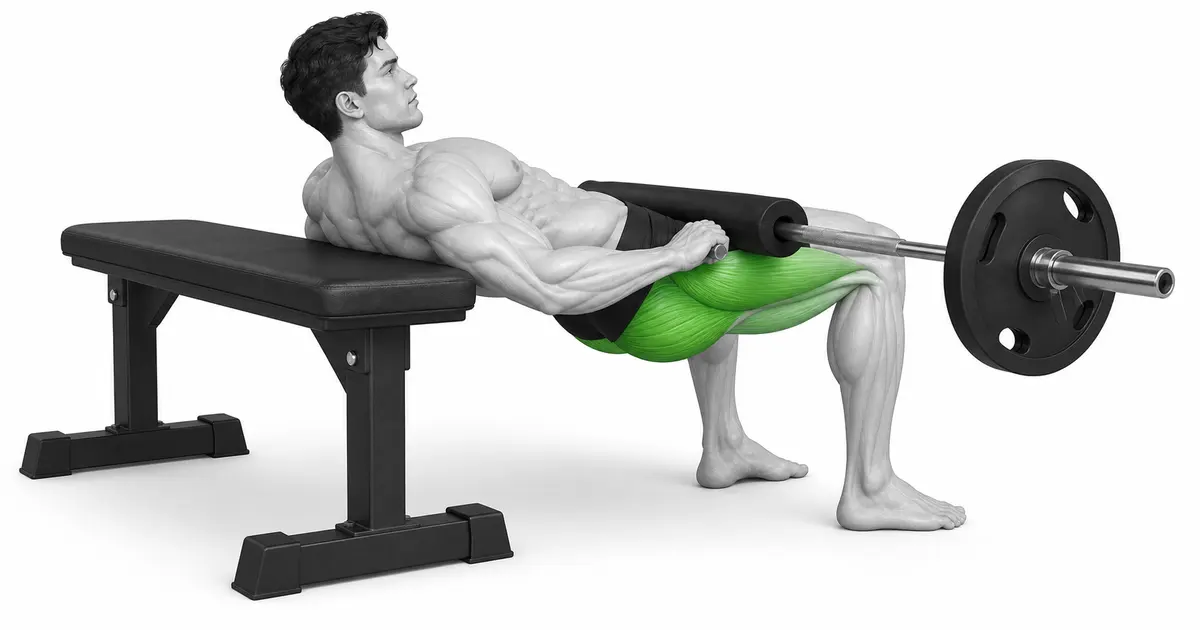
- 1
Setting up the bench and barbell safely
Lie back on a stationary bench and place a bar pad over your hips. Position the bar safely with the help of a light disc or an assistant.
- 2
Align foot and upper body position
Place your feet within or outside of hip width, with your toes and knees in the same direction. Pull your chin slightly and tighten your abdomen to avoid lifting your ribs.
- 3
Push with your entire foot to raise your pelvis
Exhale, press your entire feet into the floor, tighten your glutes, and raise your pelvis. Keep your knees in line with your toes and avoid tilting the bar from side to side.
- 4
Lock top and control down
Pause for 1 second at the point where your torso and thighs approach one line. Without arching your back further, lower your pelvis for 2 to 3 seconds and continue to the next repetition.
GLUTE LOCKOUT
The upper part is completed with pelvic extension, not lumbar hyperextension.
If you lean your chest back even after the pelvis has fully risen, the height will increase, but gluteal tension will decrease and pressure on the lower back may occur. Pull your chin in and keep your lower ribs toward your pelvis.
If your shins are nearly vertical at the top, it's easy to press into the floor with both your heels and the forefoot. If you experience frequent hamstring cramps, try moving your feet a little closer together.
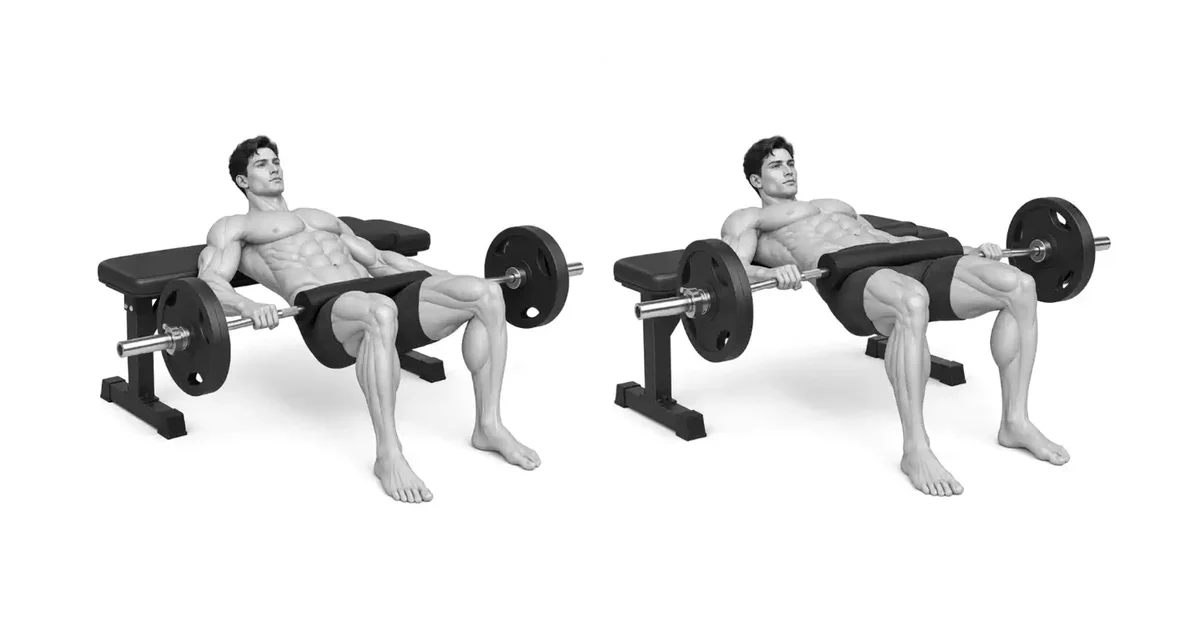
Key point: Cue to use right away: “Lower your ribs and lock your pelvis.”
BAR PATH
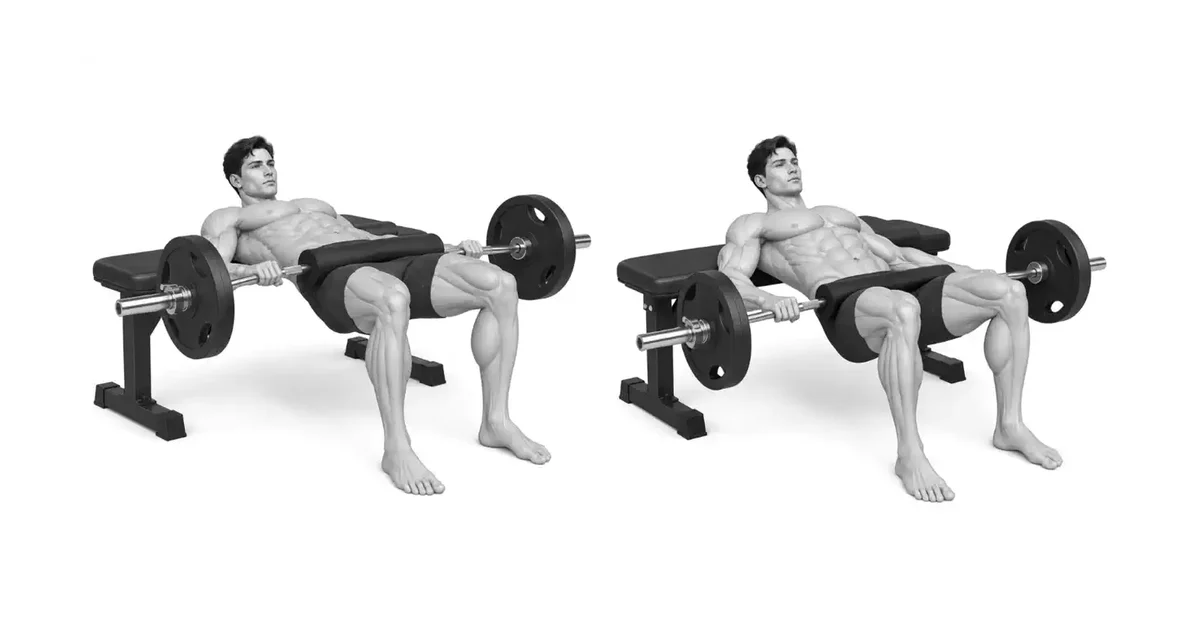
The barbell should move in a nearly vertical path with the pelvis
When my back slips on the bench or my feet move, the bar rocks back and forth. Check your bench height and floor friction and maintain the same upper body contact point for each repetition.
Rather than lifting the bar with your hands, hold it just enough to prevent it from turning left or right. If the pad is biased to one side, adjust it again before setting.
TROUBLESHOOTING
Fix the cause of a mistake, not just its appearance
Excessive bending of the waist at the top
- What you see
- The bar goes up, but the ribs are lifted and the front of the lower back is bent.
- Likely cause
- Preoccupation with height or heavy weight rather than gluteal contraction.
- How to correct it
- Keep your chin and ribs locked and stop where your torso and thighs are in one line.
Knees gathered inward
- What you see
- As you come up, both knees move toward the inside of your feet.
- Likely cause
- Foot spacing and toe direction are incorrect, or the current load is large.
- How to correct it
- Bring your knee toward your second toe and reduce weight and reach.
Foot position changes from repetition to repetition
- What you see
- Recurrent hamstring cramps, front thigh overload, or heel lift.
- Likely cause
- Body slipping on bench or not checking top shin angle.
- How to correct it
- Mark your foot position and make sure your shins are close to vertical at the top.
REGRESSION & PROGRESSION
Match the difficulty before adding load
Glute Bridge
Learn abdominal and pelvic locks from the floor.
Barebody Hip Thrust
Align bench contact and foot position.
Dumbell Hip Thrust
Practice upper pelvic loads and slow descents.
Barbell Hip Thrust
Increase slightly when upper contraction is maintained.
BEGINNER PROGRAM
A practical starting framework
Use a barbell when you can lock your pelvis without hyperextending your lower back on glute bridges, and start with a load that holds the top 1 second pause.
Count
6–12 times
1 second stop for top, 2 seconds for descent
Set
3–4 sets
90–150 seconds recovery between sets
Frequency
1–2 times a week
Deadlift/Squat Volume and Control
- If you can lock out the top while maintaining rib and pelvic alignment, increase the number of repetitions first.
- If the bar leans or your knees come together, lower the weight and re-position your feet.
- Stop immediately if sharp pain occurs in the lower back or front of the pelvis.
Frequently asked questions
Do I have to press only my heels?
It is more stable to press the floor with your entire foot, not just your heels. If your toes lift or your ankles wobble, adjust your foot position and load.
What is the difference between hip thrust and glute bridge?
Hip thrusts place your upper back on the bench for increased hip range of motion, while glute bridges place your back on the floor. You can initially learn pelvic control with glute bridges.


