
STANDING TORSO ROTATION
Standing torso rotation is not a large arm swing movement, but a torso mobility exercise that sets the conditions for the feet and pelvis and then controls rotation around the breastbone.
In a standing position, extend your arms in front of your chest and rotate your torso from side to side to practice thoracic spine rotation and oblique muscle control. The version that holds the pelvis forward emphasizes thoracic spine separation, while the version that pivots the feet engages full-body rotation. Don't mix the two methods, just set your goal and use only the range that's comfortable for you without arching your back or kicking your arms.
- Primary muscles
- Internal oblique muscle · External oblique muscle
- Secondary muscles
- Gluteus, hip rotator, erector spinae
- Difficulty
- Intermediate
- Movement type
- Standing posture, thoracic spine and hip joint rotation
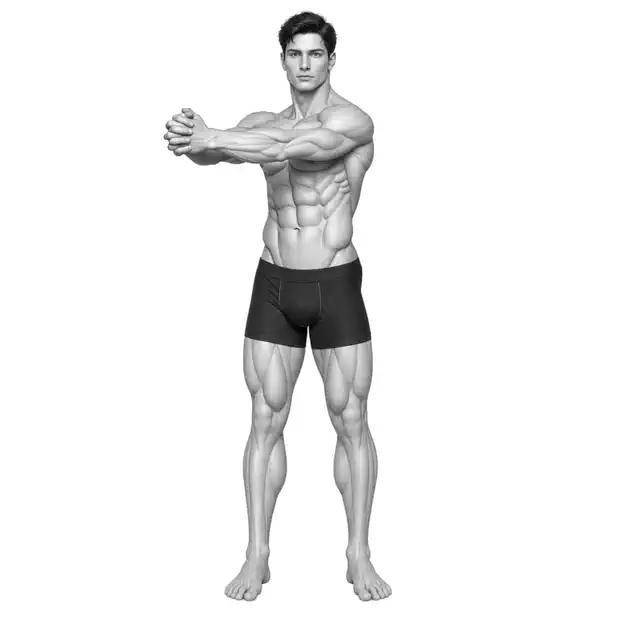
Can I also rotate my pelvis?
Possible depending on the purpose. Keep your pelvis stationary for the thoracic spine isolation version, or pivot your feet and pelvis together for the full body rotation version.
STEP BY STEP
4 Steps for One Complete Rep
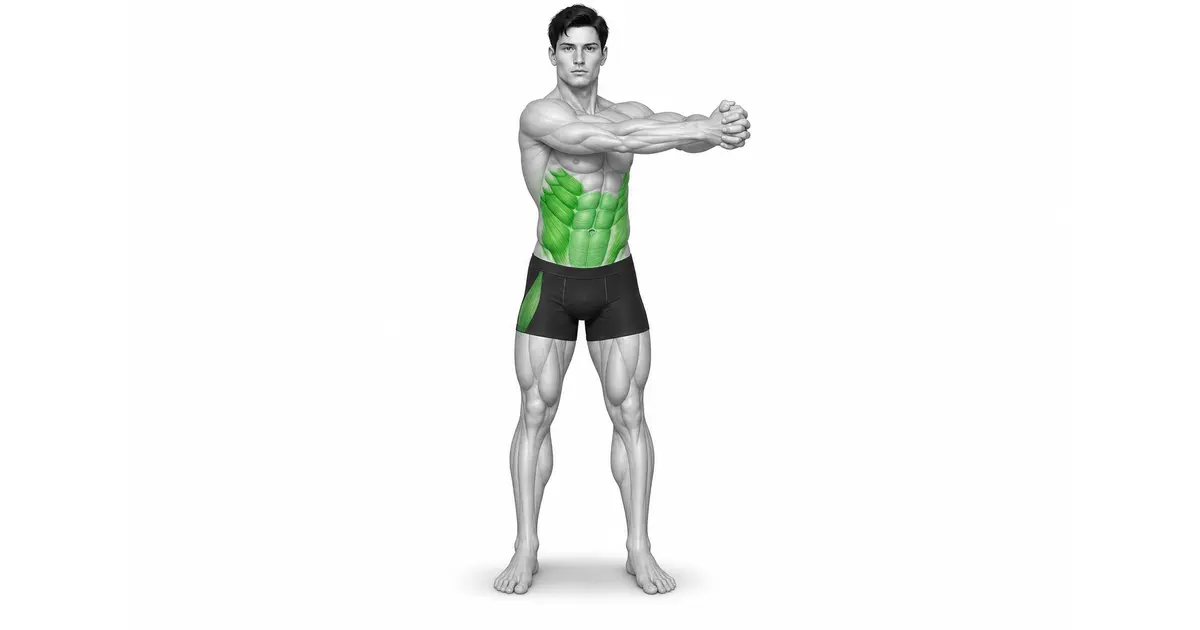
- 1
First decide how to rotate your feet and pelvis
Place your feet hip-width apart and slightly loosen your knees. Allow pelvis forward if thoracic spine separation is the goal, or heel pivot if full body rotation.
- 2
Lengthen the Spine and Stabilize the Arms
Place your ribs over your pelvis and place your hands together in front of your chest or extend your arms. Do not shrug your shoulders or arch your back excessively.
- 3
Slowly rotate your breastbone to one side
As you exhale, rotate your solar plexus to face to the side. In the pelvic fixation version, both pelvic bones remain pointed forward.
- 4
Repeat through the center to the other side
Returns to center without recoil and creates the same range on the other side. Stop before your breathing and foot pressure dissipate.
CHOOSE THE INTENT
Choose depending on your purpose whether to keep your pelvis fixed or rotate with your feet.
To isolate thoracic spine mobility, use a small range with the pelvis in front. Allow heel and hip pivot to engage sports rotation.
An intermediate form in which only the pelvis is twisted while the feet are fixed may create unnecessary torque on the lower back.
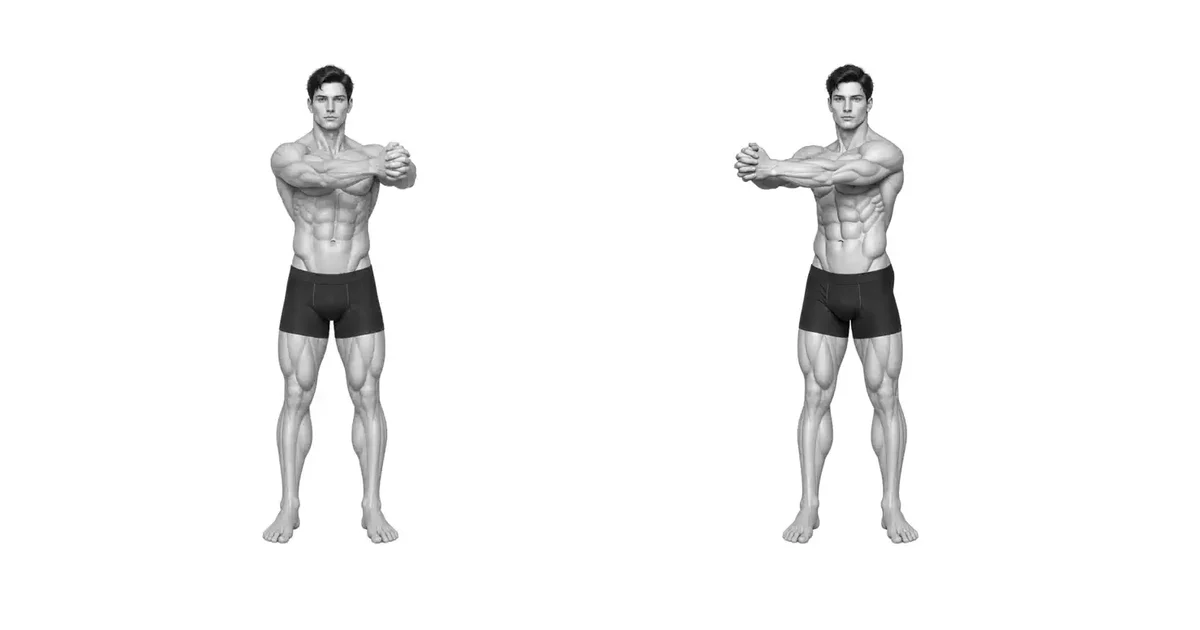
Key point: Cue to try right away: “Choose one: pelvic fixation or full body pivot.”
TURN THE RIBCAGE
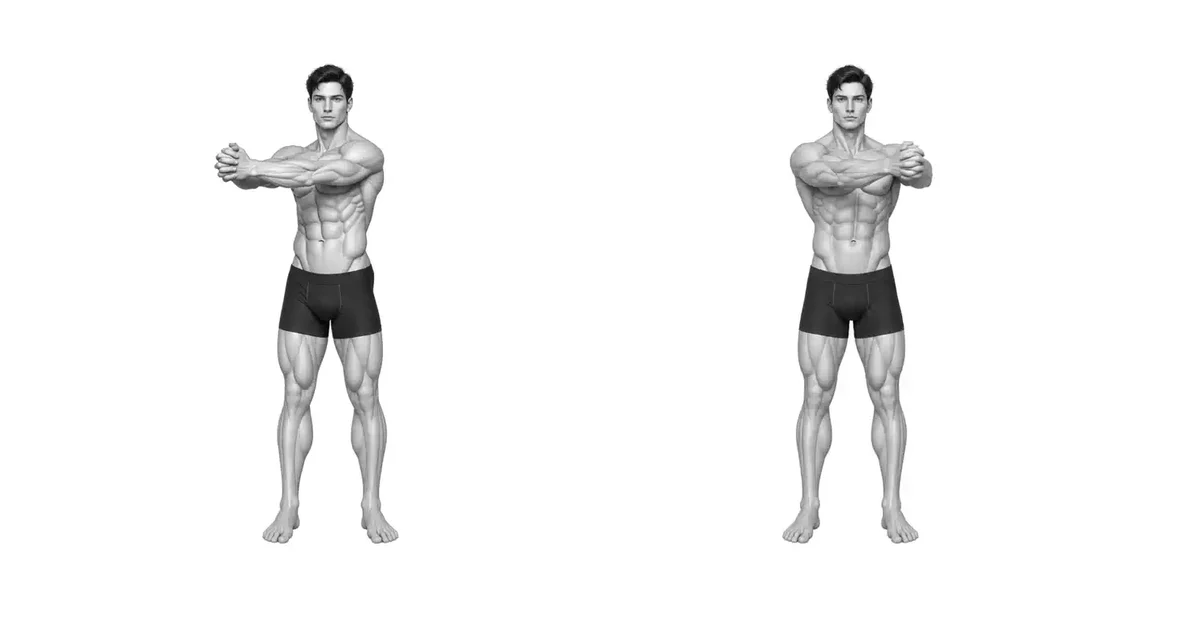
Rib and breastbone direction, not hand movement, shows range of rotation
If you just move your arms to the side, your hands will go far but your torso will barely move. Keep the distance between your hands and your chest.
If your back is bent or your pelvis is pushed, reduce the range and practice in front of a wall.
TROUBLESHOOTING
Fix the cause of a mistake, not just its appearance
Only swing your arms left and right
- What you see
- The hand moves greatly, but the direction of the solar plexus rarely changes.
- Likely cause
- Used arm recoil rather than rotation.
- How to correct it
- Practice small ranges with your hands close to your chest and your breastbone pointing to the side.
Twist your waist all the way while keeping your pelvis fixed.
- What you see
- There is pressure below the waist and the knees and feet are stiff.
- Likely cause
- A rotation greater than the thoracic range was created in the lumbar spine.
- How to correct it
- Reduce the range or switch to a full body rotation that allows for a heel pivot.
Torso tilts sideways when rotating
- What you see
- One shoulder drops and the pelvis pushes to the opposite side.
- Likely cause
- Failed to separate rotation and side bending.
- How to correct it
- Use a smaller range while maintaining head height and even pressure on both feet.
REGRESSION & PROGRESSION
Match the difficulty before adding load
Increased load and strength
Increase intensity by gradually increasing weight or shortening rest periods.
Complex Variant Behavior
Increase the difficulty level by combining it with other exercises or adding unstable environments.
BEGINNER PROGRAM
A practical starting framework
For a light warm-up, use slow side-to-side repetitions, but for power purposes, you'll need extra resistance and foot pivot techniques. Don't turn your current movement into a quick kickback movement.
Frequency
2-3 times a week
Appropriately place it in your whole body or relevant area routine.
Volume
3~5 sets, 8~15 times
Adjust the number of reps and sets according to your goals.
- Always put safety first and listen to your joint pain.
- Perform the entire operation within the scope of your control.
Frequently asked questions
Is it better to extend your arms longer?
Arm length only changes feedback and difficulty. Breastbone rotation and spinal alignment are priorities.
What if you feel a pulling sensation in your lower back?
Reduce the range and clarify how you anchor your pelvis or pivot your feet. If sharp pain occurs, stop immediately.


