
WORLD'S GREATEST STRETCH
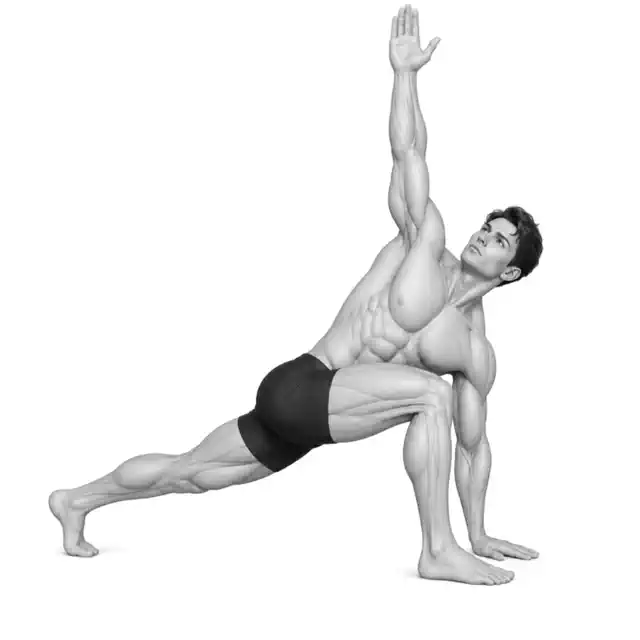
The World's Greatest Stretch is not a movement that involves holding one position hard, but a dynamic mobility routine that connects lunges, hip opening, and thoracic spine rotation with breathing.
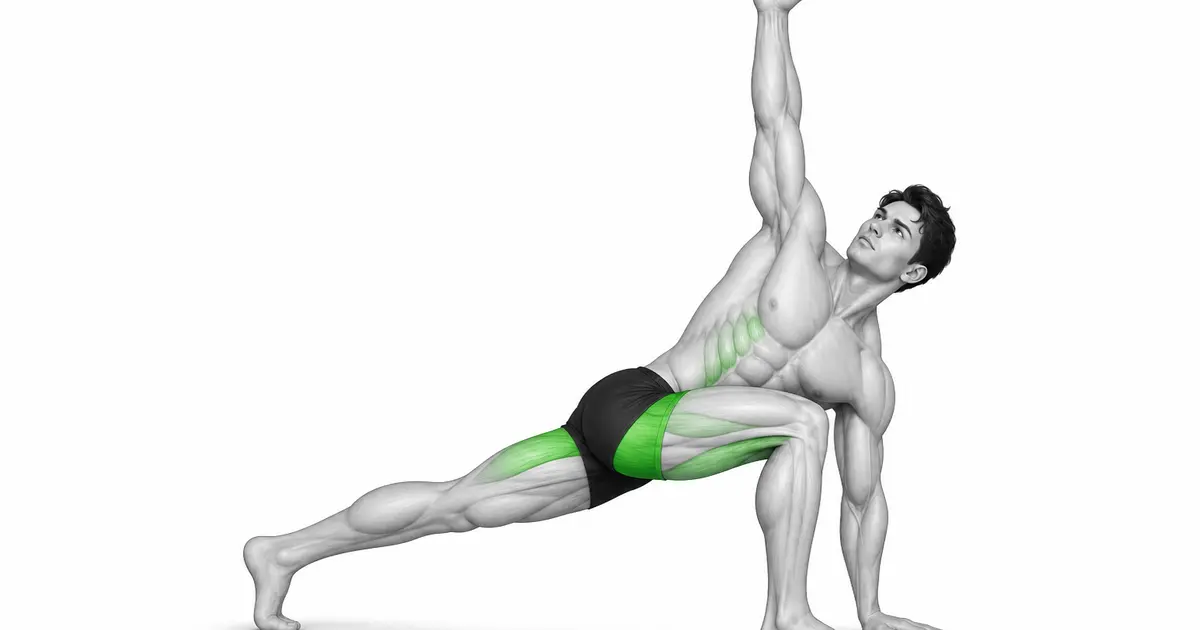
This compound stretch opens the front of the back hip joint in a long lunge, lowering the torso into the front foot and rotating the arms to add thoracic spine movement. Because multiple joints are used at once, there is no need to force each section to its end range. Use a block under your hands and transition slowly while maintaining full front foot and back alignment.
- Primary muscles
- Hip flexors, adductors, hamstrings
- Secondary muscles
- Thoracic rotator, glutes, calves, core
- Difficulty
- Intermediate
- Movement type
- Lunge-based whole body dynamic mobility
When do you do it before or after exercise?
Dynamic short connection is ideal for pre-workout warm-up. After exercising, you can gently maintain only the necessary sections for a long time.
STEP BY STEP
4 Steps for One Complete Rep
- 1
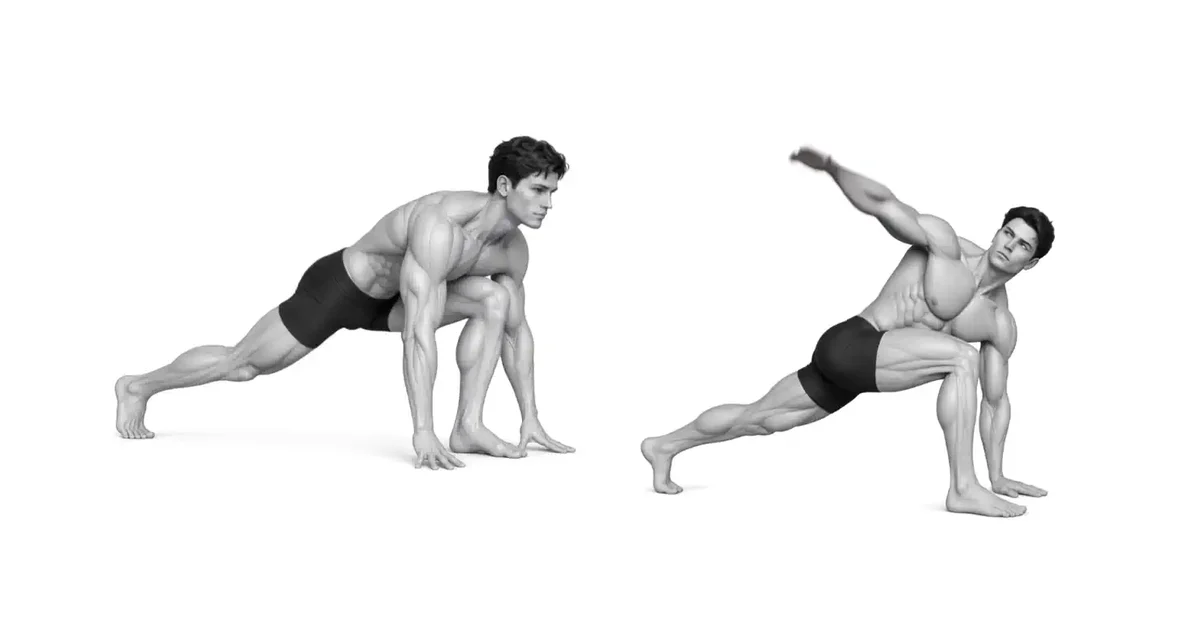
Plank with one foot next to your hand
In a high plank, place your right foot outside your right hand. Adjust the level of difficulty by placing your entire front foot on the floor and straightening your back knee or lowering it to the mat.
- 2
Front hip opening in long lunges
Instead of pushing the pelvis forward, keep the tailbone long and create gentle tension in the front of the hip joint of the hind leg.
- 3
Lower your elbows and rotate your thoracic spine
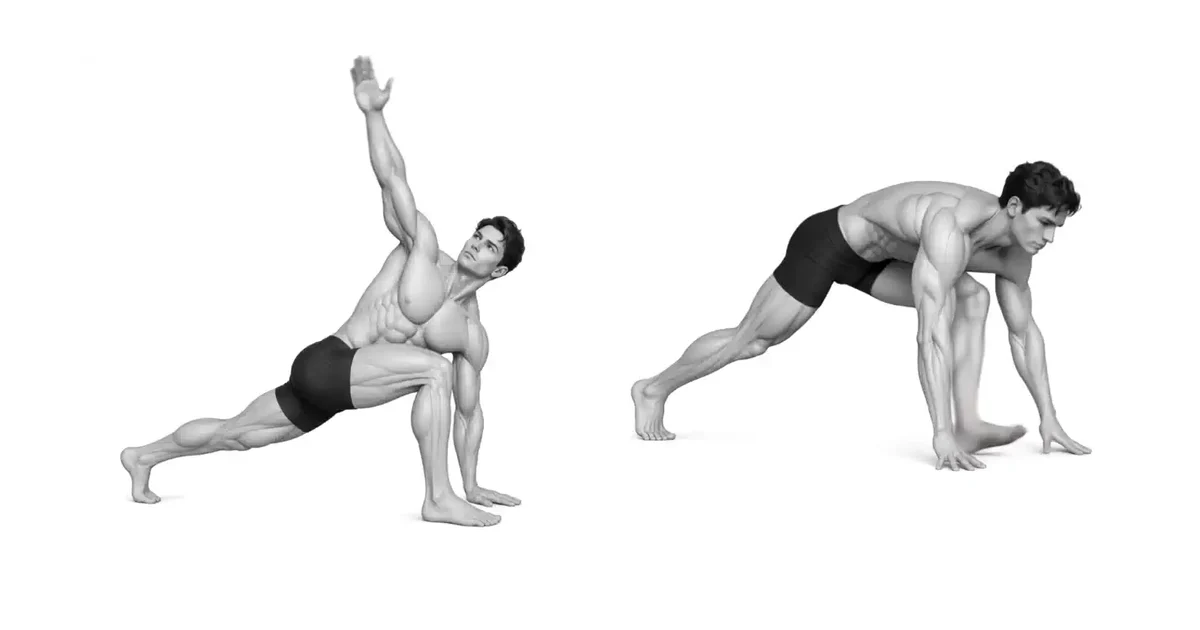
Slowly lower the elbow on your front leg toward the inside of your foot, then open the same arm toward the ceiling. If comfortable, your gaze follows your hands and your pelvis is as forward as possible.
- 4
Send pelvis back and repeat on other side
Place your hands on the floor, send your pelvis back, straighten your front knee, and lightly stretch your hamstrings. Return to plank and perform the opposite side.
MOVE THROUGH POSITIONS
Smooth transitions and breathing are more important than the maximum range of each posture
Connect lunges, elbow lowers, rotations, and hamstring shifts, taking one or two breaths each. I don't tolerate pain for long.
If your hands cannot touch the floor, use a block or bench to keep your spine long.
Key point: Cue to use right away: “Open and close your feet firmly and while breathing.”
THORACIC ROTATION
Rotations should be made around the breastbone, not just by raising the arms
Rotating the pelvis together reduces thoracic spine rotation. Press your front feet and bottom hands into the floor and open your chest toward the ceiling.
If your back is bent or your shoulders are uncomfortable, you can lower your arm height and keep your gaze on the floor.
TROUBLESHOOTING
Fix the cause of a mistake, not just its appearance
Front heel lifted
- What you see
- During lunges, my weight shifts to my toes and my knees are unstable.
- Likely cause
- The stance is short or the depth is pushed too far.
- How to correct it
- Move your front foot slightly ahead of your hands and adjust your pelvis to a range where your heels can touch.
When rotating, the pelvis flips over.
- What you see
- The belly button faces to the side and the front knee moves significantly outward.
- Likely cause
- Arm height was created by rotating the hip joint rather than the thoracic spine.
- How to correct it
- Press your lower hand and front foot into the floor, lower your arm height and rotate only your chest.
Rounds the lower back in the hamstring area
- What you see
- Do not move your pelvis, only curl your back and place your hands on the floor.
- Likely cause
- I focused on fully extending my front knee.
- How to correct it
- You can slightly bend your knees, so keep your pelvis back and spine long.
REGRESSION & PROGRESSION
Match the difficulty before adding load
Lunge with hands on blocks
Raise the upper body support height to learn alignment.
Lunges and rotations
Connects two sections without switching hamstrings.
Full Sequence
Smoothly connects lunges, rotations, and hamstrings.
Continuous walking variant
Connect with left and right forward movements in warm-up.
BEGINNER PROGRAM
A practical starting framework
Use slowly 2-4 times on each side as a dynamic warm-up before exercise. If your session is to significantly increase flexibility itself, it may be better to address each restricted area separately.
Count
2–5 times each
1~2 breaths in each section
Set
1–3 sets
Included in warm-up flow
Frequency
3–7 times a week
Low intensity without pain
- As breathing and foot pressure are maintained, gradually increase the range of each section.
- If you experience stabbing hip pain, back bending, or knee instability, increase the support height.
- Use gentle repetitions rather than long pauses before exercise.
Frequently asked questions
Do your elbows have to touch the floor?
No. Lower only to a height that maintains spine and forefoot alignment and use blocks if necessary.
Can I place my back knee on the floor?
Yes. Lowering your knees can decrease your balance and strength. Use pads and maintain pelvic alignment.


