90/90 HIP STRETCH
The 90/90 hip stretch is not about forcing the knees to the floor—it is about controlling hip rotation
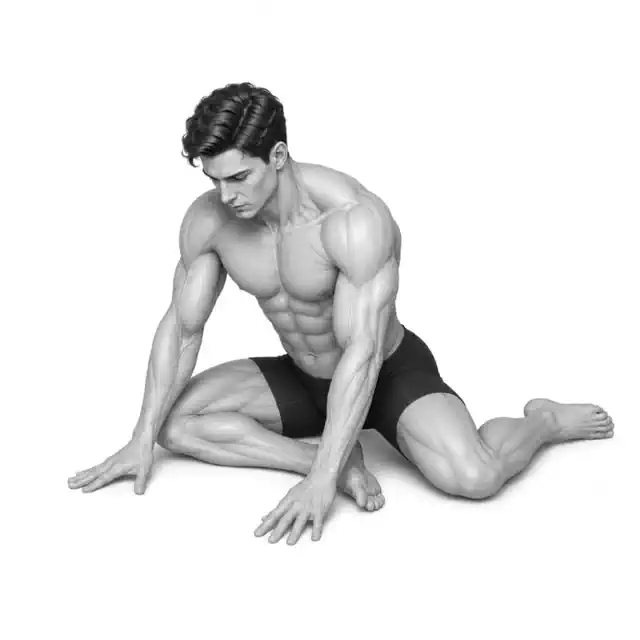
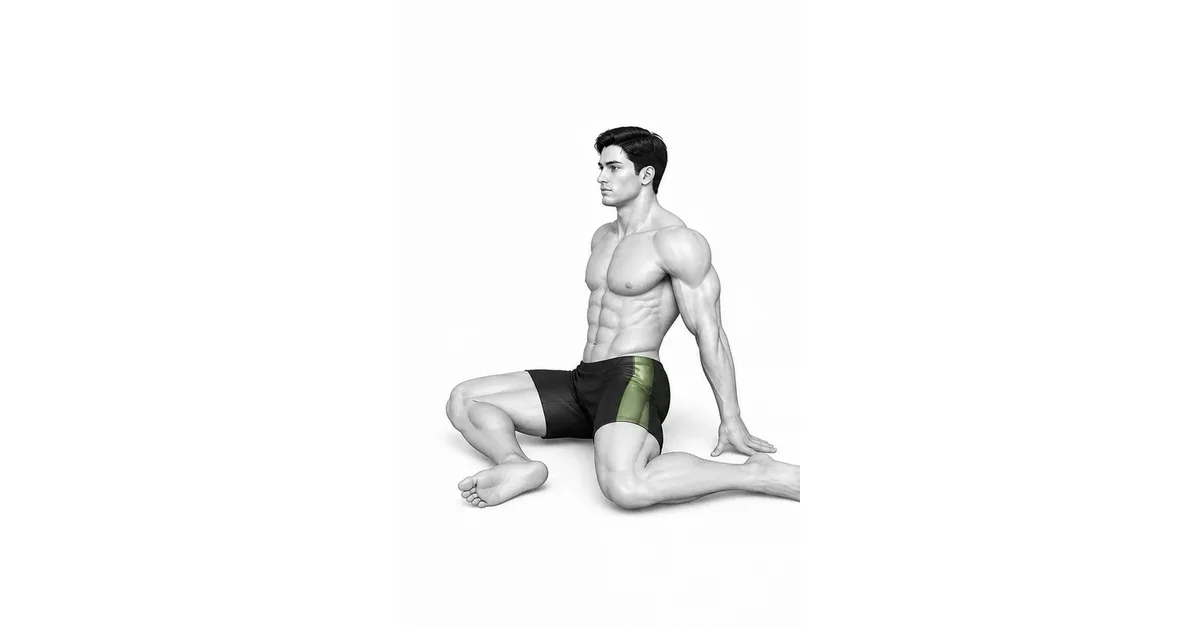
The 90/90 hip stretch is a floor position that explores external rotation at one hip and internal rotation at the other. Its name comes from the approximate 90-degree shape of the front and back knees, but not every person needs the same angle or depth. The goal is not to force the knees down or lower the chest as far as possible. It is to find a comfortable pelvic and spinal position, then notice hip movement within a pain-free range.
- Primary muscles
- Hip External Rotators · Hip Internal Rotators
- Secondary muscles
- Gluteus Maximus · Adductors
- Difficulty
- Beginner
- Movement type
- Hip Internal and External Rotation
Can I continue if both hips do not reach the floor?
Yes. Sitting on a folded towel or block can make the position more comfortable. Breathing without pain and keeping the pelvis supported matter more than reaching the floor.
STEP BY STEP
5 Steps for One Complete Rep
- 1
Build a comfortable 90/90 shape on the floor
Sit on a mat with the front knee in front of you and the back knee to the side and behind you. The two knees do not need to reach exactly 90 degrees. First find a width where the pelvis does not collapse strongly to one side and you can breathe normally.
- 2
Raise the hips if needed
If both sitting bones cannot reach the floor or the lower back rounds sharply, sit on a folded towel or yoga block. Using support does not make the movement less useful; it can help the pelvis explore rotation more comfortably.
- 3
Lean the torso slightly toward the front hip
Inhale to lengthen the spine, then exhale and move the whole torso only a little toward the front leg. Do not round only the lower back or push the knee down with your hands. A mild stretch near the outside of the front hip is enough.
- 4
Hold the position while breathing
Breathe slowly for 15–30 seconds at a pain-free point. Let the pelvis and ribs soften a little with each exhale, but immediately reduce the range or come out of the position if sharp pain, tingling, or increasing knee pressure appears.
- 5
Transition slowly and repeat on the other side
Use your hands behind you to assist the torso as you gently change the leg position. Do not twist through the knees or throw yourself across with momentum. Check the same support height and comfortable range before repeating on the other side.
PELVIC SUPPORT
Lower the angle when the pelvis lifts
It is common for one or both sides of the pelvis to lift in a 90/90 position. Pushing the knees down or forcing a deep forward lean from that position can move stress from the hip toward the knee or lower back. Elevating the pelvis with support can make hip rotation easier to explore without forcing extra depth.
Full contact from both sitting bones is not the success criterion. Check together whether the ribs can rest comfortably over the pelvis, whether you can keep breathing, whether the knees remain free of sharp pain, and whether discomfort does not remain the next day.
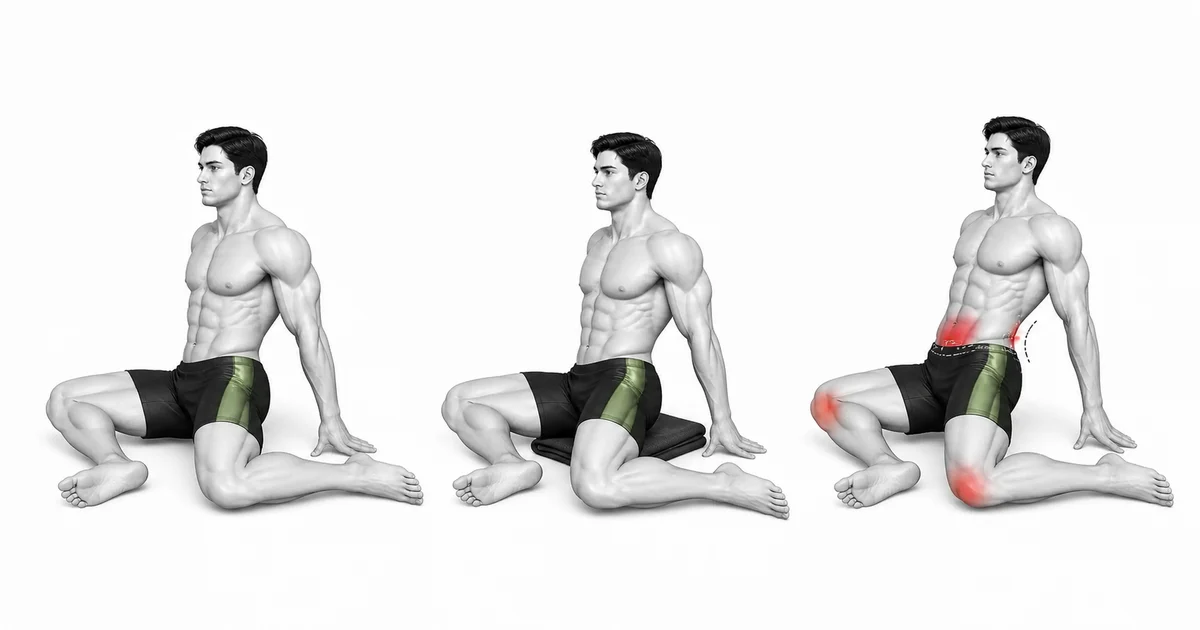
Key point: Practical cue: “it is fine to raise the hips → lengthen the ribs → do not press the knees.”
HIP, NOT KNEE
Create the movement at the hip, not by forcing the knee
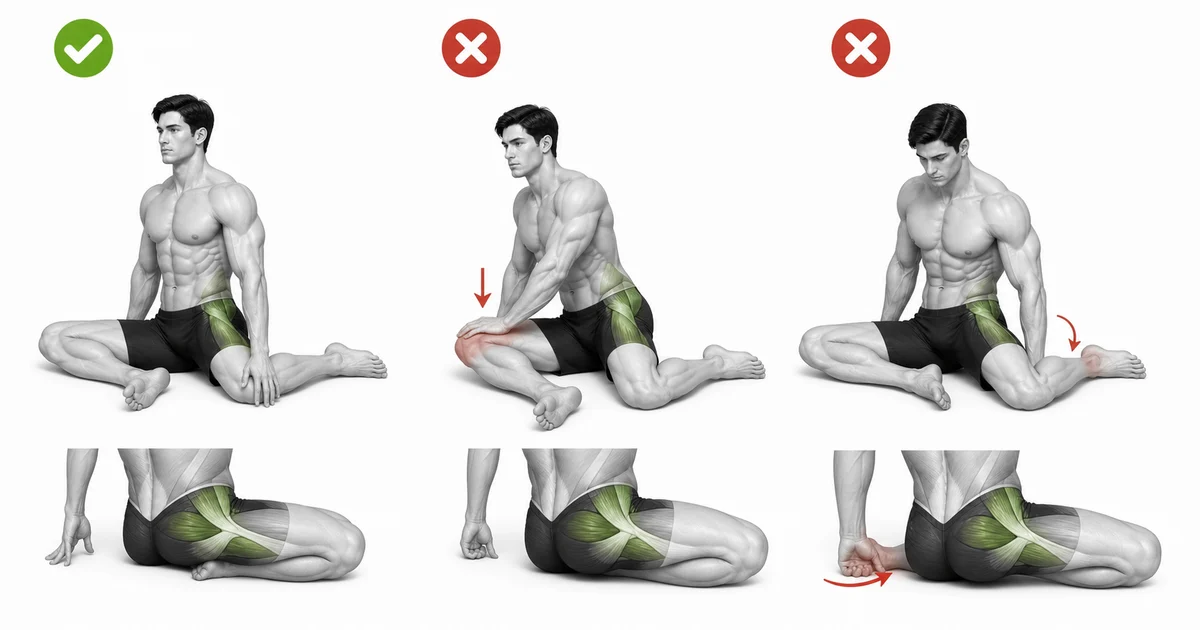
The outward rotation of the front hip and inward rotation of the back hip happen at the hips. The knees only show the rotation position; they are not joints that must be levered into the floor. If you feel pressure or pain at either side of a knee, use a narrower leg angle, raise the hips, and keep the torso more upright.
A lack of stretch sensation is not a reason to press harder on the knees. Depending on body shape and current range, the sensation may vary between the outside of the front hip, the front of the back hip, or the inner thigh. A stable pelvis and pain-free breathing come first.
FORWARD FOLD
Check spinal length and breathing before lowering the torso
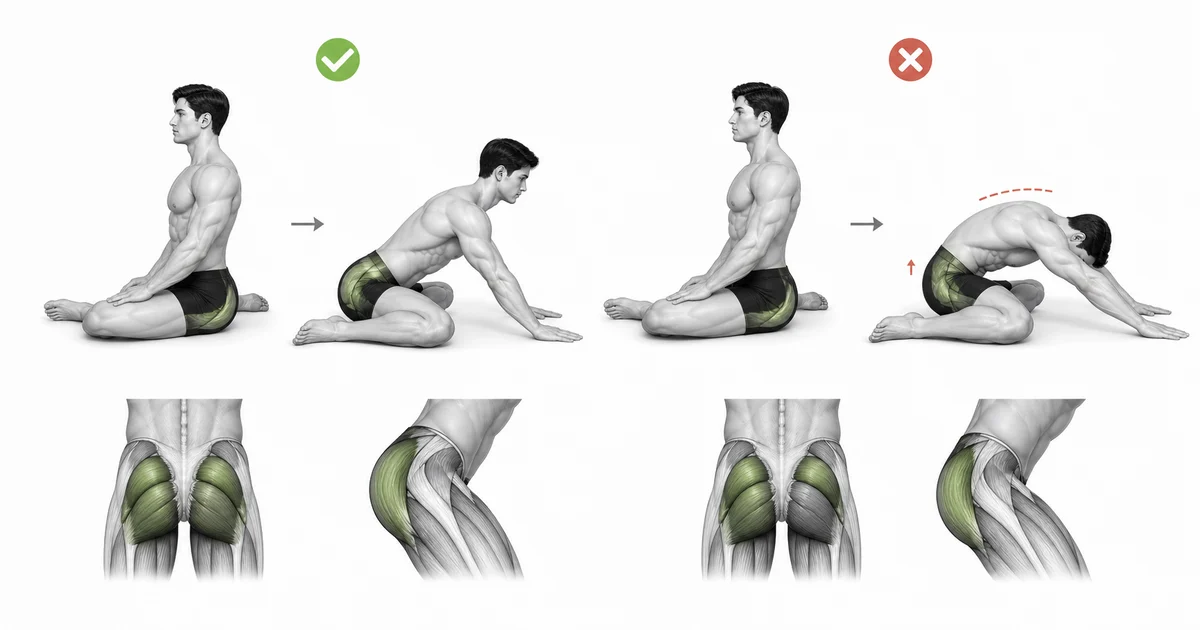
When you lean toward the front leg by only rounding the lower back, spinal flexion can increase before hip rotation does. Rest the hands lightly on the floor or front shin, feel the length from the top of the head toward the pelvis on the inhale, then move the whole torso a small amount on the exhale.
Getting the chest closer to the floor does not automatically create a more effective stretch. Reduce the torso angle if the pelvis lifts, knee pressure increases, or you start holding your breath. Several breaths in a comfortable position are more useful than forcing a deeper one.
TROUBLESHOOTING
Fix the cause of a mistake, not just its appearance
Pressing the knees hard into the floor
- What you see
- Pressure or sharp pain develops at the front or back knee.
- Likely cause
- The knee may be used as a lever to try to increase hip rotation.
- How to correct it
- Stop pressing, elevate the hips, or narrow the leg angle. Stop the position if knee pain does not settle.
Creating depth while the pelvis collapses to one side
- What you see
- One hip lifts and the lower back or groin becomes uncomfortable.
- Likely cause
- You may be trying to hold a lower position than your current range allows.
- How to correct it
- Sit on a folded towel or block, keep the torso more upright, and restart from a supported position.
Rounding only the lower back to get lower
- What you see
- The lower back tightens before the hip and breathing becomes short.
- Likely cause
- The depth of the forward lean may have become the goal, or the spine was not lengthened before moving.
- How to correct it
- Put the hands on a closer support, lengthen the spine, then use only a small whole-torso lean.
Switching sides with momentum
- What you see
- The knees twist and the body drops abruptly during the transition.
- Likely cause
- The transition is too fast or the torso is not assisted by the hands.
- How to correct it
- Place both hands behind you and use them to assist a slow transition. Do not pivot forcefully through the knees.
Treating pain as a flexibility signal
- What you see
- There is sharp pain, tingling, weakness, or altered sensation in the groin, hip, or knee.
- Likely cause
- Mild muscle lengthening may be confused with joint or nerve symptoms.
- How to correct it
- Come out immediately and reduce the range or raise the support. Consult a qualified healthcare professional if symptoms persist or you have a hip or knee history.
REGRESSION & PROGRESSION
Match the difficulty before adding load
Elevated 90/90 sitting
Sit on a folded towel or block and learn a pain-free leg position and normal breathing with the torso upright.
Supported 90/90 forward lean
Rest the hands on the floor or front shin and lean only slightly toward the front leg while maintaining spinal length.
90/90 side transition
Use both hands behind you to support the torso while you slowly switch the leg positions side to side.
Controlled unsupported transition
Reduce hand support and transition slowly only after both sides can be held steadily without pain.
BEGINNER PROGRAM
A practical starting framework
For the first two weeks, prioritize sitting comfortably on elevated support and breathing rather than the depth of the forward lean. The two hips may feel different, so do not force one side to match the other. Before training, use a small exploratory range; afterward, you may spend a little longer breathing in a pain-free position.
Hold
15–30s
Breathe gently at a pain-free point
Reps
2–3 per side
Set support height and range separately for each side
Frequency
3–5 sessions per week
Use as a light exploration before training or a comfortable cooldown afterward
- Increase hold time or forward lean only when you can keep the position without pain at the knees, groin, or hips.
- If one side of the pelvis lifts substantially or the lower back becomes uncomfortable, do not add depth; raise the support instead.
- Different angles and sensations from side to side can be normal. Do not force the less comfortable side with momentum or hand pressure.
Frequently asked questions
Must both knees be exactly at 90 degrees?
No. Ninety degrees is an approximate starting point. You may adjust the front and back leg angles if the knee or hip is uncomfortable.
Is a deeper forward lean always better?
No. Reduce the range if lowering the torso makes the pelvis collapse or causes knee or back pain. Comfortable alignment and breathing are more important.