BAND PULL-APART
The band pull-apart is not about sending your hands far away; it is a horizontal abduction that brings the band’s center toward the chest while keeping the same arm length.
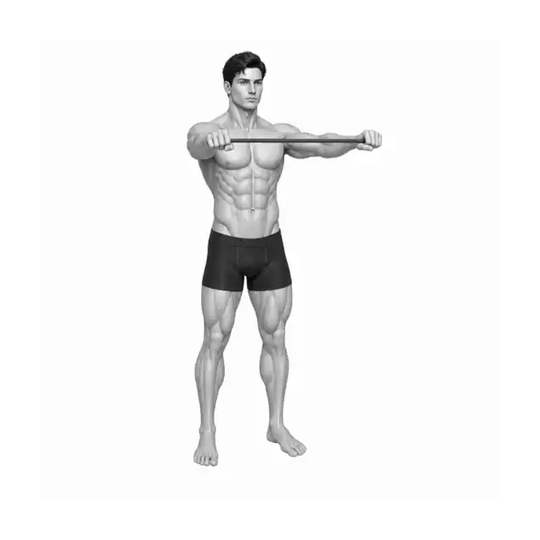
The band pull-apart is a shoulder horizontal abduction performed by extending both arms to chest height and moving an elastic band apart left and right. The shoulder girdle muscles — including the rear deltoid, middle trapezius, and rhomboids — work together, and activation patterns can vary with hand position and arm-path. Electromyography studies of the band pull-apart showed differences in infraspinatus, trapezius, and posterior deltoid activity depending on palm orientation and horizontal versus diagonal paths. Do not simplify this exercise as merely “squeezing the scapulae” or assume it treats a specific rotator cuff condition. Instead use it based on the range at which elbow angle and torso are maintained without shoulder shrugging at the current band tension.
- Primary muscles
- rear deltoid · middle trapezius · rhomboids
- Secondary muscles
- infraspinatus · teres minor · lower trapezius
- Difficulty
- Beginner
- Movement type
- shoulder horizontal abduction
Does the band have to touch the chest?
No. Prioritize the range where the elbow angle and torso are maintained. If your shoulders shrug or your lower back arches before the band reaches the chest, stop at that point and reduce resistance.
STEP BY STEP
6 Steps for One Complete Rep
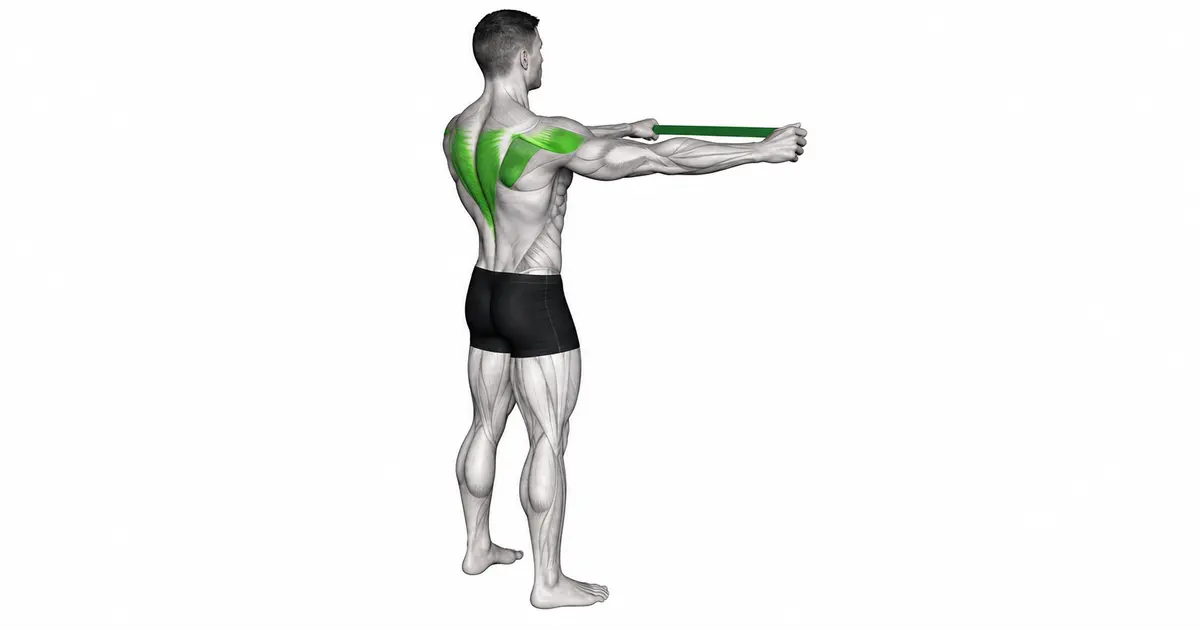
- 1
Inspect the band and surrounding space
Without stretching the entire band, scan it for splitting, thinned areas, stickiness, or discoloration. Stand where there is room on both sides and behind you so you won’t hit objects or people. Do not use a damaged band.
- 2
Match band strength and hand spacing
Hold the band with light tension so it does not sag when your arms are extended forward. If you cannot maintain your torso and elbow position through the finish, use a lighter band or widen your hand spacing. Do not wrap the band multiple times around your hand to secure it.
- 3
Stabilize your feet and torso
Place your feet hip-width apart and do not lock your knees. Stack your ribs over your pelvis and lightly brace your abdomen and glutes. Keep your neck long and look straight ahead.
- 4
Start with long arms at chest height
Hold your hands slightly wider than shoulder-width and extend them to chest height. Use an overgrip with the back of the hands facing up and keep the wrists straight. Do not lock the elbows; bend them only slightly to set the left-right angle.
- 5
Open both hands to the sides at the same speed
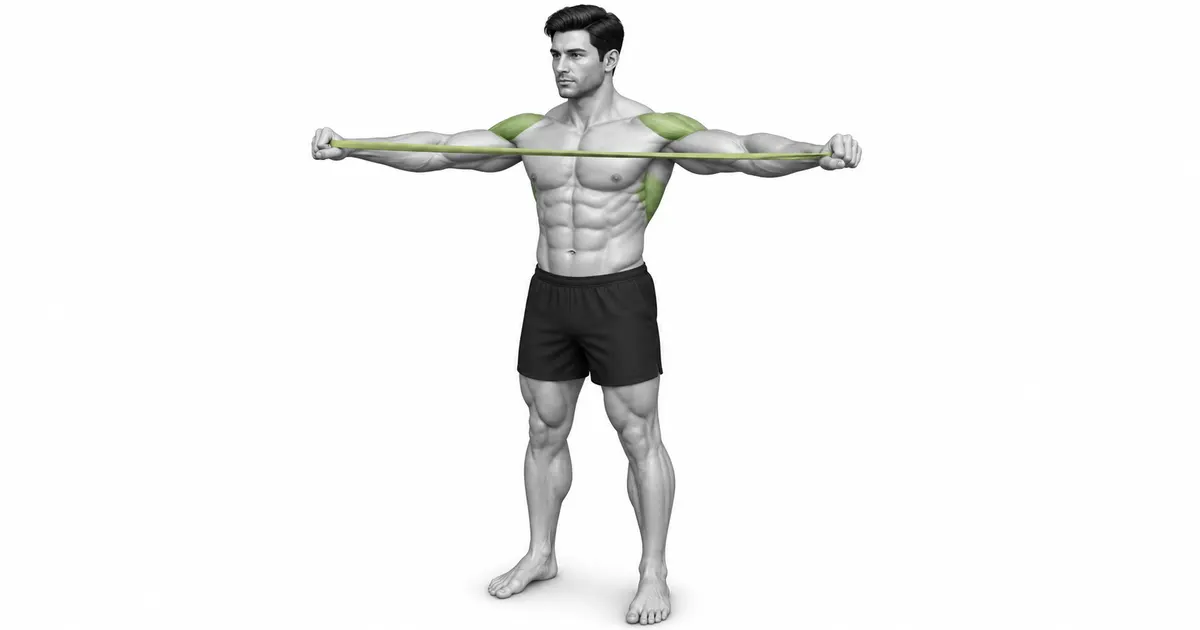
Exhale briefly while moving your hands in opposite directions. Keep the band on a horizontal line at chest height with almost no change in elbow angle, and do not let the shoulders rise toward the ears.
- 6
Stop within a controlled range and return
Pause for 1 second where the arms are roughly alongside the torso and the band’s center is near the upper chest. Do not force your hands behind your back; return to the start over 2–3 seconds and prepare for the next rep before the band becomes slack.
TENSION & WIDTH
Hand spacing and band strength determine the finish range first
Elastic bands increase resistance as they stretch, so the finish range is the most difficult. If you pre-stretch the band excessively from the start, you may have to bend the elbows or lean the torso later in the set. Choose a tension that allows you to open your arms nearly to the sides on the first repetition and maintain the same path for at least 10 repetitions.
Rather than forcing a wide range with a band that’s too strong, it’s better for skill acquisition to match wrist, elbow, and shoulder height using a lighter band. Higher band resistance can increase activity across several shoulder muscles, but greater muscle activation does not necessarily mean better posture or better therapeutic effect.

Key point: Criteria to try now: light starting tension · long arms to finish · 10 reps at the same height
SHOULDER & SCAPULA
Allow upper-arm horizontal abduction and the scapula’s natural posterior movement together
As the arms open to the sides, the humerus moves posteriorly relative to the torso and the scapula naturally moves backward on the rib cage. You do not need to hold the scapulae rigid from start to finish or force them together excessively at the end as if they were colliding. Use a range that keeps the neck long without the front of the shoulders protruding.
Band pull-apart EMG studies were short experiments in healthy young adults comparing immediate shoulder-girdle muscle activity across hand positions and paths. Rather than assuming one palm orientation is best for everyone, first confirm whether the horizontal variation with the back of the hand up — as shown on this page — can be repeated without pain.
TROUBLESHOOTING
Elbow flexion and torso extension are signs the band is stronger than your current technique
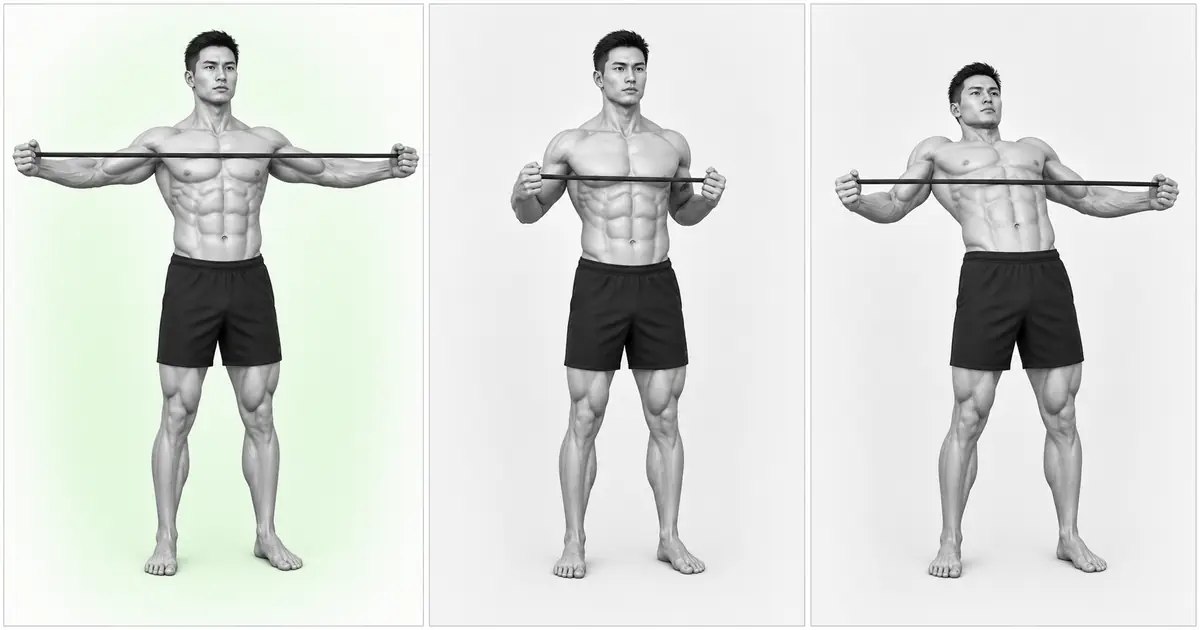
If the elbows fold back and the hands sit toward the chest, you are pulling like a row instead of widening the band. Widen your hand spacing or switch to a lighter band, and keep the small starting elbow angle through to the end.
If you arch the low back, lift the ribs, or raise the shoulders toward your ears, you are compensating for limited arm range with torso movement and the upper traps. Relax the knees, stack the ribs over the pelvis, and only open until the shoulders begin to shrug.
TROUBLESHOOTING
Fix the cause of a mistake, not just its appearance
Starting tension is too high
- What you see
- Hands tremble from the first rep, and the shoulders lift or elbows bend before you can open halfway.
- Likely cause
- The band is too strong or the hand spacing is too narrow.
- How to correct it
- Switch to a lighter band or widen hand spacing so you can maintain the same path for 10+ reps.
Bending the elbows and pulling like a row
- What you see
- At the finish the elbows travel behind the torso and the hands remain close to the chest.
- Likely cause
- You could not control the band’s late resistance with long arms, shortening the lever.
- How to correct it
- Fix the small elbow angle created at the start and think of sending the hands away.
Wrists flexed or rotated
- What you see
- The back of the hand and forearm are not in one line and only one fist rotates up or down.
- Likely cause
- An asymmetrical grip or holding the band only with fingertips.
- How to correct it
- Match band length and grip depth in both hands and place your fists as extensions of the forearms.
Shoulders rising toward the ears
- What you see
- As you open the arms, your neck shortens and the upper trapezius shows high tension.
- Likely cause
- The band is too strong or the arm height is above your current shoulder range.
- How to correct it
- Reduce resistance and lower the hands a few centimeters to a horizontal line that allows a long neck.
Leaning back to create range
- What you see
- At the finish the ribs lift, the pelvis shifts forward, and the body tilts backward.
- Likely cause
- You exceeded your shoulder range trying to make the band touch your chest.
- How to correct it
- Stack your ribs over your pelvis and stop just before the torso moves. The band does not need to touch your chest.
Releasing the band on the return
- What you see
- Hands snap forward quickly, the band sags, or it slips from your hand.
- Likely cause
- Treating only the open phase as the exercise or a fatigued grip.
- How to correct it
- Slowly bring the arms together over 2–3 seconds and stop before the starting tension disappears. End the set if your grip loosens.
REGRESSION & PROGRESSION
Match the difficulty before adding load
Wall-supported arm opening
Stand with your back against a wall and open the arms horizontally without a band to learn torso and shoulder height.
Short-range with a light band
At chest height, open the hands only 20–30 cm while maintaining wrist and elbow alignment.
Full-range horizontal band pull-apart
Use the full controllable range and pause 1 second at the finish.
Slow-return band pull-apart
After opening, return over 3–4 seconds to control the late resistance and left-right balance.
BEGINNER PROGRAM
A practical starting framework
Use 2–4 times per week as a light warm-up for back and shoulder work or as an accessory at the end of a session. For warm-up sets prioritize movement quality over fatigue; for work sets start with a band that leaves 2–3 reps in reserve. Rehabilitation for a painful shoulder depends on individual diagnosis and goals; do not assume this single exercise replaces a tailored plan.
Reps
10–20 reps
Maintain the same hand height and elbow angle
Sets
2–4 sets
Rest 30–60 seconds between sets
Tempo
1–2 sec outward · 1 sec pause · 2–3 sec return
Control the band so it does not snap back
- When wrist, elbow, shoulder height, and torso position are maintained on every rep, add repetitions before increasing resistance.
- After reaching the top of the target rep range in every set, narrow your hand spacing slightly or move to a band one step stronger; do not increase both variables at the same time.
- If the finishing range shortens or your shoulders begin to shrug and elbows bend, return to the prior resistance. Band colors differ by manufacturer, so do not compare resistance by color alone.
Frequently asked questions
Should I squeeze the scapulae together fully?
Allow the scapulae to move naturally posteriorly with the arm; that is sufficient. Do not force a squeeze at the finish that pushes the front of the shoulders forward or shortens the neck.
Should the palms face up or down?
Muscle activation can vary with hand position and there is no single correct answer for everyone. This demonstration shows the overgrip with the back of the hand up; first learn that variation and confirm you can repeat it without pain.
Can I do this every day?
Light preparatory movements can be done frequently, but account for muscle soreness, fatigue, and the volume of other pulling exercises. If form deteriorates or joint pain persists, reduce frequency and resistance.
Is this good for shoulder pain rehabilitation?
It can be one option to train the shoulder-girdle muscles, but the cause of pain and the appropriate exercises vary by person. If pain persists or you have night pain or weakness, seek evaluation from a healthcare professional rather than self-prescribing.
Evidence and references
- 1. Lee et al. — Movement direction, hand position, and shoulder muscle activity during the band pull-apart
- 2. Sung et al. — Shoulder abduction angle, band resistance, and shoulder muscle activity
- 3. Tsuruike & Ellenbecker — Scapular retraction and lower trapezius, infraspinatus, and deltoid activation
- 4. Haik et al. — Infraspinatus and trapezius activation during scapular retraction under progressive load
- 5. Ito et al. — Elastic-band horizontal abduction load and shoulder muscle activity