RING PUSH-UP
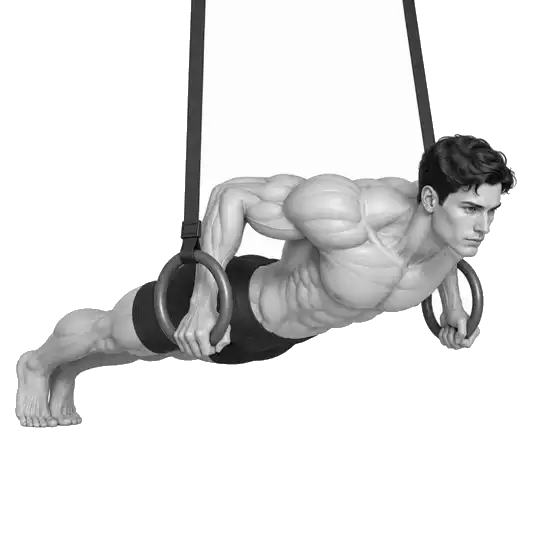
Ring push-ups are not a deeper movement, but rather a push-up that controls two moving support points.
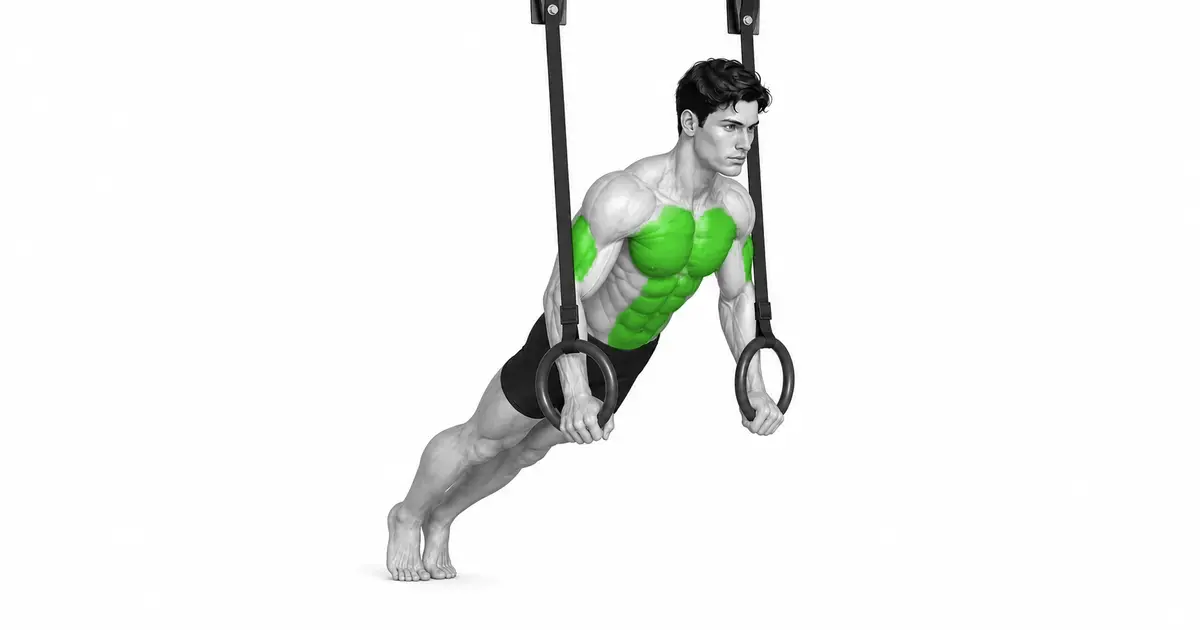
A ring push-up is a push-up performed with both hands holding a swinging ring independently. While the pectoralis major, triceps, and anterior deltoid muscles push the body, the muscles around the abdomen and shoulder blades must prevent the ring from opening and the torso from sagging. In studies comparing different suspension devices, muscle activation patterns differed depending on the device structure and body angle, and instability did not stimulate all muscles equally more. So rather than hanging the rings low or forcing your chest down, start at a height that allows you to maintain the position of both rings and head-to-heel alignment throughout the repetition.
- Primary muscles
- Pectoralis major, triceps
- Secondary muscles
- Front deltoid muscle, abdominal muscle, shoulder stabilizer muscle
- Difficulty
- Advanced
- Movement type
- Unstable horizontal push, torso stability
Are ring pushups necessarily better for your chest than regular pushups?
no. Some studies found higher activation of specific muscles in suspended push-ups, but results varied depending on equipment geometry, angle, and participant. Instability also increases the demands on torso control, so if you want to focus on your chest, a steady, regular pushup may be better for you.
STEP BY STEP
5 Steps for One Complete Rep
- 1
Check anchors and straps first
Make both straps the same length and connect them to anchor points designed to support your body weight. Make sure the buckles are fastened, the straps and rings have no rips or cracks, and choose a non-slip sole.
- 2
Setting the difficulty level in the high ring
Start with your body at an angle, with the ring positioned between your waist and chest. The higher the ring and the closer your body is to vertical, the less strain there is. Lower the ring little by little only after you have performed a regular push-up steadily.
- 3
Create a wrist and full body plank
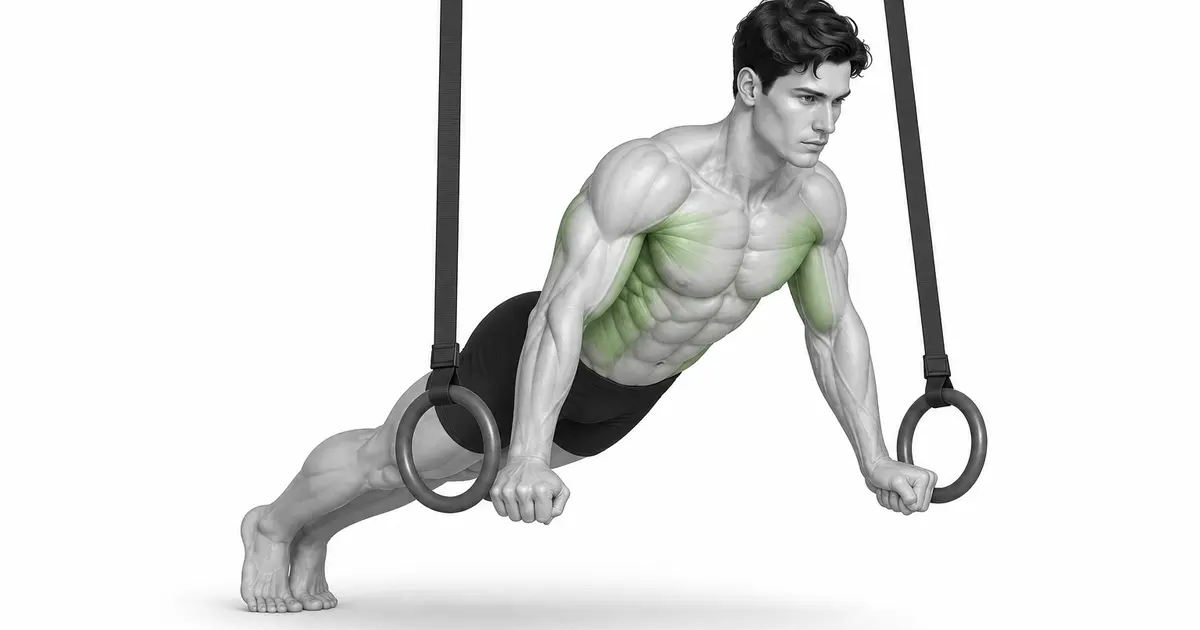
Hold the ring deep in your palm, keeping your wrist in line with your forearm. Place the ring under your shoulders with your arms straight, and create a long straight line from your head to your heels by strengthening your abdomen and hips as if you are stacking your ribs and pelvis.
- 4
Keep the ring close and control it down
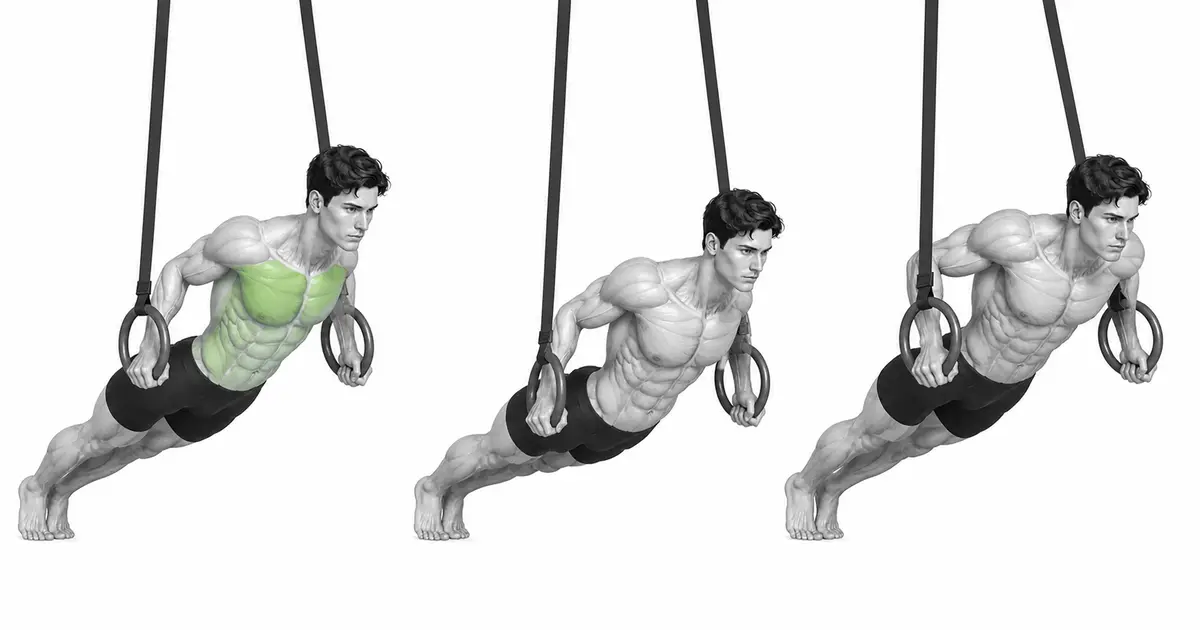
Inhale and bend your elbows diagonally back from your torso, about 30–45 degrees. Place the ring next to your body so that it does not flare outward, and lower your chest and pelvis at the same time. Pause at a depth before your shoulders slump forward or your torso sag.
- 5
Press down on the ring and slide it in one piece
Return to the starting position by straightening your elbows with the feeling of pressing both rings toward the floor. Do not force the rings together at the top or rotate your palms excessively, but quietly stabilize them under your shoulders and then begin the next repetition.
HEIGHT & LOAD
Ring height is the simplest and safest adjustment to determine difficulty level.
If your foot position is the same, the higher you raise the ring, the closer your body is to vertical, which reduces the weight on your hands. The lower the ring, the closer your body is to horizontal, which increases the burden. The latest study on suspended push-ups at different angles also showed that body tilt was a factor that significantly changed upper body muscle activity. Rather than forcing the number of repetitions to endure instability, it is practical to first set the difficulty level by ring height.
Even at the same height, it becomes easier if you move your foot towards the ring, and it becomes difficult if you move your foot farther back. If you change the height, foot position, and range of motion all at once, it is difficult to know why your posture has collapsed. Change just one element slightly and recheck the quality 6–10 times.
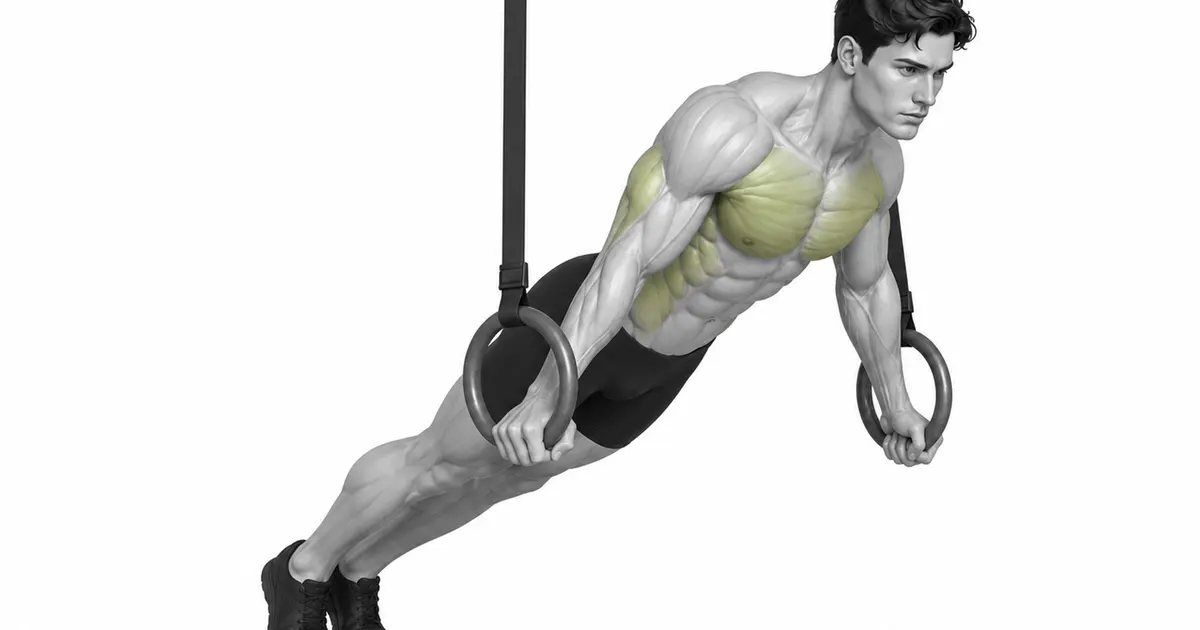
Key point: Standard to try right away: Start at a height where ring spacing and straight torso are maintained for 6 reps.
RING & ELBOW PATH
The ring moves close to the body under the shoulder and the elbow is folded diagonally back.
If the ring opens too far outside the body, the support surface becomes more unstable and can place strain on the front of the shoulder. As you descend, keep the ring close to your chest, with your elbows just behind your wrists. The ring handle should be positioned in line with the forearm, allowing for natural rotation to the point where the palms are facing each other at the top, if this is comfortable for the individual.
Unlike a fixed base, the ring allows each hand to move independently. If one side goes down first or spreads out further, adjust to the range of the weaker side and raise the height. Deep reps that bring the chest below the rings are a progression of choice when you have sufficient shoulder mobility and control, not the default.
SCAPULAR CONTROL
The scapula moves controlled over the ribs rather than being completely fixed.
Push-ups, unlike bench presses, are a closed chain exercise that allows the shoulder blades to move over the ribcage. Allow your shoulder blades to naturally close together as you go down and spread back out again as you go up, but continue to push against the ring without shrugging your shoulders into your ears or protruding the inside of your shoulder blades too much.
An unstable support surface increased muscle activity of the trunk and upper trapezius muscles in some studies, but increased serratus anterior activity was not consistently found. Don't view the ring pushup as an all-purpose exercise for shoulder rehabilitation, but rather use it as an advanced variation following controlled, pain-free regular pushups and planks.
TROUBLESHOOTING
Fix the cause of a mistake, not just its appearance
The ring continues to expand on both sides
- What you see
- As you go down, the ring spacing widens and your wrists and elbows look in different directions.
- Likely cause
- The ring height may be too low or your ability to stabilize the ring will reach its limit before your chest strength.
- How to correct it
- Rather than raising the ring and pulling it to the side of your body, press down to stabilize it. Go down only as far as you can maintain the same spacing.
The pelvis sags and the ribs lift.
- What you see
- Your stomach goes down before your chest and your back bends like a bow.
- Likely cause
- Your abdominal muscles may be loose or your torso is not supporting your weight at the current angle.
- How to correct it
- Raise the ring, tighten your hips, and move your chest and pelvis together while keeping your ribs and pelvis stacked.
Shoulders rise toward ears
- What you see
- At the bottom, the neck is shortened and the front of the shoulders are pulled excessively forward of the ring.
- Likely cause
- The range of motion is too deep or the shoulder control to push off the ring is lost due to fatigue.
- How to correct it
- Decrease the depth, raise the ring, and keep your neck long as you continue to press the ring toward the floor.
One ring shakes first
- What you see
- One hand moves forward or out and the chest and pelvis rotate together.
- Likely cause
- The length of the left and right straps may be different or there may be a difference in the controllable range of both arms.
- How to correct it
- Re-adjust the strap length and adjust both sides to the depth of the weak side. If necessary, practice the left and right paths first with regular pushups.
Hitting the ring hard at the top
- What you see
- The moment you extend your arm, the two rings come together in the center and your wrist sharply bends inward.
- Likely cause
- We are adding unnecessary inward compression to make the breasts feel bigger.
- How to correct it
- Stop the rings parallel under each shoulder. Allow only natural rotation of the palm and keep the wrist in line with the forearm.
REGRESSION & PROGRESSION
Match the difficulty before adding load
high incline pushups
Start by learning full-body planks and elbow paths on a stationary bar or bench.
floor push ups
Perform 8–12 reps at the same depth and torso alignment on a stable support surface.
high ring pushups
Place the ring at waist to chest level and learn independent hand support at a small incline.
low ring pushups
Lower the ring height one step at a time, but only if ring spacing and full body alignment are maintained.
BEGINNER PROGRAM
A practical starting framework
Use 1–2 times a week as a technical or auxiliary movement for chest exercises. People who can control 8–12 regular push-ups without pain are advised to start with the high rings. Leave about 2 reps per set to spare and finish before the ring starts to wobble.
number
6–10 times
Maintain ring spacing and full body straightness
set
2–4 sets
90–180 seconds recovery between sets
progress
Lower the ring by 5–10 cm
Only when all iterations are stable
- If both rings are in the same position and your head, ribs, pelvis, and heels are moving together by the last repetition, lower the height slightly for the next session.
- On days when I lower my height, I don't increase my reps or bottom depth at the same time. Change just one variable and see how your posture changes.
- If the ring wobbles significantly or one side moves first, end the set immediately rather than pushing to failure reps.
Frequently asked questions
How low should the ring be installed?
There is no set height. Ring spacing, wrist alignment, and full body plank height are appropriate for your current level for 6–10 reps. Start from waist to chest height and lower only 5–10 cm at a time.
Should my chest go below the ring?
It is not a requirement. The ring allows for a greater range of motion, but the benefits are lost if the shoulder rolls forward or causes pain. Use only as deep as your shoulders and wrists can stabilize and return on the same path.
Can I turn the ring inward at the top?
Natural rotation within a comfortable range for your wrist is fine. However, there is no need to hit the ring hard or sharply bend your wrist inward. The priority is for each ring to be stable under the shoulder.
Evidence and references
- 1. Calatayud et al. — Comparison of push-up muscle activity on different suspension devices.
- 2. Snarr & Esco — Comparison of regular and suspended push-up muscle activity
- 3. Mok et al. — Recruitment of shoulder activator and torso stabilizer muscles for suspension push-up
- 4. Mendez-Rebolledo et al. — Meta-analysis of unstable support surfaces and scapular stabilizers.
- 5. Study on upper body muscle activity of suspended push-ups by angle