BAND ROW
Band Row — controlled horizontal pull for balanced upper-back strength, posture and shoulder health
The band row is a versatile, accessible horizontal-pull exercise that places emphasis on scapular retraction and thoracic extension while training the large pulling muscles of the upper back. When performed with deliberate tension, a stable trunk and correct shoulder mechanics the band row improves pulling strength, shoulder positioning, grip endurance and the muscular balance needed to counteract prolonged sitting and forward-shoulder postures. Because elastic bands alter load through the range, attention to tempo, anchor placement and joint angles is essential. This guide explains setup, the four-phase repetition, three in-depth technical focus areas, common errors and precise corrections, sensible progressions and two complete sample training rules. Safety instructions and practical frequently asked questions cover when to reduce range or consult a clinician. Read the full steps and technical notes before your first set and treat the band row as a controlled strength-building movement rather than a momentum-driven motion.
- Primary muscles
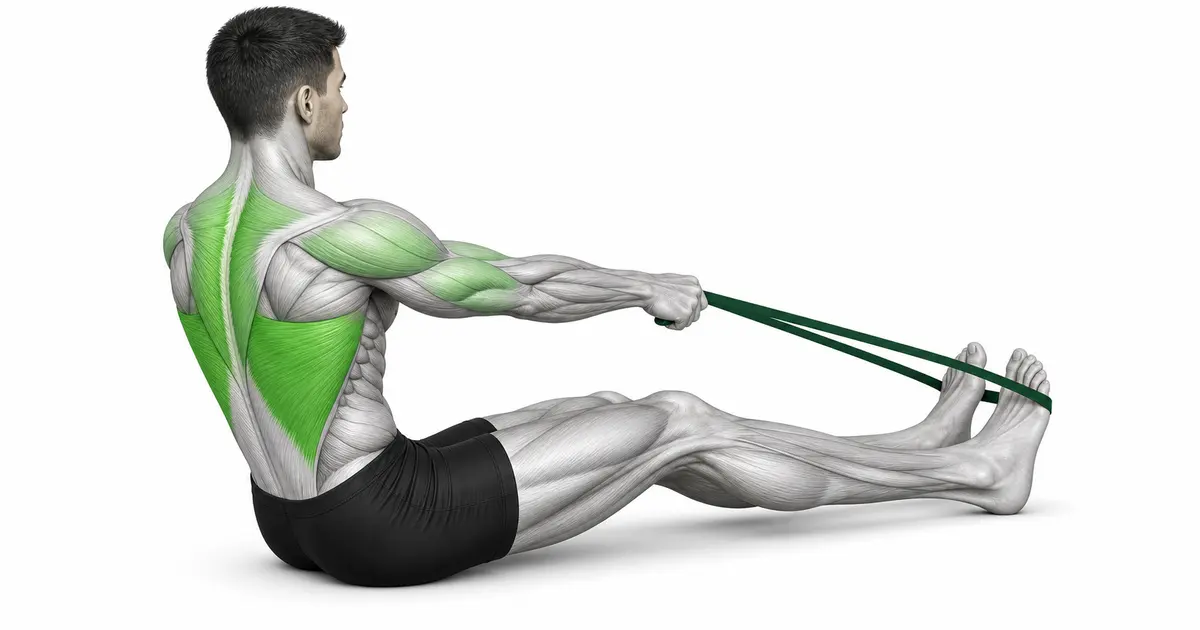
- Mid and lower trapezius, rhomboids, posterior deltoids, latissimus dorsi
- Secondary muscles
- Biceps brachii, brachialis, forearm extensors, thoracic extensors and core stabilizers
- Difficulty
- Intermediate
- Movement type
- Horizontal-pull compound movement with scapular control
Can I use a bent-over position instead of seated or standing?
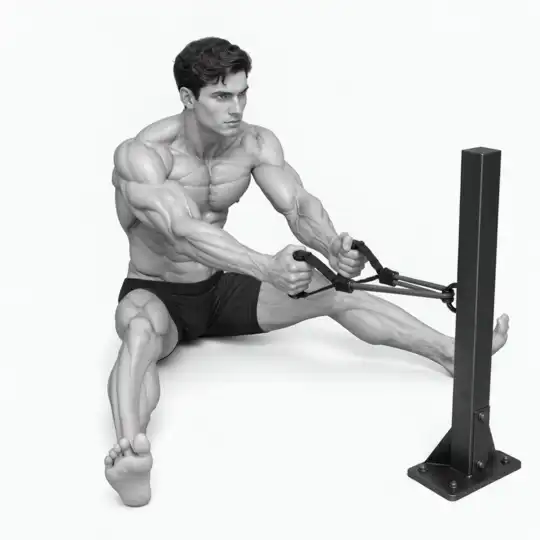
Yes. The bent-over band row (hinged at the hips) increases posterior chain demand on the hamstrings and glutes while mimicking a conventional barbell row. Only use the hinged variation if you can maintain a neutral lumbar spine without rounding. If lumbar control fails, revert to a supported seated row or seated with chest support to isolate the upper-back safely. The key is the same: initiate from scapular retraction and control the eccentric phase.
STEP BY STEP
4 Steps for One Complete Rep
- 1
Anchor and band choice
Choose a resistance band that allows 8–16 controlled repetitions with good form. Anchor the band to a sturdy fixed point at approximately chest height for a seated or standing row, or slightly below sternum height for a low row variant. Check the anchor for any abrasion and run the band through or around a carabiner or anchor point designed for elastic bands. If using a door anchor, confirm the door closes toward the hinge side and locks; never rely on a partially latched door. With the band doubled or single depending on desired resistance, hold the band handles or the band itself with a neutral wrist and a full hand grip.
- 2
Start position and posture
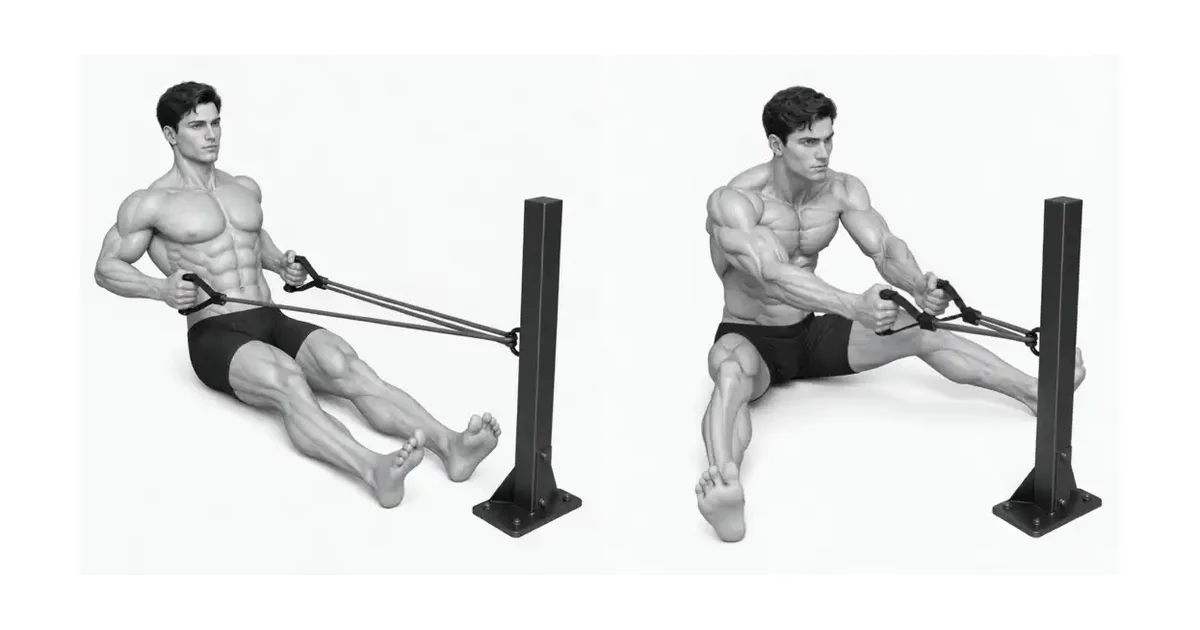
Stand or sit tall with a neutral spine: maintain the natural lumbar curve without excessive arching or flattening. Draw the ribs slightly down toward the pelvis and brace the abdominal wall gently to create a stable torso. Retract the shoulder blades only to the point of natural scapular positioning — do not force extreme pinching — and set the sternum slightly up to allow a small thoracic extension. Keep the chin neutral and eyes forward. If seated, place feet flat and press the heels to create a stable base. Hands should begin extended toward the anchor with elbows slightly bent; maintain tension in the band at the start so there is no slack.
- 3
Execution: concentric pull
Initiate the pull by pulling the elbows back and down, leading with the elbows rather than the hands. Drive the movement from the scapulae by actively retracting and slightly depress the shoulder blades (downward rotation) while maintaining thoracic extension. The hands will follow and finish near the lower ribs or the abdomen depending on your arm length and anchor height. Keep the wrists neutral and avoid excessive elbow flare; aim for approximately 10–25 degrees of horizontal adduction of the humerus at the end of the pull, so the elbows track close to the torso rather than wide. Exhale gently during the concentric phase to avoid breath-holding and to help maintain trunk stability.
- 4
Controlled eccentric return
Reverse the movement in a controlled manner, allowing the band to lengthen under tension and returning to the start position with a deliberate eccentric tempo. Do not allow the band to snap you forward; control the shoulder blades so they protract under tension rather than collapse into a rounded thoracic position. Maintain bracing through the core and a neutral pelvis throughout the eccentric portion. Reset briefly at the start for band tension and repeat for the prescribed number of quality repetitions.
FORM & STRENGTH
Efficient mechanics and strength-roading for the band row
1) Scapular rhythm and the proximal-to-distal sequence: The most reliable band rows start at the scapula. Before visible elbow bend, initiate a small, controlled scapular retraction and mild downward rotation. After scapular movement begins, allow the glenohumeral joint to adduct horizontally so that the elbows move posteriorly toward the midline. This proximal-to-distal sequencing preserves shoulder joint congruency and shifts load from passive ligaments to active musculature (rhomboids, middle trapezius and posterior deltoid). Practice this sequencing unloaded by performing slow scapular squeezes, then add the band and maintain that timing.
2) Band line, anchor height and line of pull: Anchor height determines the resultant moment at the shoulder. Anchoring too high promotes excessive elevation and upward scapular rotation; anchoring too low encourages thoracic flexion and downwards humeral drift. For a standard seated or standing row target an anchor near the sternum to lower-chest height so the line of pull follows a slightly upward path toward the scapula. This creates a safer moment arm across the glenohumeral joint and emphasizes mid-back activation. If your goal is more lat engagement, lower the anchor and emphasize a wider lat-focused pull, but reduce range and keep strict scapular control.
RANGE, LOAD & TEMPO
Choose a range and load that keep the Band Row repeatable
The useful range of motion ends before your torso or working joints have to change position to move the load. Keep the mid and lower trapezius, rhomboids, posterior deltoids, latissimus dorsi producing the movement while the biceps brachii, brachialis, forearm extensors, thoracic extensors and core stabilizers support the same alignment from the first repetition to the last.
Use a controlled lowering phase of about two to three seconds and avoid bouncing through the transition. If the final repetitions become shorter, faster, or visibly different from the first, reduce the load or stop the set before technique breaks down.
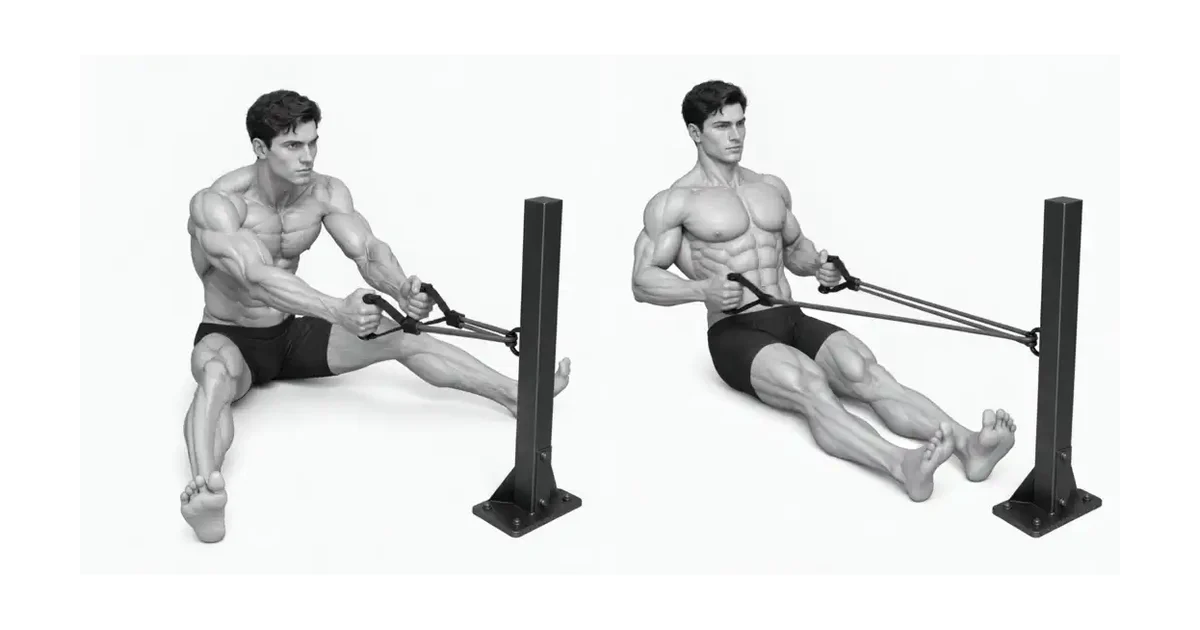
Key point: Progress the Band Row only after every repetition follows the same path without joint pain.
TROUBLESHOOTING
Fix the cause of a mistake, not just its appearance
Using momentum or whole-body swinging
- What you see
- Torso thrusting, rapid hip drive or visible lower-back extension during the concentric phase.
- Likely cause
- Band resistance selected that is too heavy, or attempting too many reps without adequate trunk bracing.
- How to correct it
- Reduce band resistance or shorten the band path; re-establish a braced neutral spine and initiate the pull from scapular retraction. Perform single-rep slow practice sets focusing on the scapula-first sequence. If you must recruit hip drive for heavier loads, switch to a different exercise (e.g., bent-over barbell row with a spotter or machine row) where the load is safer to handle.
Collapsing into thoracic flexion on the return
- What you see
- Rounded upper back and forward head position at the start of the next repetition instead of a tall chest.
- Likely cause
- Letting the band snap the shoulders forward and failing to control the eccentric phase; weak thoracic extensors or poor scapular control.
- How to correct it
- Deliberately slow the eccentric phase and keep the ribcage connected to the pelvis. Cue a 2–3 second controlled return and practice unloaded thoracic extension drills and scapular protraction-retraction progressions to rebuild control. If thoracic mobility is limited, reduce range of motion and focus on building tolerance before increasing band length or resistance.
REGRESSION & PROGRESSION
Match the difficulty before adding load
Incremental band resistance and band configuration
Progress by reducing band elongation at the start (move slightly further from the anchor) or switching to a heavier band once you can complete the target repetitions with strict form. When using heavier bands, consider doubling the band to alter the load curve and avoid excessive end-range peak load. Progress slowly to allow tendons and shoulder stabilizers to adapt; alternate heavier sets with technique-focused light-band sets within the same training week.
Single-arm and position variations for unilateral strength
When bilateral strength is established, progress to single-arm band rows to address side-to-side asymmetries. Perform seated single-arm rows with your trunk supported or standing single-arm rows with a staggered stance for stability. Use a tempo-focused approach and keep the non-working side relaxed; do not allow torso rotation to assist the working arm. Single-arm rows also allow greater emphasis on the scapular retractors and can reveal weak links that bilateral rows may mask.
BEGINNER PROGRAM
A practical starting framework
Use the band row as a primary horizontal-pull in a balanced upper-body program. It can be placed earlier in a session as a strength-focused movement or later as an accessory for volume and endurance. Prioritize technique work in the first two weeks of introducing the band row, then gradually increase load and reduce tempo to develop force production.
Frequency
2 sessions per week
Place band rows on upper-back or pulling-focused days, allowing 48–72 hours recovery between intense rowing sessions.
Volume
3–4 sets of 8–15 reps
Aim for quality repetitions with controlled tempo. If the last two reps show form breakdown, reduce load or reps.
- Always perform a general warm-up followed by specific shoulder and scapular activation drills before loading rows. Warm muscles allow for safer and more effective contractions.
- Stop immediately and reduce range or unload if you experience sharp joint pain, sudden tendon pain, pins-and-needles, or anything resembling mechanical catching in the shoulder. Consult a licensed clinician before returning to full range if those symptoms occur.
Frequently asked questions
How do I manage shoulder pain while continuing to train?
First, differentiate between muscular fatigue and joint pain. Mild muscular discomfort from high reps is normal; sharp, pinching or radiating pain is not. Reduce band resistance, shorten the range so you stop before pain onset, and add specific rotator cuff and scapular stabilization exercises with light resistance to restore motor control. Consult a physical therapist if pain persists beyond a few sessions or if symptoms include weakness, numbness or functional loss.