CLEAN PULL
The clean pull is not an exercise in which you raise the barbell high with your arms, but a pulling drill that maintains the starting path of the clean and creates vertical speed on the bar with your lower body and hips.
The clean pull starts from the floor in the same position as the clean, but instead of going under the bar, you perform a strong full body extension. If the bar moves forward to round your knees or your elbows bend prematurely, you lose the power your lower body has created. After stabilizing the clean starting position and first pull, place the bar close to your body and get used to the feeling of your ankles, knees, and hips straightening in order.
- Primary muscles
- Gluteus maximus, hamstrings, quadriceps, trapezius
- Secondary muscles
- Latissimus dorsi, calves, erector spinae, forearms
- Difficulty
- Intermediate
- Movement type
- Floor pull and explosive full body extension
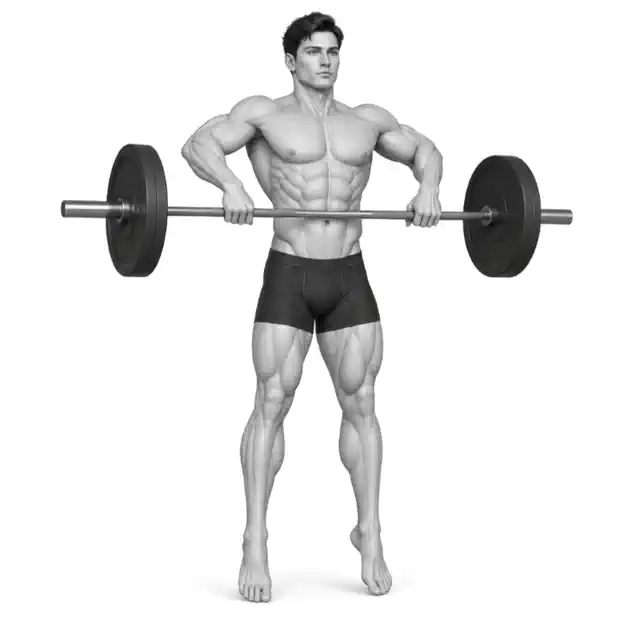
Are clean pull and high pull the same?
Clean pulls usually focus on full-body extension with arms kept long, while high pulls add a section where the elbows are pulled high after extension.
STEP BY STEP
4 Steps for One Complete Rep
- 1
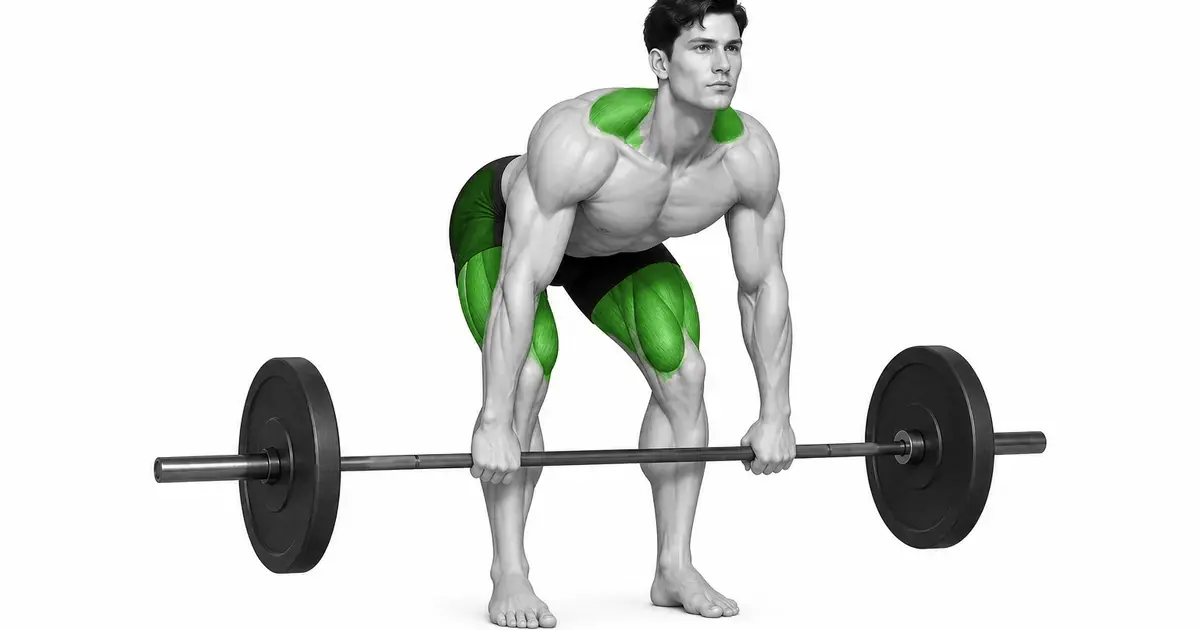
Matching clean grip and starting position
Hold the bar slightly wider than shoulder-width above your mid-feet. Place your shins close to the bar and your shoulders slightly in front of the bar, keeping your back tight.
- 2
Push the bar up above your knees with your legs
Push the platform with your feet so that your hips and shoulders rise together. Keep your arms long and let the bar move close to your body along your shins.
- 3
Put your knees back to create a power position
Once the bar passes your knees, straighten your torso and gently re-enter your knees under the bar. Place the bar near your upper thighs.
- 4
Stretch out your whole body and put it down under control
Explosively straighten your ankles, knees, and hip joints and raise your shoulders up. Rather than pulling with your arms, after the top, lower the bar controlled to your thighs and floor with your hip hinge.
PUSH THE FLOOR
The first pull is not the section where you lift the bar with your back, but the section where you push the floor with your legs.
When the bar rises, only the pelvis rises first, the back approaches horizontal, and then the hips hit the bar forward. Maintain the relative angles of your shoulders and hips.
Don't just lean on your heels, feel the pressure of your entire foot and let the bar pass over the middle of your foot.
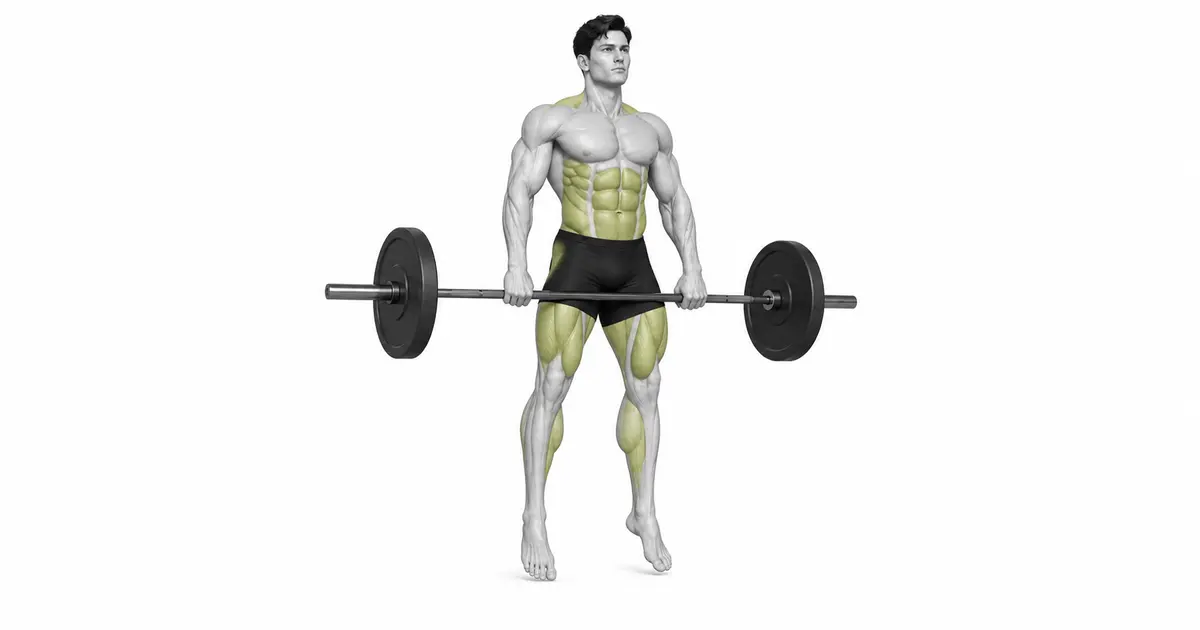
Key point: Cue to try right now: “Arms long, bar close, legs pushing into the floor.”
FINISH TALL
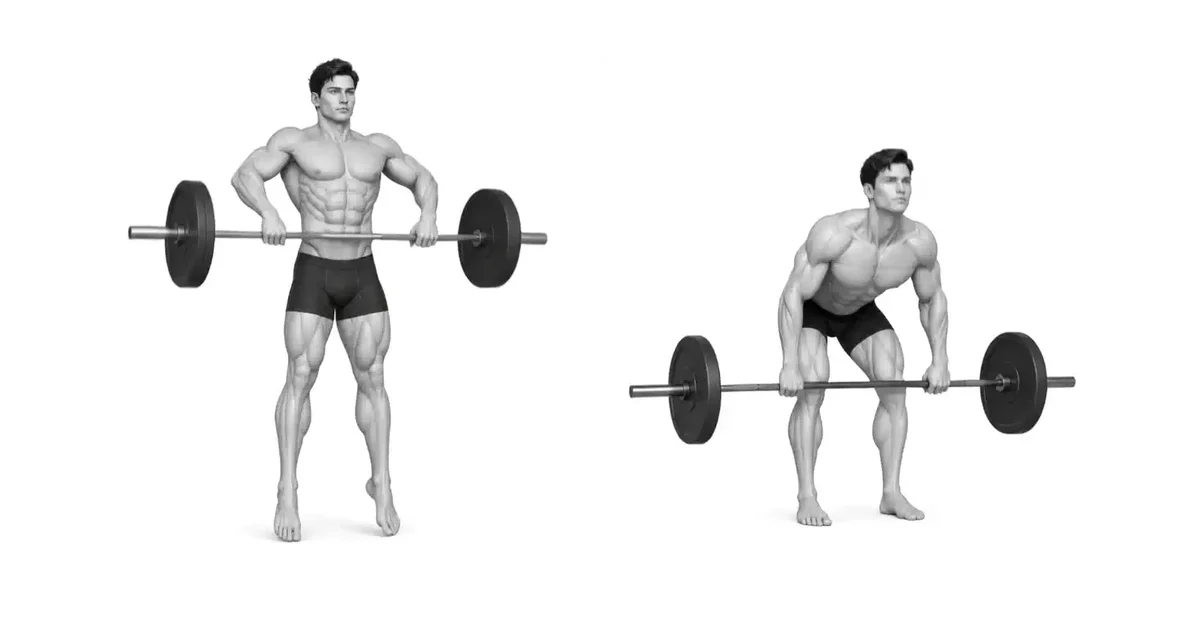
Accelerate the bar through full lower body extension rather than bending your elbows to create height
If your arms bend early, your trapezius muscles and arms will get tired before your lower body. Place your hands like hooks connecting the bar.
Do not throw your feet forward excessively or lean your back backwards, and finish extending at the point where you are tallest.
TROUBLESHOOTING
Fix the cause of a mistake, not just its appearance
Pelvis rises first
- What you see
- When the bar leaves the floor, only your hips go up, leaving your chest.
- Likely cause
- Insufficient leg pressure or starting position too low.
- How to correct it
- Lower the weight and practice a shoulder-pelvic upward path with stationary clean deadlifts.
Bar moved away from front of knees
- What you see
- The bar is lifted away from the body and the weight is shifted to the front of the feet.
- Likely cause
- Lack of lat tension or sending the bar forward when avoiding the knees.
- How to correct it
- Tighten your armpits to pull the bar toward your body and straighten your knees back to create a path.
Elbows bend early
- What you see
- Curl the bar with your arms before your hips are fully extended and your forearms tire first.
- Likely cause
- Obsessed with bar height or lacking lower body acceleration.
- How to correct it
- Keep your arms long and perform only up to a shoulder shrug with light weight without straps.
REGRESSION & PROGRESSION
Match the difficulty before adding load
Interval Training
improve calorie consumption efficiency by repeating high and low intensity.
Increased time and resistance
Strengthen your stamina by increasing performance time or increasing the resistance level of the machine.
BEGINNER PROGRAM
A practical starting framework
If skill and speed are your goals, use short sets of 2 to 4 reps. If the bar path moves away or your arms start to bend first, don't increase the weight.
Frequency
3 to 5 times a week
If your goal is to lose body fat, it is important to do it consistently.
Volume
20~40 minutes
Gradually increase the time according to your fitness level.
- Do this while drinking plenty of water.
- Protect your joints through light stretching before and after exercise.
Frequently asked questions
Can I go heavier than clean?
Experienced users may use heavier loads but should be able to maintain the same starting position and bar speed. Beginners start with technical weights.
Do your feet have to be off the floor?
With strong extension, you can naturally raise your heels, but there is no need to intentionally jump. Transmitting vertical force to the entire foot is a priority.