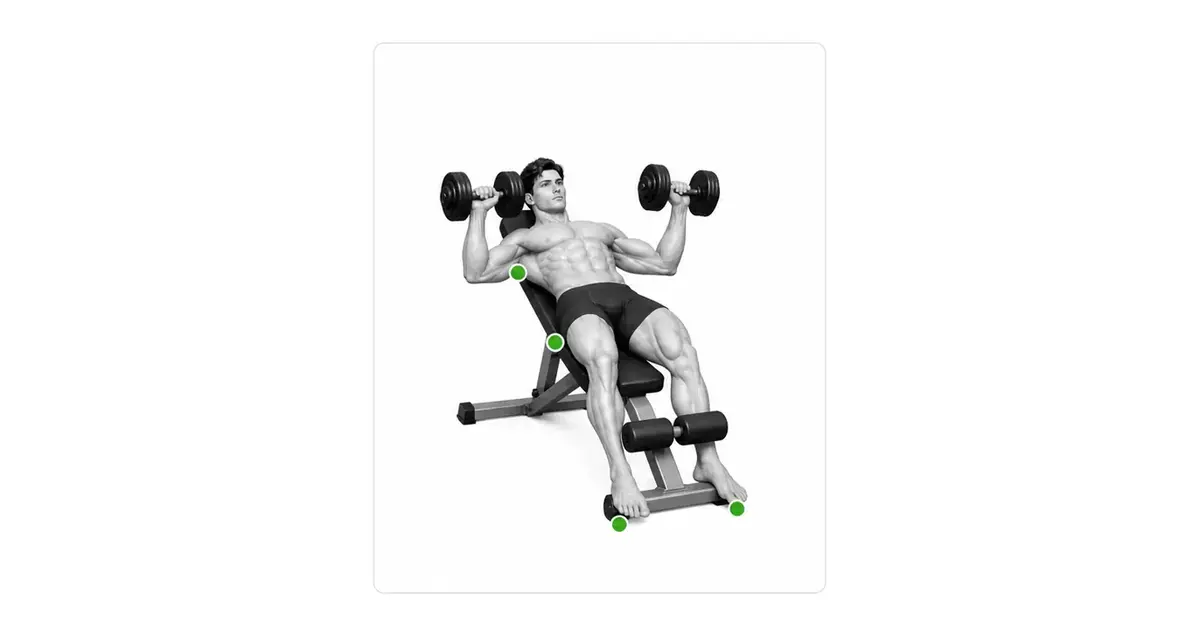
DECLINE BENCH PRESS
For the decline bench press, being secured and holding the bar path come before the angle
The decline bench press is a pressing variation performed on a bench where the head sits lower than the hips, lowering the bar toward the lower chest. It is often described as isolating the lower chest, but a study comparing flat, incline, and decline pressing in trained athletes found most differences in muscle activity were not significant. It is more accurate to treat it as one chest-pressing option that may give you a comfortable, stable shoulder path than as an essential exercise for a specific region. Do not attempt it in a setting that lacks leg restraints, safety arms, and a spotter.
- Primary muscles
- Pectoralis major
- Secondary muscles
- Triceps · anterior deltoids
- Difficulty
- Intermediate
- Movement type
- Declined horizontal press
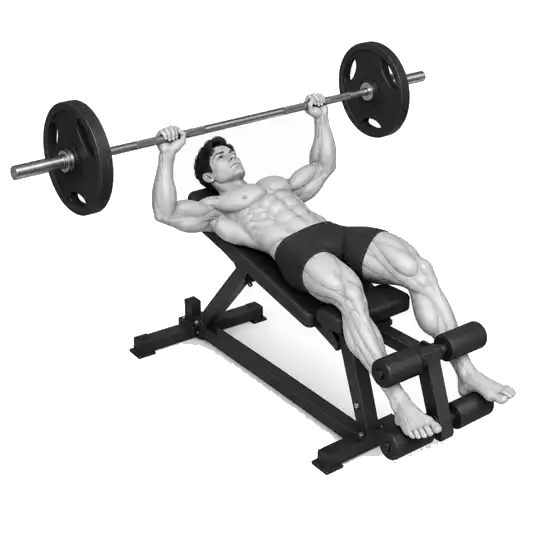
Does the decline bench press build the lower chest more?
It is a pressing variation directed toward the lower chest, but it is hard to claim it isolates one region. In research, most differences in muscle activity between flat and decline pressing were not significant. Choose it based on a comfortable shoulder path and program variety.
STEP BY STEP
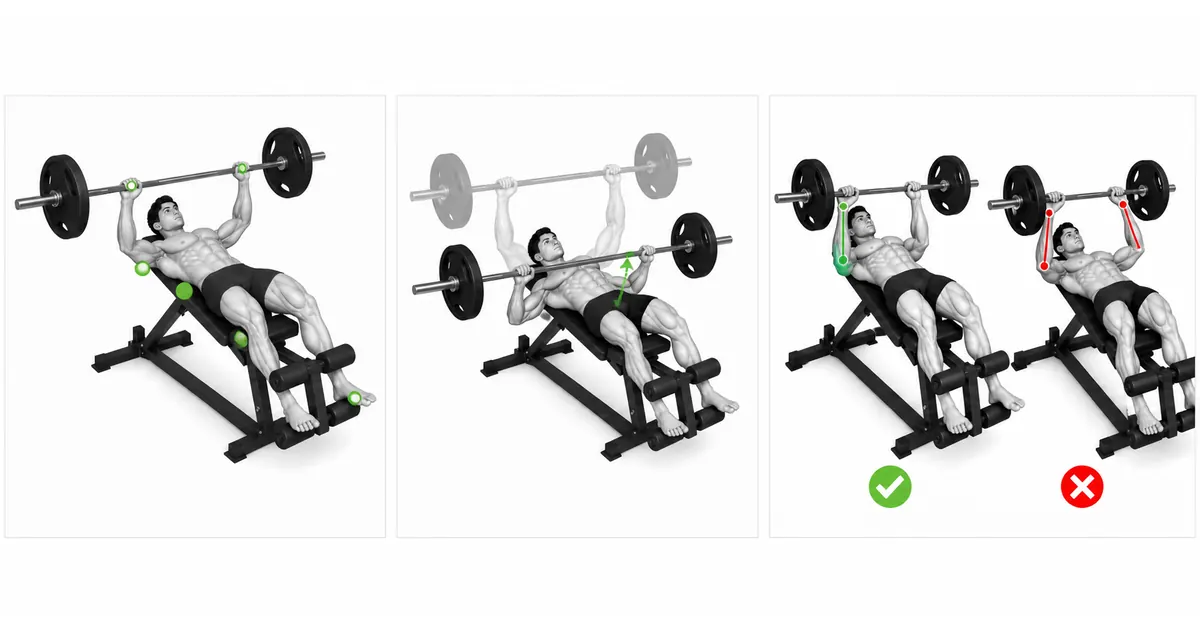
5 Steps for One Complete Rep
- 1
Set the bench and safety arms first
Start with a decline of roughly 15–30 degrees and confirm that the foot and shin pads hold you firmly. Set the safety arms slightly below where the bar meets your chest, and agree on unrack and rerack signals with your spotter.
- 2
Secure your legs and lie back slowly
Hook your legs between the pads so your body cannot slide toward your head, then hold a handle or the bench and lie back slowly. Do not drop your head suddenly, and check that you feel no dizziness or reflux.
- 3
Set your grip and upper back
Start with a grip slightly wider than shoulder width—the width that leaves the forearms close to vertical when the bar is down. Wrap your thumbs, place the bar low in the palms, and draw the shoulder blades back to stabilize the upper back against the bench.
- 4
Lower under control to the lower chest
Take a handoff to bring the bar over the shoulder joints, then inhale and brace. Keep the elbows roughly 45–70 degrees from the torso and lower the bar slowly to the lower sternum or the rib line.
- 5
Press over the shoulder line and rack it safely
Do not bounce the bar off the chest; press with both arms at the same speed back over the shoulder joints. After the last repetition, keep the arms extended and stable, move the bar toward the rack with your spotter, and confirm it is seated on both hooks.
DECLINE SUPPORT
Leg restraints are a safety device, not a convenience
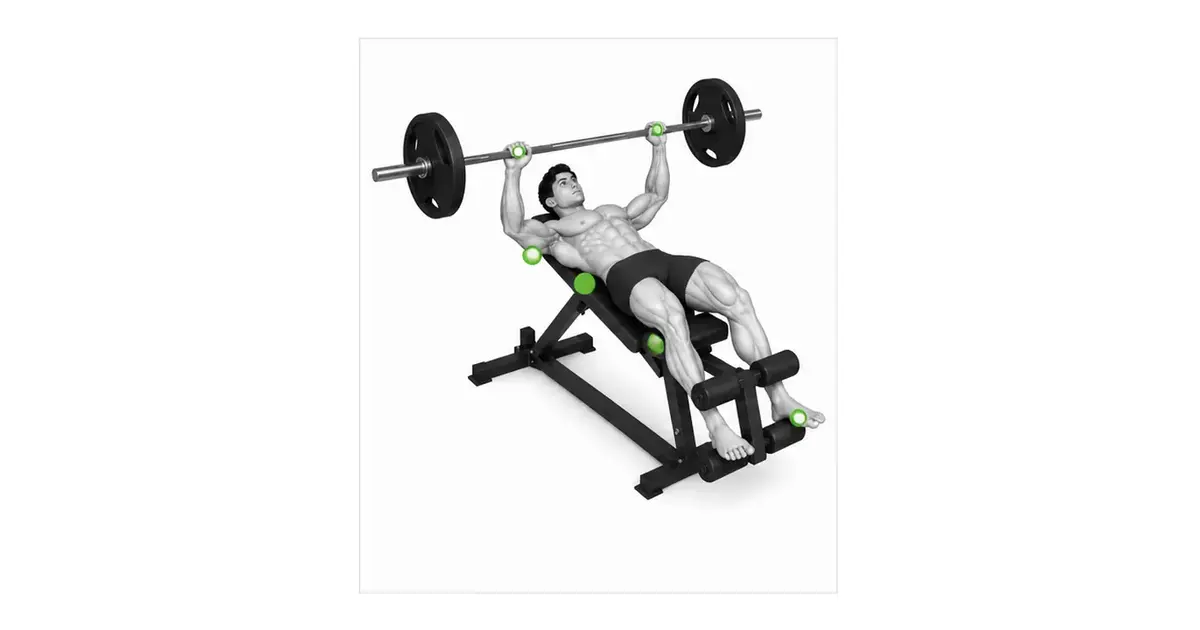
In the decline position, gravity makes it easy for your body to slide toward your head. The ankle or shin pads have to hold you firmly, and the upper back and glutes have to stay on the bench, before you can transfer force into the bar reliably. If the pads are loose or do not fit your proportions, use a different adjustable bench rather than improvising with a rolled towel.
Some people simply do not tolerate having the head below the hips. If you feel dizziness, a headache, or reflux while lying down or getting up, stop immediately and sit up slowly. The decline bench press is not a mandatory movement—you can substitute a flat press or a machine press.
Key point: Check before the set: “Pads secured → no sliding → safety arm height → spotter signals.”
BAR PATH
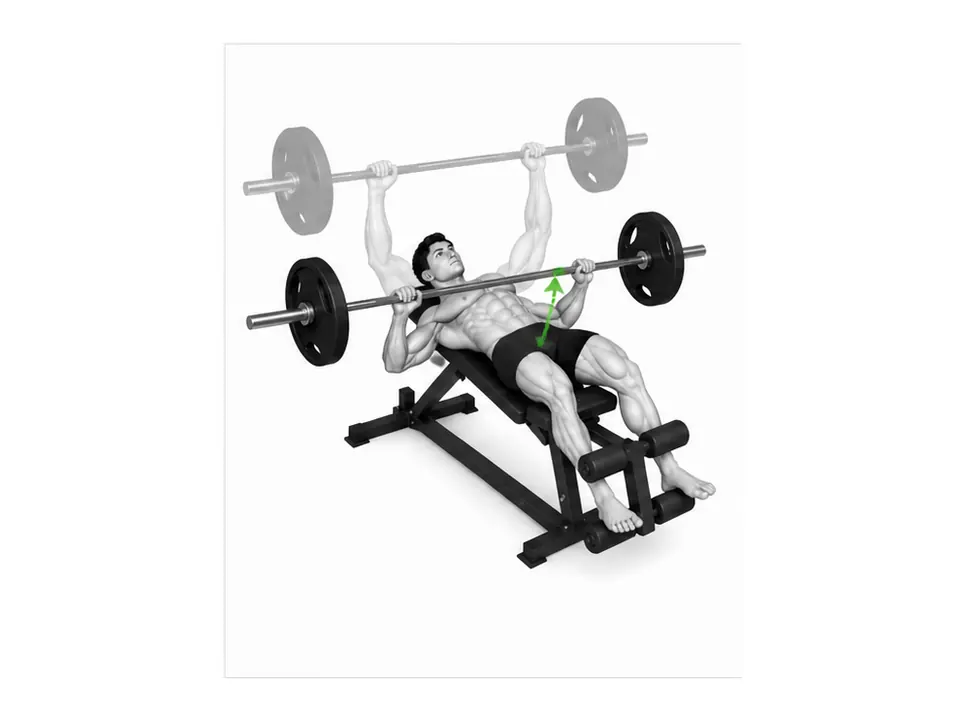
The bar returns from the lower sternum to over the shoulder line
Because the bench is tilted, the bar meets the body lower than it does on a flat bench press. The start position is over the shoulder joints, and during the descent the bar travels to the lower sternum or the rib line. On the way up it retraces that path back over the shoulders while staying level from end to end.
Do not force the same touch point on everyone. Arm length and grip width change where it lands. Use these standards instead: from the side, the wrist sits above the elbow, the bar does not stray toward the neck or the abdomen, and the shoulders do not lift off the bench.
WRIST & ELBOW
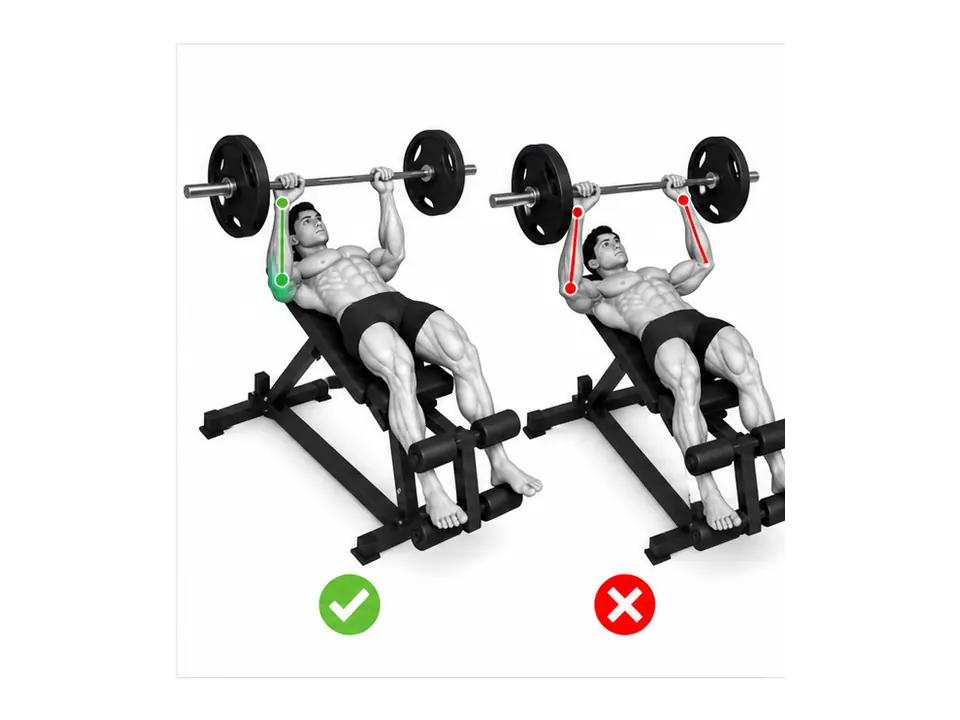
Stack the wrist and elbow beneath the bar
When the bar rolls toward the fingers, the wrist folds back and force no longer travels cleanly through the elbow. Place the bar low in the palm and use a thumb-wrapped grip. Adjust the grip width so the forearms come close to vertical at the bottom, seen from both the front and the side.
Do not flare the elbows to 90 degrees at shoulder height, and do not pin them tight to the torso either. Bench press technique research has found that grip width, shoulder-blade position, and the angle of shoulder abduction all influence shoulder joint loading. For most lifters it is practical to stabilize the shoulder blades and find a repeatable path with the elbows roughly 45–70 degrees from the torso.
TROUBLESHOOTING
Fix the cause of a mistake, not just its appearance
The leg restraints are loose
- What you see
- The body slides toward the head as the set continues and the feet shift on the pads.
- Likely cause
- The pad spacing may not suit your proportions, or the shins may not be hooked deeply enough.
- How to correct it
- Readjust the pads before you touch the load and rock your body to confirm there is no slipping.
The bar is lowered toward the neck
- What you see
- At the bottom the bar approaches the collarbone and the elbows flare wide to shoulder height.
- Likely cause
- You may be using the same touch point as a flat bench, or moving the bar in a purely vertical line.
- How to correct it
- Reduce the load and rehearse the diagonal path that lowers to the lower sternum and returns over the shoulders.
The wrists fold backward
- What you see
- The bar sits toward the fingers and the wrist no longer stacks over the elbow.
- Likely cause
- The grip may be loose, or the bar may be held high in the palm.
- How to correct it
- Wrap the thumb and set the bar low in the palm so the elbow lines up directly beneath the wrist joint.
The bar bounces off the chest
- What you see
- The descent speeds up abruptly and the press begins with rebound off the lower chest.
- Likely cause
- The load may be too heavy, or you may be masking a loss of force at the bottom with a bounce.
- How to correct it
- Reduce the load and control the change of direction with a two-second descent or a brief pause above the chest.
Searching for the rack alone
- What you see
- After the last repetition you lift your head or unset your shoulders and grope backward for the hooks.
- Likely cause
- In the decline position the rack hooks are hard to see, and there may be no spotter present.
- How to correct it
- Agree on a rerack signal with your spotter and lower the bar together once it contacts both hooks. If you are alone, use a rack with safety arms.
REGRESSION & PROGRESSION
Match the difficulty before adding load
Push-up
Learn trunk bracing and the horizontal pressing pattern with bodyweight.
Dumbbell floor press
The floor limits depth at the bottom, making it useful for practicing wrist and elbow alignment.
Flat bench press
Repeat the unrack and the bar path consistently on a horizontal bench.
Decline bench press
Start with a light bar once the leg restraints and a spotter are in place.
BEGINNER PROGRAM
A practical starting framework
Use it roughly once per week, alternating with flat or incline pressing. For the first four weeks, choose a load that lets you hold the same bar path and leg support through the final repetition, and leave two or three repetitions in reserve. Count it together with your other chest-pressing sets when tallying weekly volume.
Reps
6–10
Keep the lower-chest touch point and the bar level
Sets
2–3
Rest 2–3 minutes between sets
Load
+2.5–5%
Only when every repetition is stable
- If the bar path, wrist alignment, and leg support stay the same through the final repetition, add a small amount of weight next session.
- If the bar tilts or the touch point changes from rep to rep, drop the load by 5–10% that day and finish with technique work.
- Leave two or three repetitions in reserve rather than training to failure, and always use a spotter and safety arms for heavy sets.
Frequently asked questions
What decline angle should I use?
Starting somewhere around 15–30 degrees is practical. A steep angle can make it harder to stay secured and to unrack, so use a shallow decline where the pads fit your proportions and you feel no dizziness.
Can I do this without a spotter?
It is not recommended. In the decline position the rack is hard to see and the bar is difficult to escape if you fail. Without a spotter, use a rack with properly set safety arms and light loads, or substitute a machine press.