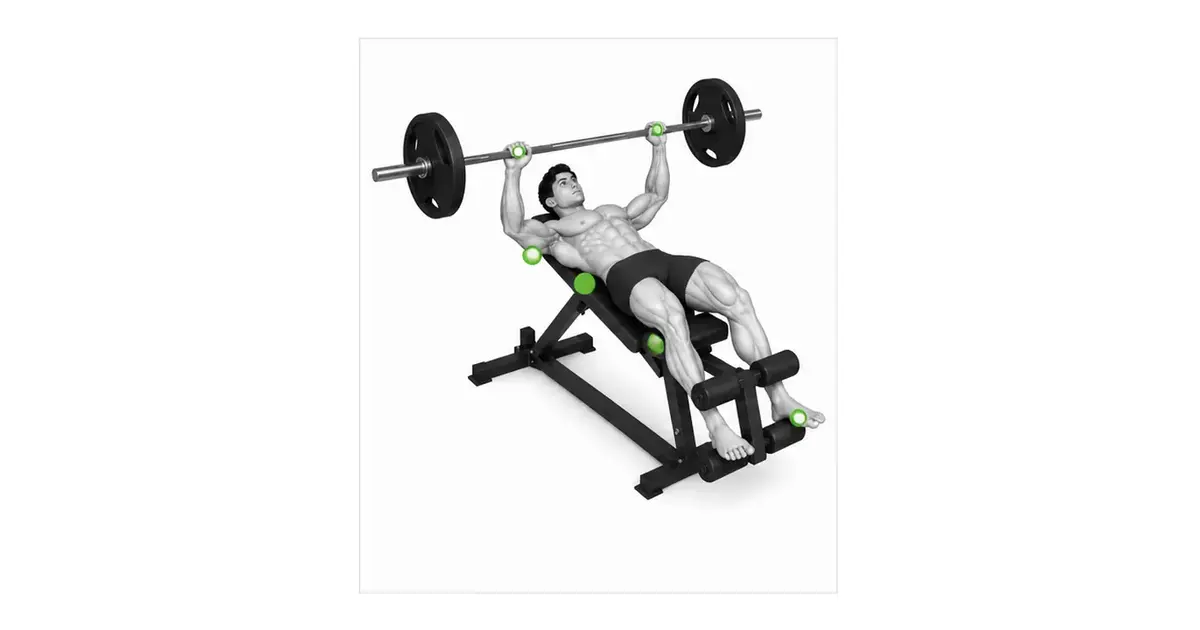
INCLINE DUMBBELL PRESS
The incline dumbbell press is not about pressing higher—it is about holding the right angle
The incline dumbbell press is an inclined pressing movement in which each arm works independently, recruiting the clavicular fibers of the pectoralis major along with the anterior deltoids and triceps. Raising the bench is not automatically better for the upper chest. Studies have observed high upper-pec activity at around 30 degrees, and past roughly 45 degrees the anterior deltoid tends to take on more of the work. The key is to start at a low incline and find the angle where the shoulders feel comfortable and the chest can control every repetition.
- Primary muscles
- Upper pectoralis major
- Secondary muscles
- Anterior deltoids · triceps
- Difficulty
- Intermediate
- Movement type
- Incline press
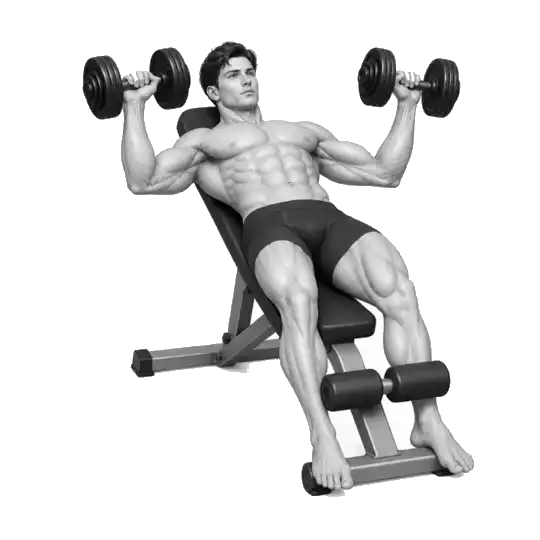
Is 30 degrees or 45 degrees the better bench angle?
If you want to prioritize the upper chest while limiting how much the front of the shoulder contributes, starting around 30 degrees is practical. You can use 45 degrees too, but lower the angle if the shoulders fatigue first or the path turns vertical.
STEP BY STEP
5 Steps for One Complete Rep
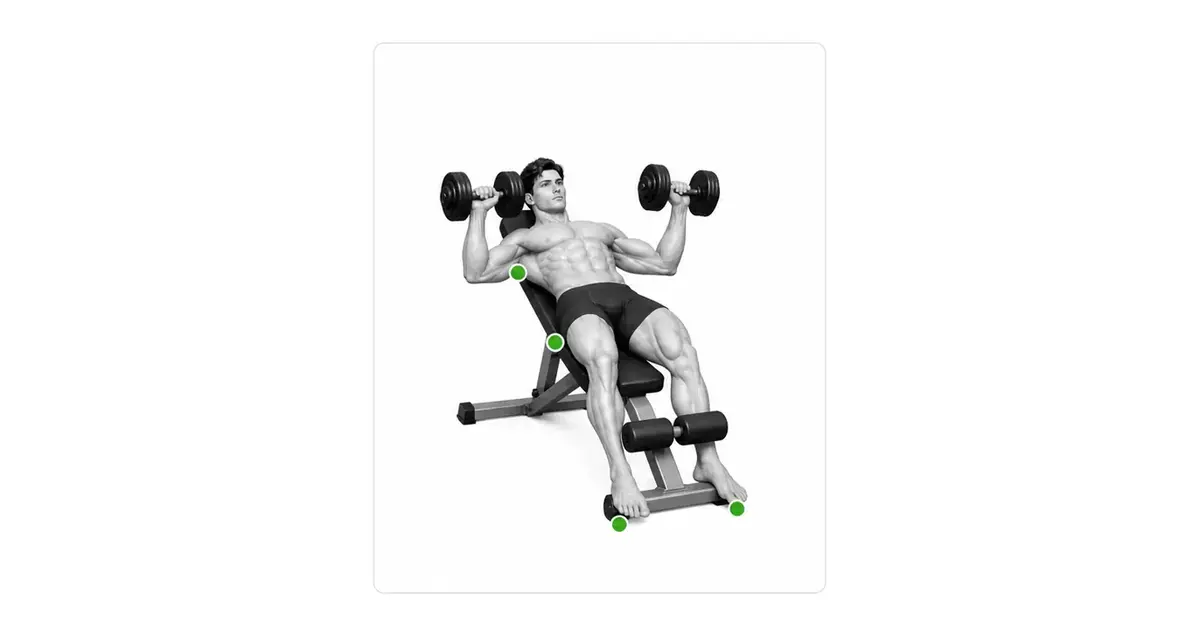
- 1
Set the bench to a low incline
Set the bench to about 30 degrees and confirm that the backrest and seat are locked. Starting below 45 degrees reduces how much the front of the shoulder takes over and makes it easier to learn the feeling of pressing with the chest.
- 2
Use your knees to bring the dumbbells up
Sit with the dumbbells standing on your thighs, drive them up one at a time with your knee, and lie back against the bench. Do not pick the dumbbells up off the floor with your arms out to the side or muscle them into the start position with your shoulders alone.
- 3
Set your contact points and wrists
Keep your upper back and glutes on the bench and both feet on the floor. Draw the shoulder blades back to stabilize them, and place the dumbbell handles low in the palms so the wrists stay neutral. At the bottom, the elbows should sit directly beneath the wrists.
- 4
Lower under control beside the upper chest
Inhale and lower both dumbbells at the same speed. Keep the elbows roughly 45–70 degrees from the torso, and find the point where the upper arms travel slightly below the line of the torso and the chest is fully loaded without pain at the front of the shoulder.
- 5
Press up without clashing the dumbbells
Maintain pressure through both feet and the upper back as you press the dumbbells up and slightly inward. Extend the arms under control at the top and keep the dumbbells over the shoulder line without letting them bang together or the shoulders roll forward.
BENCH ANGLE
Start near 30 degrees and judge the angle by how much the shoulder takes over
The bench angle changes the roles of the upper pectoralis major and the anterior deltoid. In one study of trained participants comparing 0, 15, 30, 45, and 60 degrees, peak upper-pec activity was observed at 30 degrees, while anterior deltoid activity was highest at 60 degrees. Other work has reported that as the incline increases, activity within the pectoralis major shifts toward the clavicular region.
EMG results alone do not settle the best angle or the most growth for any individual. Start between 15 and 30 degrees and check upper-chest tension, shoulder comfort, and a repeatable range of motion together. If raising the angle only makes the front of the shoulder fatigue faster, lower the incline or the load.
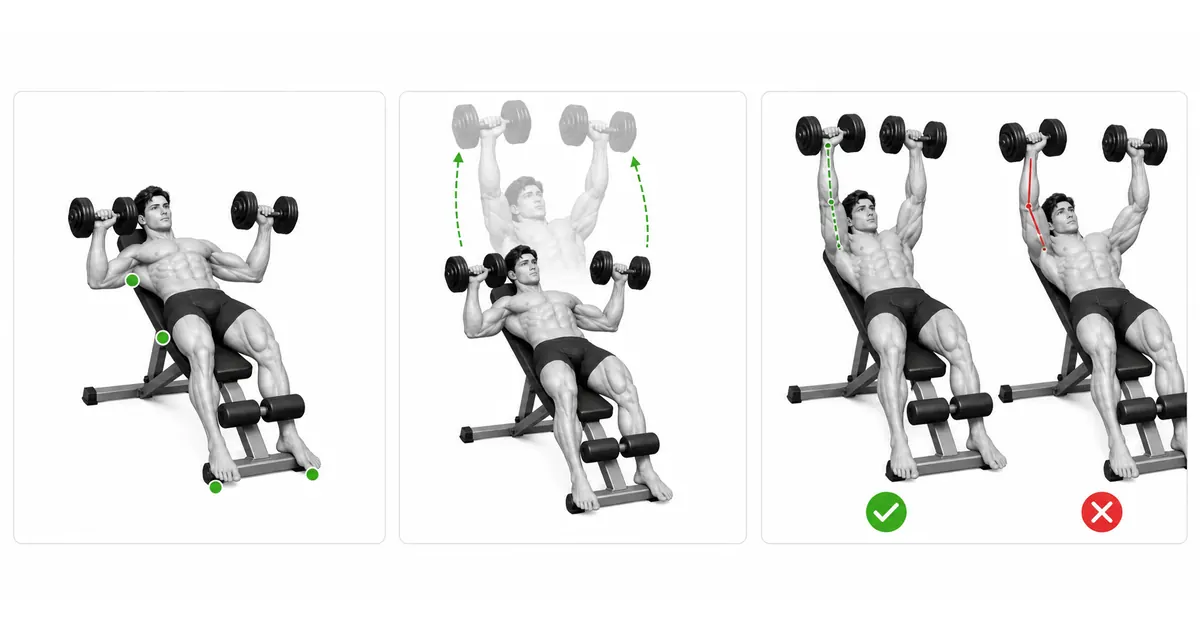
Key point: Practical standard: set the backrest to 30 degrees → check that the shoulders feel comfortable → adjust one step only when needed.
DUMBBELL PATH
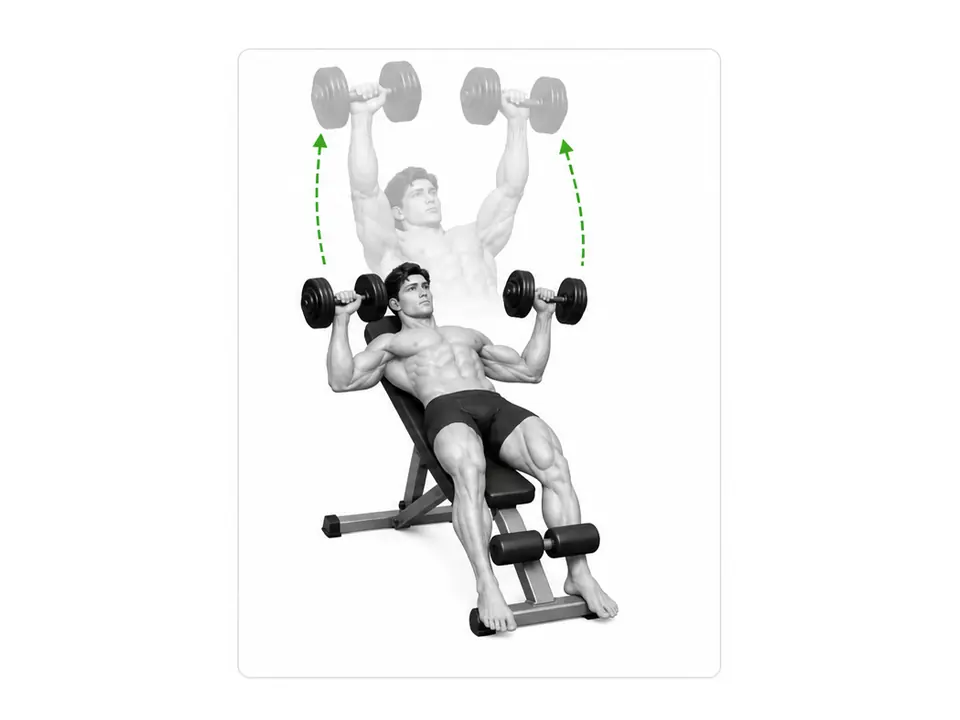
The dumbbells travel from beside the upper chest to over the shoulder line
At the bottom the dumbbells sit on either side of the upper chest, with the wrists and elbows stacked close to vertical beneath the load. As you press, they move up and slightly inward until they finish over the shoulder joints. Do not travel in a purely vertical line or press them far toward your face.
Banging the dumbbells together releases tension at the top and can cost you balance. Leave about a fist of space between them, and film from the front to check that both sides move at the same height and speed.
WRIST & ELBOW
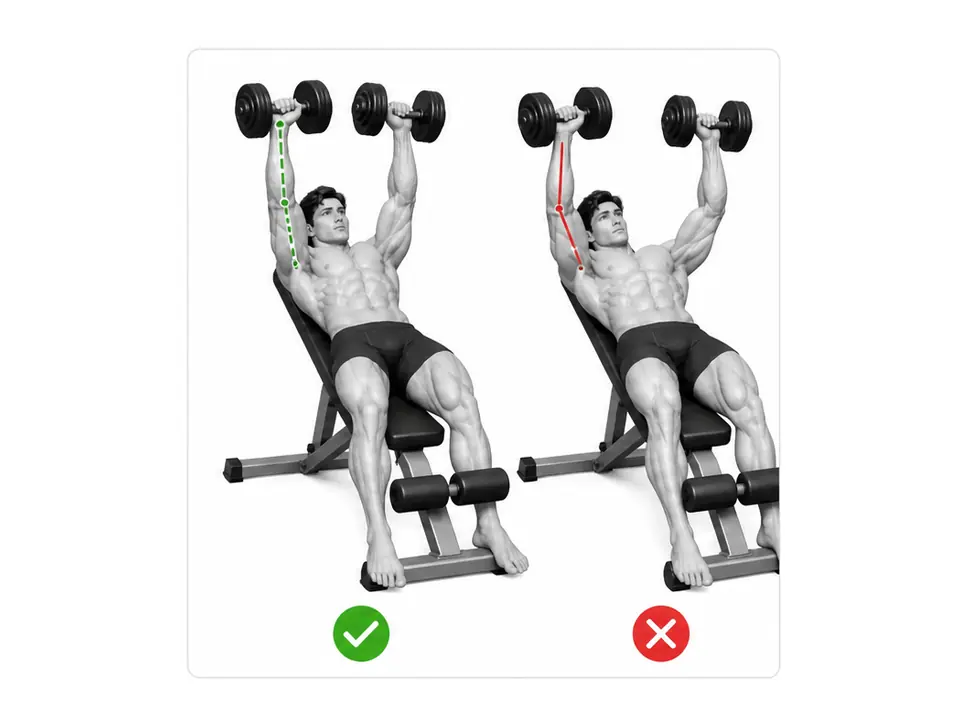
Stack the dumbbell, wrist, and elbow into one column
When the dumbbell drifts toward the fingers, the wrist folds back and force is harder to transfer through the forearm. Place the handle low in the palm and keep the wrist straight. If the elbow strays well inside or outside the wrist at the bottom, reset your grip and the position of the dumbbell.
Flaring the elbows all the way out to shoulder height can increase stress at the front of the shoulder for some lifters. Pinning them tight to the ribs, on the other hand, shifts more work to the triceps and makes the range of motion awkward. For most people, a path that keeps the elbow beneath the wrist at roughly 45–70 degrees from the torso works well.
TROUBLESHOOTING
Fix the cause of a mistake, not just its appearance
The bench is set too upright
- What you see
- The front of the shoulder fatigues before the chest and the movement becomes nearly vertical, like a shoulder press.
- Likely cause
- Trying to hit the upper chest harder, many lifters raise the incline to 45–60 degrees.
- How to correct it
- Lower the backrest to 15–30 degrees and rehearse the path that lowers the dumbbells beside the upper chest.
The dumbbells are lowered too deep
- What you see
- The front of the shoulder pulls at the bottom, or the upper arm bone travels well behind the torso.
- Likely cause
- Assuming a bigger range is always better, or losing control at the bottom because of the load.
- How to correct it
- Lower only into a pain-free range and use a two-second descent. If needed, switch to a neutral grip and a lighter load.
The wrists fold backward
- What you see
- The dumbbell sits over the fingers and the wrist joint drifts behind the elbow.
- Likely cause
- The dumbbells may be too heavy, or the handle may be held high in the palm.
- How to correct it
- Set the handle deep and low in the palm and line the elbow up directly beneath the wrist joint.
The dumbbells clash at the top
- What you see
- The dumbbells knock together at the end of every repetition and the shoulders lift forward off the bench.
- Likely cause
- Chasing a bigger squeeze by bringing the arms too far in, or failing to control the speed of the press.
- How to correct it
- Leave a small gap between the dumbbells and finish each repetition at the point where the shoulders are still stable on the bench.
One arm finishes first
- What you see
- The dumbbells reach different heights, the elbow angles differ, and the torso rotates toward one side.
- Likely cause
- The load may be too heavy, or strength and setup may differ between sides.
- How to correct it
- Drop to a load the weaker side can control, and check both paths by filming from the front rather than watching a mirror.
REGRESSION & PROGRESSION
Match the difficulty before adding load
Incline push-up
Use an elevated surface to learn trunk bracing and the inclined pressing pattern first.
Dumbbell floor press
The floor limits depth at the bottom, making it useful for practicing wrist alignment and left-to-right control.
Light incline press
Repeat the same path on a 15–30 degree bench with light dumbbells while holding your contact points.
Incline dumbbell press
Add load or range only when every repetition is symmetrical and the shoulders stay comfortable.
BEGINNER PROGRAM
A practical starting framework
Practice once or twice per week with enough recovery between sessions. For the first four weeks, work in the 8–12 range and leave two or three repetitions in reserve to lock in the technique. If you also flat bench that week, count your total chest-pressing sets together.
Reps
8–12
Within the range where both sides follow the same path
Sets
2–3
Rest 90 seconds to 2 minutes between sets
Load
+1–2 kg
Only after hitting the top of the rep range on every set
- If your upper back, glutes, and feet stay supported and the wrists stay aligned through the final repetition, add a small amount of weight next session.
- If one dumbbell lags or a shoulder lifts forward, end that set and reduce the load on the next one.
- Distinguish upper-chest fatigue from sharp shoulder pain. If joint pain appears, reduce the range and angle or stop the exercise.
Frequently asked questions
How far down should the dumbbells go?
Lower them beside the upper chest, but only as far as the elbows stay under the wrists and the front of the shoulder stays comfortable. A repeatable, controlled alignment matters more than touching the dumbbells to your chest.
Can I use a neutral grip with the palms facing each other?
Yes. A neutral or slightly angled grip is more comfortable on the shoulders for some lifters. You still need to check that the wrists and elbows stack under the dumbbells and that both sides follow the same path.
Evidence and references
- 1. ACE — Incline Chest Press Exercise Library
- 2. Rodríguez-Ridao et al. — Muscle activity across five bench angles
- 3. Lauver et al. — Upper-body muscle activity by bench angle
- 4. Cabral et al. — Regional pectoralis major activity in flat and incline pressing
- 5. Noteboom et al. — Bench press technique and shoulder loads