FOAM ROLLER - IT BAND
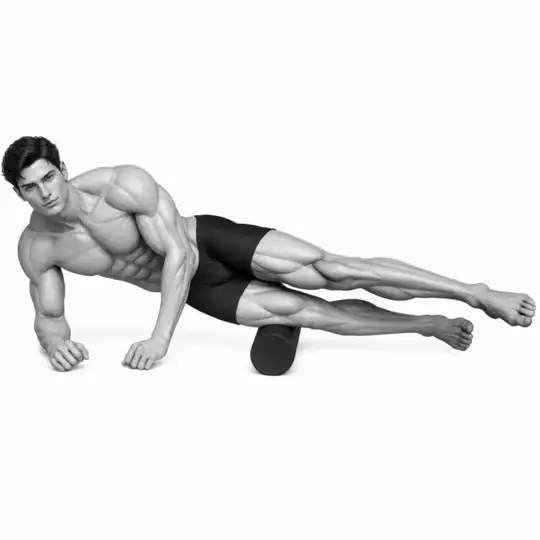
Foam Roller — IT Band: targeted, safe self-release for lateral thigh tension and improved hip loading
Foam rolling the lateral thigh and iliotibial band can reduce localized fascial stiffness, improve comfort when squatting or running, and support hip mobility when performed safely and deliberately. Because the IT band is dense connective tissue rather than a contractile muscle, the goal of rolling is to modulate pressure to the surrounding soft tissue (TFL, vastus lateralis, and gluteal insertions), to reduce guarding and improve sliding between fascial layers, and to re-establish comfortable range of motion. This protocol favors slow, controlled application, clear breath timing, and conservative progressions. Use it as part of a recovery session, after dynamic warm-ups, or on rest days; avoid aggressive, painful attempts to “break up” tissue. If you have acute inflammation, recent surgery, DVT, a fracture, severe varicosities, or neurologic symptoms, stop and consult a qualified clinician before performing self-myofascial work.
- Primary muscles
- Tensor fasciae latae and lateral thigh tissues
- Secondary muscles
- Gluteal complex and hip stabilizers
- Difficulty
- Beginner
- Movement type
- Targeted self-myofascial release
How long should each spot be rolled or held?
Begin with 15–30 seconds at any sensitive spot and assess response. If comfort improves and there is no worsening inflammation, you can progress to holds of 45–60 seconds for stubborn but tolerable tightness. Prioritize multiple short sessions over a single prolonged, painful session.
STEP BY STEP
4 Steps for One Complete Rep
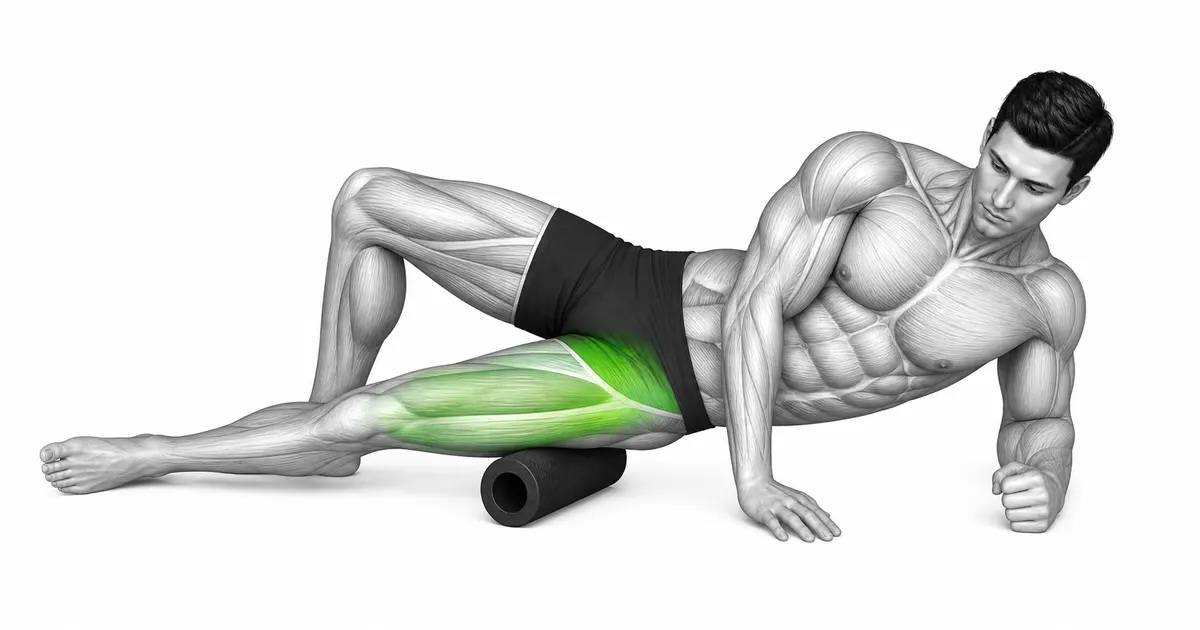
- 1
1. Positioning and baseline checks
Place the foam roller on a stable floor surface and sit beside it so the roller rests under the outside of the thigh. Extend your legs and place the roller so it aligns roughly from just below the greater trochanter (upper lateral thigh) toward just above the lateral knee. Use your hands and the opposite leg to support part of your weight. Before applying full bodyweight, test a small amount of pressure by lifting some weight with your supporting arms and sliding your side slightly onto the roller. Confirm you can breathe comfortably and that there is no sharp, radiating pain into the knee or lower leg. If you feel pins-and-needles, abrupt shooting pain, or numbness, stop immediately and reassess.
- 2
2. Establish a slow, grazed contact
Begin with light-to-moderate pressure: maintain enough support through your hands and opposite foot so the roller applies a firm but tolerable contact to the lateral thigh. Use small, controlled gliding motions—3 to 6 centimeters in length—rolling slowly from the upper aspect (hip area) to the area just above the knee. Keep your pelvis level and avoid letting your hips sag or rotate dramatically. Focus on a smooth tempo of approximately 2–4 seconds in each direction, prioritizing consistent contact rather than forceful compression.
- 3
3. Find and dwell on tight, non-sharp areas
When you encounter an area that feels tight, gritty, or 'sticky' but not acutely painful, slow the movement and hold your body over that spot. Maintain breath rhythm: inhale comfortably through the nose, then exhale slowly through the mouth while reducing active tension in the adjacent hip and knee. Hold the gentle pressure for 15–30 seconds to allow local nervous system modulation; if moderate discomfort persists and you are experienced, hold up to 45 seconds only if pain is stable and not increasing. Avoid forcing the roller into sharp pain. During holds, actively relax the thigh and gently move the ankle, foot, or hip a few degrees to encourage subtle tissue glide.
- 4
4. Exit with controlled unloading
To finish, reduce the applied bodyweight and roll back to a neutral area before stepping off the roller. Move deliberately—do not push off with a sudden explosive movement. After unloading, take 30–60 seconds to perform a few slow hip circles or gentle side-lying leg lifts to check comfort and mobility. Reassess: if sharp pain occurred at any point, stop and consult a clinician. If you feel a gradual reduction in tightness and improved movement, you can repeat the sequence 2–3 times per side within a single session.
FLEXIBILITY & RECOVERY
Key technique considerations to improve safety and effectiveness
Pressure modulation, not punishment: The IT band itself is dense fascial tissue with limited contractile properties. Effective self-release focuses on the tissues that interface with the IT band—TFL, lateral quadriceps, gluteal insertions—and on the nervous system’s sensitivity to pressure. Start with light pressure and progress only when the area is calm and the breathing remains steady. Do not chase the deepest possible 'breakdown' or endure severe pain; extreme pressure can provoke increased tissue guarding and inflammation. Use your arms and opposite leg to offload as needed. When you need more pressure, gradually shift more weight over the roller while monitoring comfort. If a spot produces sharp stabbing pain or referred symptoms below the knee, reduce load immediately and consider that the structure under the roller may require a different approach or professional evaluation.
Alignment and hip mechanics: Maintain a neutral pelvis and avoid rotating the hips excessively while rolling. Small rotational adjustments (a few degrees of internal or external hip rotation) can change which fibers of the TFL and lateral thigh contact the roller; use them deliberately to target a specific area. Keep the spine long and shoulders relaxed—do not hike the opposite shoulder to push through discomfort. If you lack the shoulder or arm strength to safely control weight distribution, reduce pressure or perform alternative mobilizations (seated lateral thigh stretching, side-lying TFL release with manual contact) until you build sufficient control. For runners or athletes with asymmetrical gait, compare sides but prioritize the side that is more guarded with conservative loading.
RANGE, LOAD & TEMPO
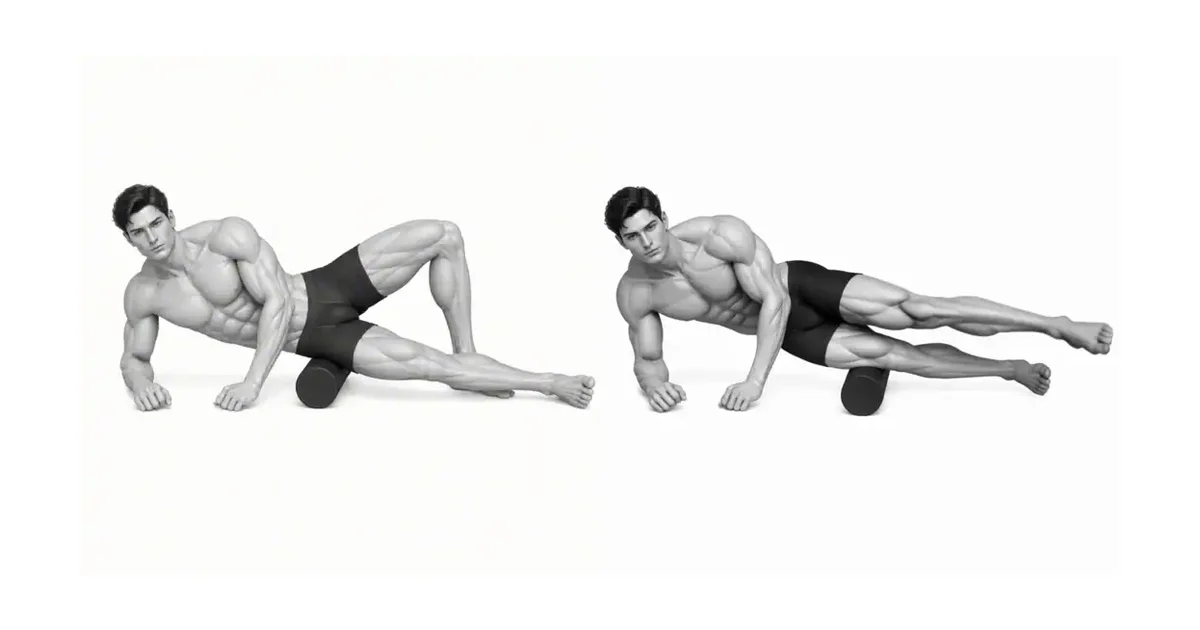
Choose a range and load that keep the Foam Roller - IT Band repeatable
The useful range of motion ends before your torso or working joints have to change position to move the load. Keep the tensor fasciae latae and lateral thigh tissues producing the movement while the gluteal complex and hip stabilizers support the same alignment from the first repetition to the last.
Use a controlled lowering phase of about two to three seconds and avoid bouncing through the transition. If the final repetitions become shorter, faster, or visibly different from the first, reduce the load or stop the set before technique breaks down.
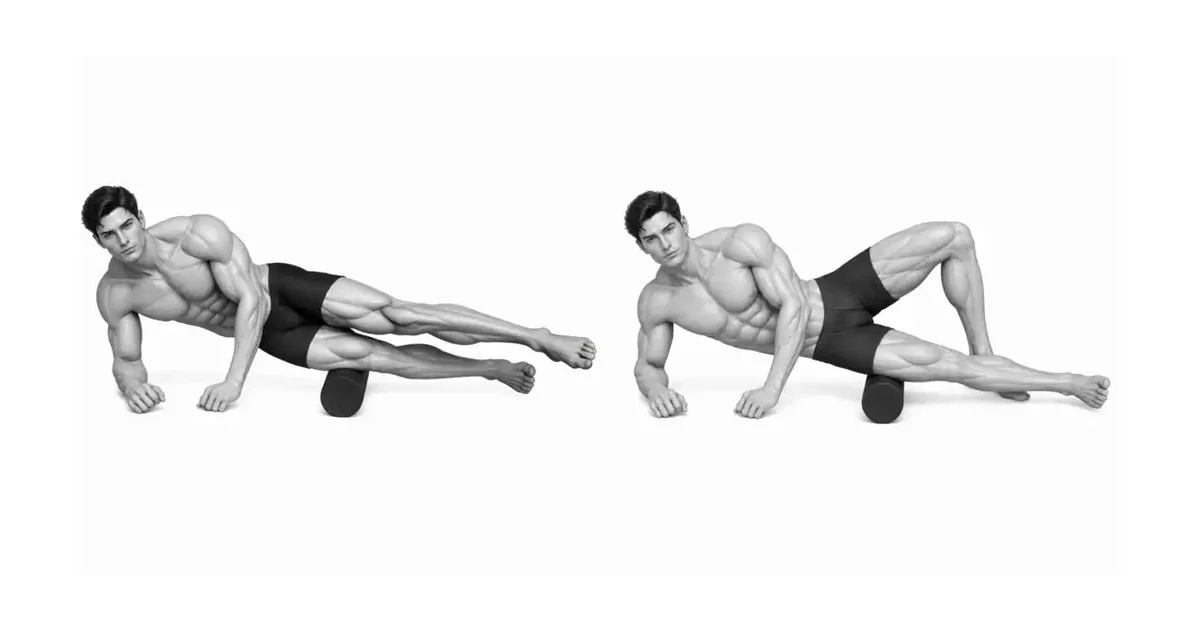
Key point: Progress the Foam Roller - IT Band only after every repetition follows the same path without joint pain.
TROUBLESHOOTING
Fix the cause of a mistake, not just its appearance
Applying excessive pressure or pinning the roller
- What you see
- Immediate sharp or shooting pain, increased soreness for days after rolling, or new numbness/tingling down the lower leg.
- Likely cause
- Using bodyweight to force the roller into tissue without modulation or attempting to 'break up' the IT band directly; relying on pressure to create dramatic short-term relief.
- How to correct it
- Reduce applied weight so that sensations are tolerable and breathing remains normal. Use shorter glides and more support from the hands/opposite foot. Replace a heavy session with multiple brief, lighter sessions spaced over consecutive days. If persistent neuropathic sensations (numbness, pins-and-needles) occur, stop rolling and seek professional assessment.
Rolling over the knee joint or below the fibular head
- What you see
- Localized knee or fibular head pain, sharp irritation at the lateral joint line, or discomfort that radiates toward the fibula.
- Likely cause
- Incorrect roller placement traveling too far distally; direct pressure on the lateral knee structures, ligaments, or superficial nerves.
- How to correct it
- Keep the roller focused between the greater trochanter and the lateral femoral condyle; stop approximately 4–6 cm above the joint line depending on individual anatomy. If unsure where to stop, place your hand on the lateral knee and roll only above the place where your fingers rest. Avoid rolling directly over bony prominences or the fibular head. Substitute targeted soft-tissue work by a trained therapist if knee-related pain persists.
REGRESSION & PROGRESSION
Match the difficulty before adding load
Increase contact time and controlled range
When light-to-moderate pressure for 15–30 seconds produces reliable decreases in tightness and no post-session inflammation, gradually increase hold durations to 45–60 seconds for specific spots while maintaining breathing and relaxation. Only increase time if discomfort is steady or diminishing, never if it escalates.
Add active movement and positional variations
Progress by incorporating gentle active hip internal/external rotation, small knee bends, or short eccentric step-downs immediately after rolling to translate the improved tissue mobility into functional movement. Eventually reduce manual support with the arms so that you control more bodyweight over the roller, but only after you can maintain alignment and breathing during lighter loading.
BEGINNER PROGRAM
A practical starting framework
Integrate IT-band rolling as a consistent recovery habit that complements strengthening and mobility work. Short daily modulation sessions reduce neural sensitivity and maintain lateral thigh comfort; longer, conservative sessions can be added after high-volume training. Avoid using rolling as a standalone solution—combine it with glute-strengthening, hip-abductor control, and gait mechanics coaching for lasting improvements.
Frequency
Daily
Perform immediately after waking up, before going to bed, or before or after exercise.
Volume
Repeat 2~3 times
Take sufficient time to relax each area.
- Always listen to your body; never push into sharp or radiating pain. Stop immediately if symptoms worsen.
- Perform rolling in a warm environment or after a brief warm-up to reduce tissue stiffness and improve tolerance.
Frequently asked questions
Should I foam-roll before or after a workout?
Use light, short-duration rolling as part of a warm-up to reduce surface tension and increase perceived mobility. Reserve longer holds and slightly higher pressure for post-workout recovery or non-training days. Always follow rolling with appropriate dynamic movement or strengthening that addresses hip stability and glute function.