HIGH BAR SQUAT
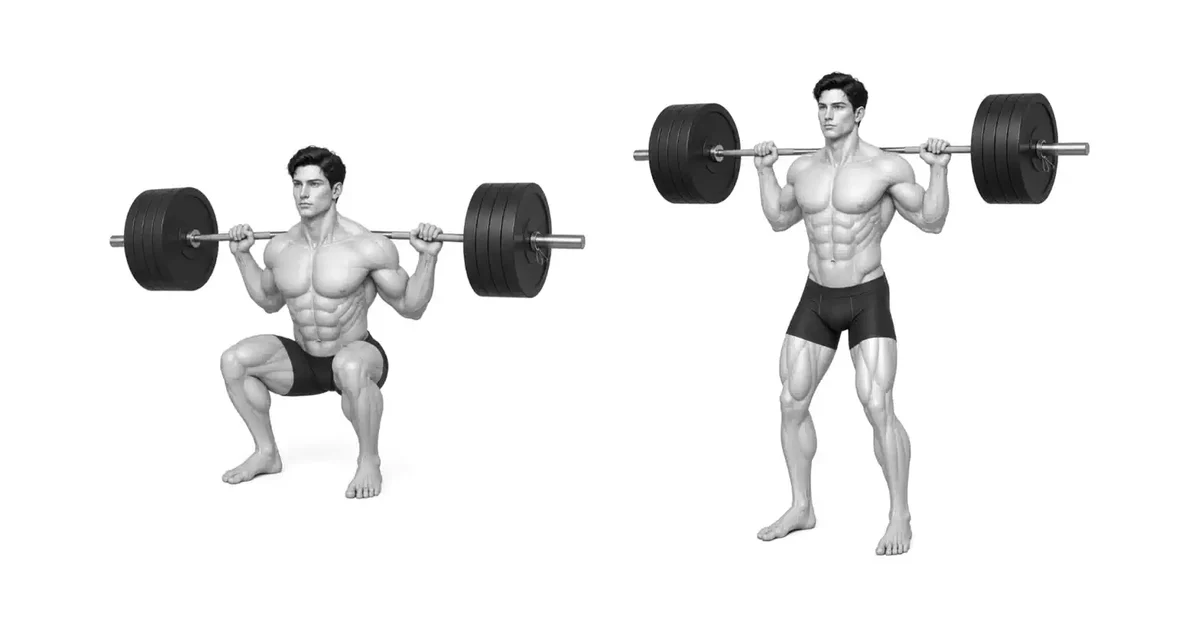
The high bar squat is not an exercise in which the bar is placed on the cervical spine, but rather a back squat in which the bar is fixed on a shelf above the trapezius muscle and moved above the middle of the foot.
High bar squats place the bar above the trapezius muscles, so they often result in a relatively upright torso posture and greater knee bending than low bar squats. Create an upper back shelf without the bar pressing on your cervical spine or taking the weight of your hands, and make sure the combined center of gravity of the bar and your body remains above your mid-feet as you lower.
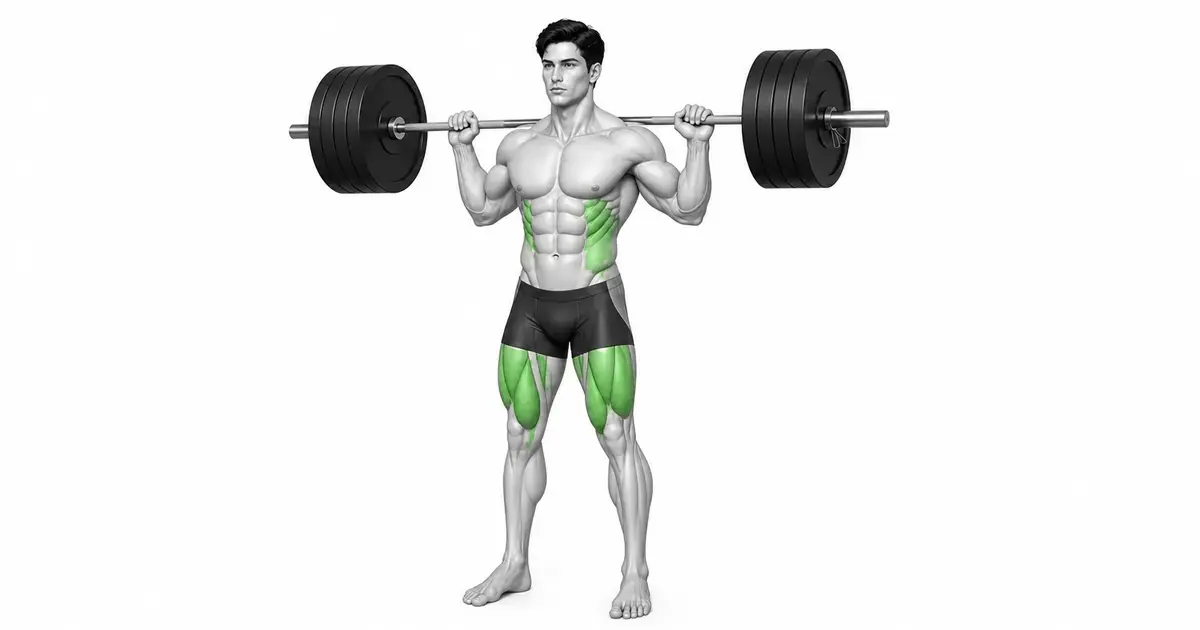
- Primary muscles
- Quadriceps, gluteus maximus
- Secondary muscles
- Adductors, hamstrings, calves, core, upper back
- Difficulty
- Intermediate
- Movement type
- High Bar Back Squat
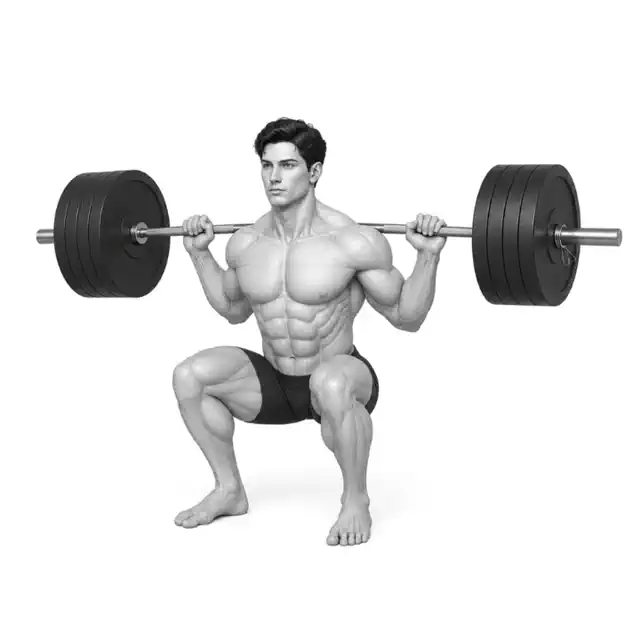
Where exactly do I place the bars?
Place on the muscle shelf above the contracted trapezius muscle, not on the cervical spine. There should be no sharp bone pressure.
STEP BY STEP
4 Steps for One Complete Rep
- 1
Align rack and safety height
The bar is placed at the height of the upper chest so that it can be unlocked without tiptoeing. Set the safety pin just below the lowest controllable depth.
- 2
Building a bar shelf on the trapezius muscle
Go under the bar and place it on top of your trapezius muscles, below your cervical spine. Hold both hands the same width and tighten your upper back without excessively lifting your chest.
- 3
Sit together above midfoot
Take a short step backwards to straighten your feet and create abdominal pressure. Bend your knees and hips together, sending your knees toward your toes and maintaining your entire foot.
- 4
Raising the bar and pelvis together
Push the floor with the middle of your feet and allow your chest and pelvis to rise at the same speed. After fully standing, make sure the bar touches the rack pillar and hang it on both sides.
UPPER-TRAP SHELF
High bar position is not on the cervical spine, but on the toned trapezius muscles
If the bar presses directly against the cervical spine, pain and instability may occur. Bring your shoulder blades together and contract your upper back to create a shelf over the muscles.
The hands hold the bar against the back, but the weight of the bar is not carried by the wrists. Adjust the grip width to suit your shoulder range of motion.
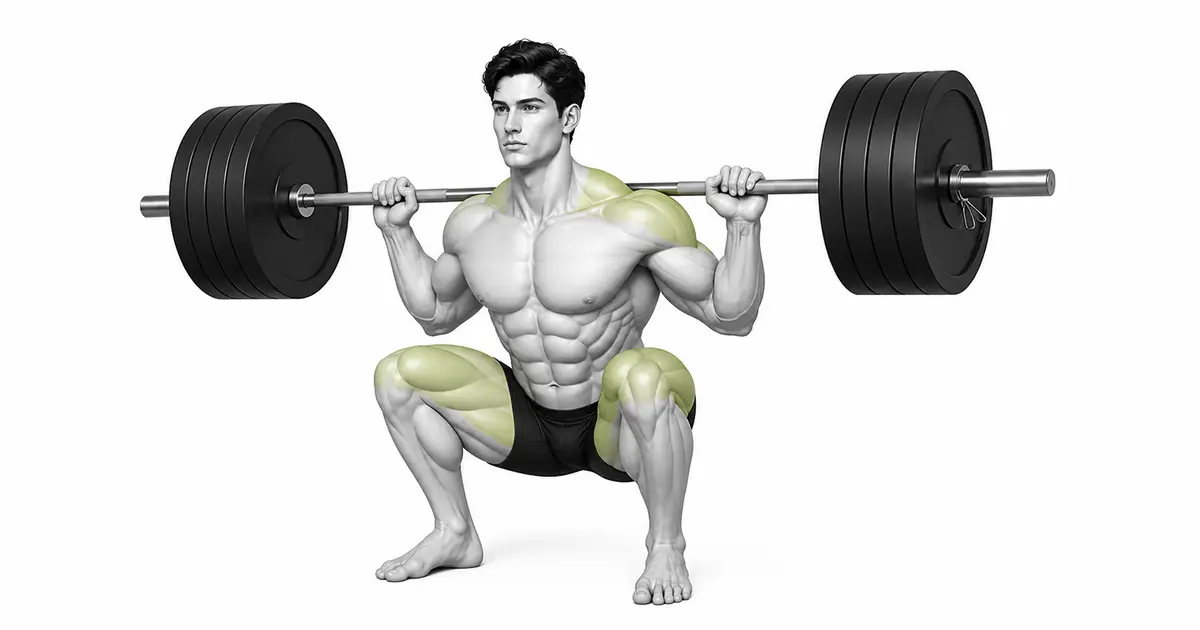
Key point: Cue to use right away: “Put it on your trapezius muscles and lock it with your upper back.”
MID-FOOT BALANCE
Keeping the bar above mid-foot is more important than keeping your torso erect.
Torso tilt varies depending on body type and ankle range of motion. If you force yourself to be vertical, you may fall backwards or hyperextend your back.
If the heel floats, check the depth, ankle range of motion, and stance, and if necessary, use weight lifting shoes, but do not lose the foot pressure itself.
TROUBLESHOOTING
Fix the cause of a mistake, not just its appearance
Bar presses directly on cervical spine
- What you see
- There is a sharp pressure on the bar position and the bar is lifted with the hands.
- Likely cause
- Didn't build the trapezius shelf or placed the bar too high.
- How to correct it
- Move the bar slightly lower onto your trapezius muscles and tighten your upper back.
Heel lifted
- What you see
- At the bottom, your weight shifts to the front of your foot and your heel comes off the floor.
- Likely cause
- Depth or ankle demands are beyond current range or stance is incorrect.
- How to correct it
- Reduce the depth, match the knee/toe direction and foot pressure, and then train the required range of motion separately.
Only the pelvis rises first
- What you see
- At the beginning of the ascent, the hips rise and the torso bows sharply.
- Likely cause
- The weight is heavy or the strength of the upper back and quadriceps is relaxed.
- How to correct it
- Use tempo repetitions that lower the weight and raise your chest and pelvis together.
REGRESSION & PROGRESSION
Match the difficulty before adding load
Goblet Squat
Learn midfoot pressure and knee path.
Empty Bar High Bar Squat
Repeat bar position and unlock.
Tempo High Bar Squat
Check balance with 3 second descent.
Progressive High Bar Squat
Increase load at the same depth and bar path.
BEGINNER PROGRAM
A practical starting framework
Don't just compare high and low bars based on weight - choose based on your goals, joint comfort, and reproducible depth. Check bar position and safety during each warm-up set.
Count
4–10 times
Maintains depth equal to abdominal pressure
Set
3–5 sets
2–4 minutes recovery between sets
Frequency
1–2 times a week
Adjustable to total lower body volume
- Once the bar is above mid-foot and the depth is constant, increase the number of repetitions first.
- If you experience neck pressure, wrist pain, or heel lift, reset the bar position and load.
- Heavy sets should not be performed without a safety rack or trained assistant.
Frequently asked questions
Does the torso have to be completely vertical?
No. You can tilt it depending on your body type, it's important that the bar remains above mid-foot and that the spine and foot pressure are stable.
Is it a quadriceps exercise better than the low bar?
Typically you will see a more upright torso and greater knee bend, but this will depend on your individual body type and posture. No one variant is absolutely superior.