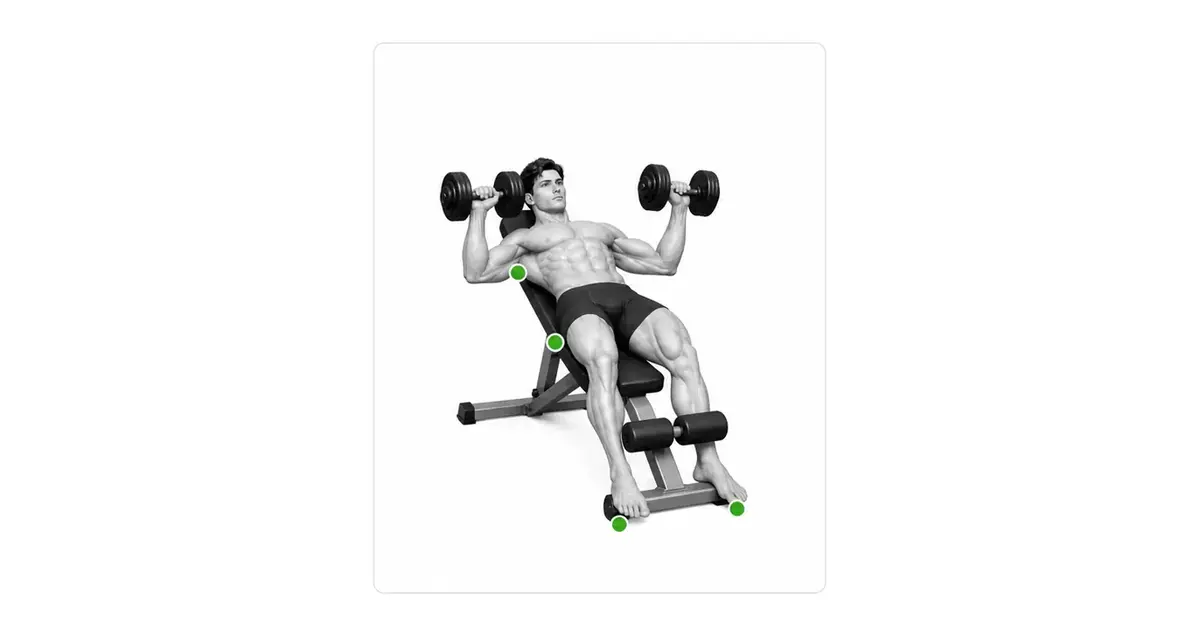
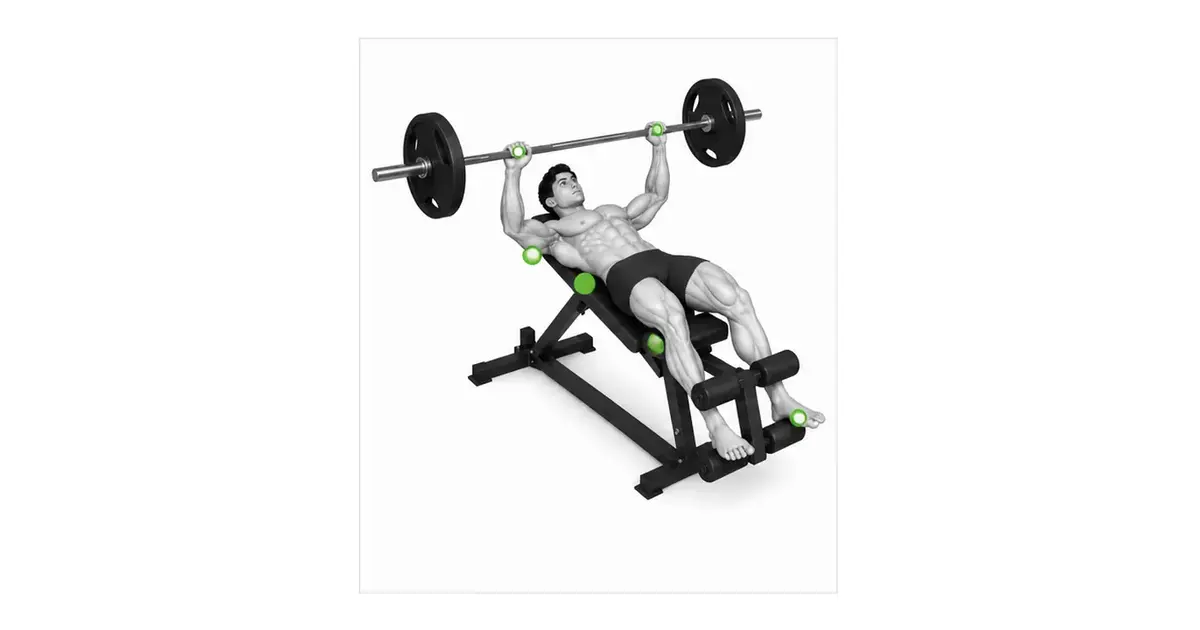
INCLINE BARBELL PRESS
Raising the incline does not give you the same chest exercise—it also increases the role of the shoulder
The incline barbell press is an inclined press in which the barbell lowers toward the upper chest on a tilted bench and is driven back up over the shoulders. The movement demonstration on this page is closer to a backrest of about 55–65 degrees than the 30–45 degrees described for the seat, so it is more accurate to treat it as a high-incline variation that demands a great deal from the anterior deltoids as well as the upper pectoralis major. Research likewise observed high upper-pec activity at 30 degrees while anterior deltoid activity increased toward 60 degrees. Rather than treating every incline angle as the same exercise, set your load, path, and expectations to the actual bench angle and your goal.
- Primary muscles
- Upper pectoralis major · anterior deltoids
- Secondary muscles
- Triceps
- Difficulty
- Intermediate
- Movement type
- High-incline press
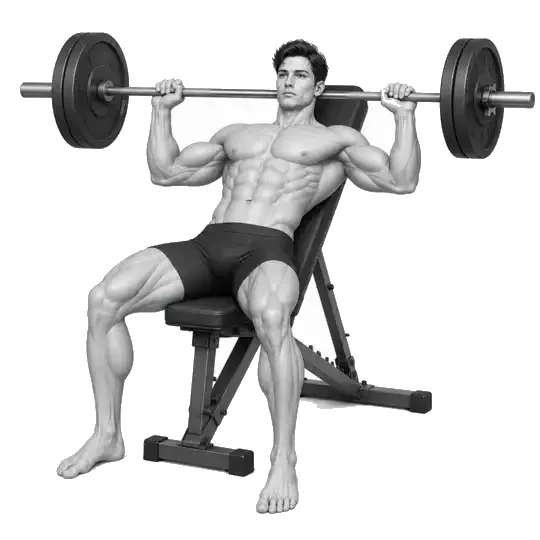
Does the incline bench have to be set to 30–45 degrees?
No. The angle changes the character of the exercise. Research has shown high upper-pec activity around 30 degrees, while anterior deltoid involvement grows at 60 degrees. The movement demonstration on this page is a high variation of roughly 55–65 degrees.
STEP BY STEP
5 Steps for One Complete Rep
- 1
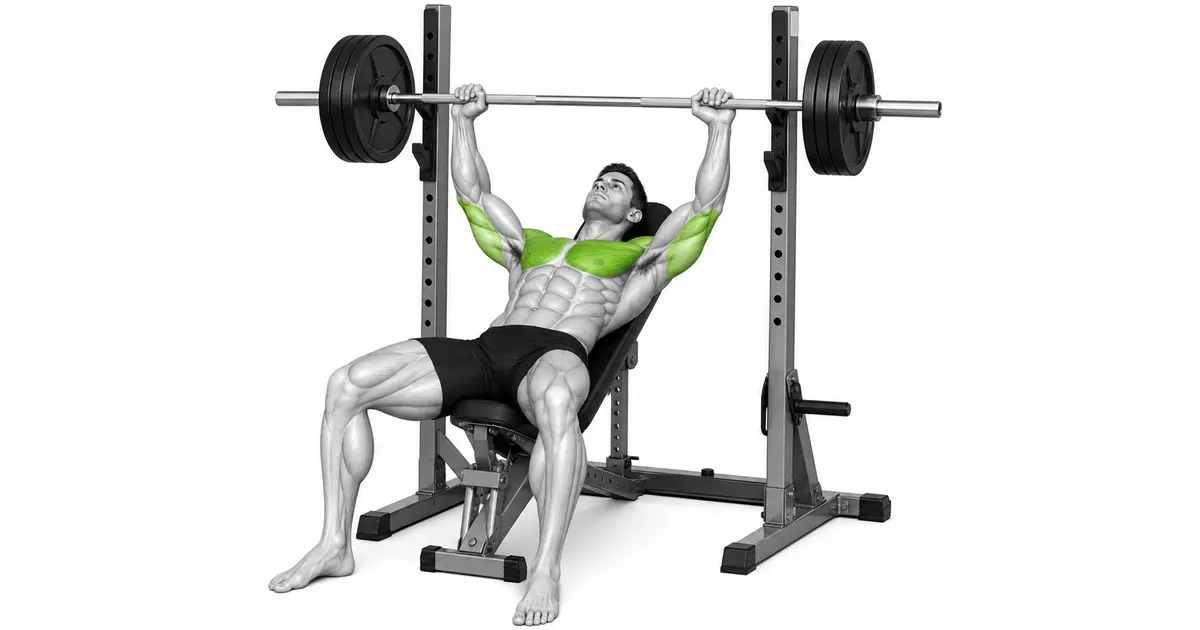
Set the rack, safety arms, and spotter first
Set the rack height so you can lift the bar clear with nearly straight arms without shrugging, and place the safety arms slightly below your controlled bottom position. Secure the plates with collars, and agree on unrack and rack signals with your spotter for unfamiliar loads.
- 2
Confirm the actual bench angle and your goal
The demonstration uses a high incline of roughly 55–65 degrees. This angle can involve the anterior deltoids more than a 30-degree incline, so do not expect the same load. Lock the seat and backrest so your head, upper back, and pelvis contact the pad and both feet sit flat on the floor.
- 3
Take a grip that leaves the forearms vertical at the bottom
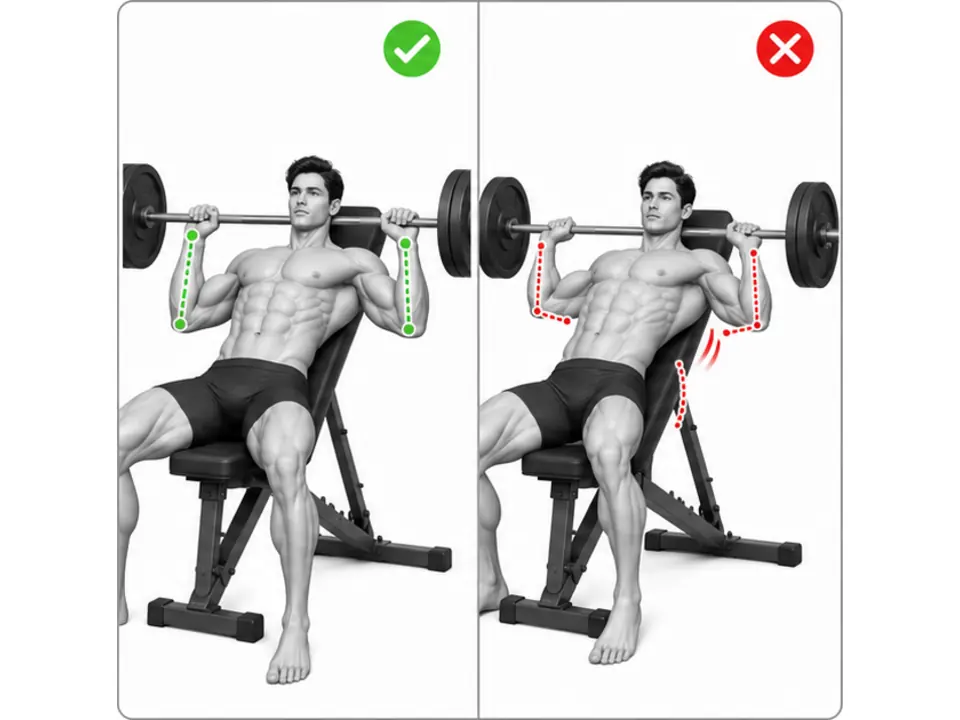
Use a thumb-wrapped closed grip and find the width that puts the wrists over the elbows with the forearms close to vertical when the bar reaches the upper chest. Place the bar low in the palm rather than toward the fingers so the wrist stays straight.
- 4
Lower under control toward the upper chest
Stabilize the bar over your shoulders, then inhale and lower it over two to three seconds toward the upper chest, below the collarbone. Keep the elbows symmetrical beneath the bar and stop before the shoulders lift off the backrest or the bar drifts toward your neck.
- 5
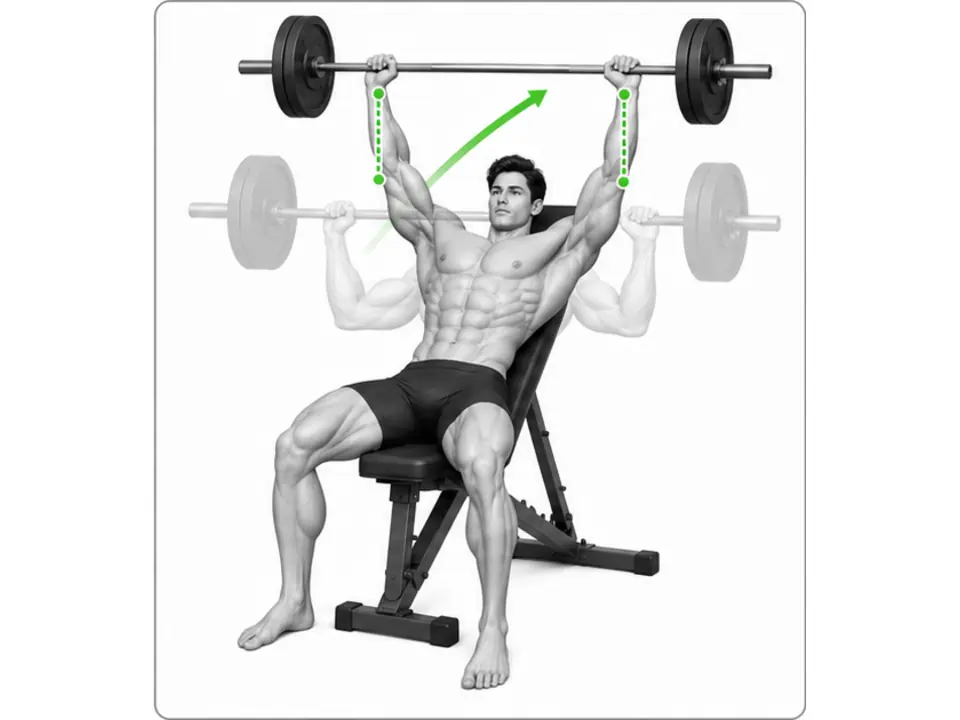
Press up and slightly back
Maintain pressure through both feet and the upper back as you press the bar up, returning it slightly back over the shoulder joints as it rises. Trace a shallow diagonal so the bar does not graze your face, and rack it securely once both arms extend at the same speed.
BENCH ANGLE
The 55–65 degrees shown here loads differently than a 30-degree incline
Bench angle is not a matter of taste—it changes the direction the shoulder joint presses. A study comparing 0, 15, 30, 45, and 60 degrees found upper-pec activity most pronounced at 30 degrees, with anterior deltoid activity rising at 45 and 60 degrees. Another study in beginners comparing 0, 30, and 60 degrees also found the highest anterior deltoid activity at 60 degrees.
The high angle in this demonstration is therefore hard to describe as a variation that targets the upper chest alone. Understand it as a high inclined press where the upper pectoralis major, anterior deltoids, and triceps all work together. If you want more upper-chest emphasis, compare 15–30 degrees in a separate low-incline session—just do not log those numbers together with this movement.
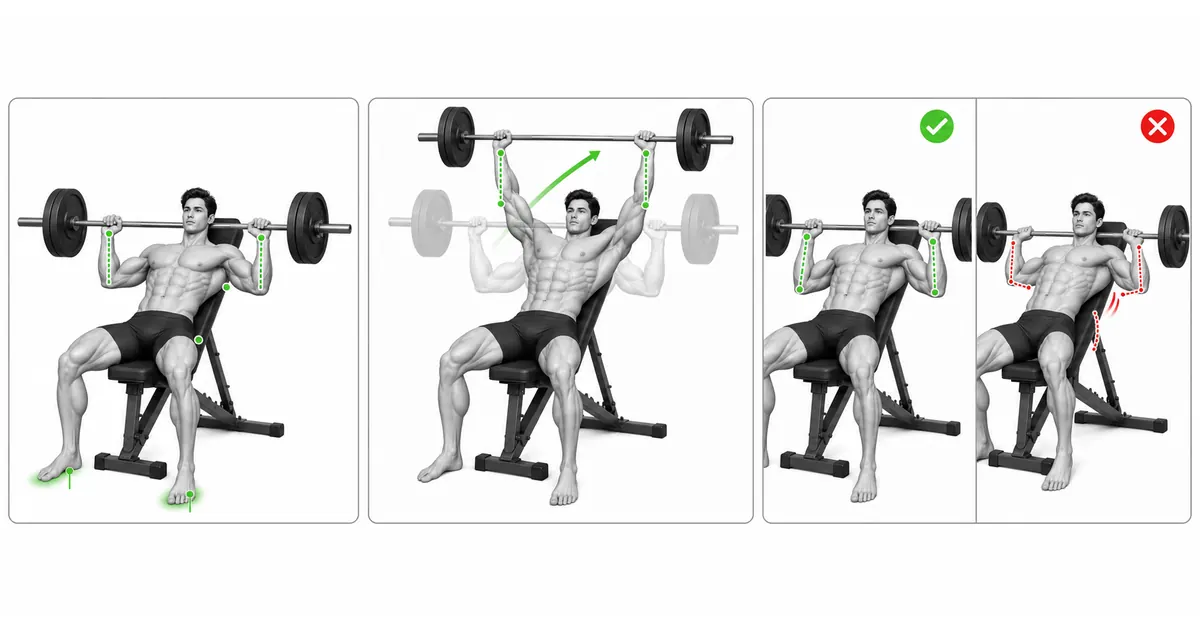
Key point: Practical cue: “Log the angle first → a higher angle means more shoulder → pick the load that matches the day's goal.”
BAR PATH
The bar returns from the upper chest gently back over the shoulders
At the bottom the bar rests at a controllable point on the upper chest—not on the collarbone itself and not at the neck. Pressing in a purely vertical line can bring the bar close to your face, so trace a shallow diagonal that passes your face and then travels slightly back over the shoulder joints. The bar should not travel behind your head, and it should stay level at both the bottom and the top.
At a high angle the bar may feel like it lands higher than on a low incline, but it must never become a press to the neck. Set your touch point and depth by where the wrists and elbows stack beneath the bar and both shoulders stay on the pad. The exact point varies with your proportions and grip width.
SUPPORT & ALIGNMENT
On a high backrest, support yourself so the pelvis does not slide forward
On a high incline the load pushes your body down the seat, so it is easy for the pelvis to slide forward and the low back to over-arch. Plant both feet firmly on the floor and keep the head, upper back, and pelvis on the pad. A natural curve from lifting the chest can remain, but do not shove the pelvis forward to imitate a lower bench angle.
Place the bar low in the palm and stack the wrist and elbow into one column. If the wrist folds back or the elbows flare wide to the shoulder line, force cannot travel through the pad and arms and joint alignment breaks down. Reset the rack height, grip width, and load together.
TROUBLESHOOTING
Fix the cause of a mistake, not just its appearance
Treating a high angle like a 30-degree incline
- What you see
- The front of the shoulder fatigues first, yet you force load and reps on the belief that only the upper chest should work.
- Likely cause
- You may not be logging the bench setting and may be treating every incline as the same exercise.
- How to correct it
- Record the actual backrest angle and program 55–65 degrees as a high inclined press with substantial anterior deltoid involvement.
The wrists fold backward
- What you see
- The bar sits toward the fingers and the wrist joint drifts behind the elbow.
- Likely cause
- The grip may be loose, or the load may be too heavy to support the bar.
- How to correct it
- Wrap the thumb and set the bar low in the palm so the wrist and forearm form a straight line. Reduce the load as well.
The elbows flare wide to the shoulder line
- What you see
- At the bottom the upper arms sit at nearly 90 degrees to the torso and the bar travels close to the neck.
- Likely cause
- The grip may be too wide, or you may be applying a low-incline touch point at a high angle.
- How to correct it
- Narrow the grip slightly, keep the elbows beneath the bar, and lower to a controllable point on the upper chest.
The pelvis slides forward and the low back arches
- What you see
- The hips creep toward the front of the seat as the set goes on and the gap under the low back widens noticeably.
- Likely cause
- Foot support may be weak, or you may be manufacturing a lower bench angle with a load you cannot manage.
- How to correct it
- Adjust the feet closer to your body and push the pelvis back onto the pad. Reduce the load to hold the same angle.
One side of the bar rises first
- What you see
- The bar tilts during the press and one elbow reaches extension before the other.
- Likely cause
- Your hands may be placed unevenly, or the load may be too heavy relative to fatigue and a strength difference.
- How to correct it
- Match your hands to the markings on the bar and reduce the load. Use safety arms and a spotter to avoid repeated failures.
REGRESSION & PROGRESSION
Match the difficulty before adding load
High-incline machine press
Learn the high inclined pressing path first on a machine with a stable backrest and levers.
Light dumbbell high-incline press
Use light dumbbells to check wrist and elbow paths and pad support independently on each side.
Empty-bar high-incline press
With the rack and safety arms set, rehearse the bar path and touch point at the actual bench angle.
Incline barbell press
Log the same angle, grip, and touch point and add small increments only when every repetition is stable.
BEGINNER PROGRAM
A practical starting framework
Place it once or twice per week in an upper-body pressing session, and log it as a separate exercise from the flat bench press or a low incline. At a high angle, account for anterior deltoid fatigue and leave two or three repetitions in reserve while holding the same bar path through the final rep.
Reps
6–10
Hold the same angle, touch point, and bar path
Sets
2–3
Rest 2–3 minutes between sets
Load
+2.5–5%
Only when the bar stays level for all 10 reps
- Log the bench angle, seat position, and grip width so you compare load changes under the same conditions each session.
- If the pelvis slides, the wrists fold, or the bar drifts toward your neck, drop the load 5–10% that day and finish with technique work.
- Do not compare loads directly between a low and a high incline—manage repetition quality and recovery for each variation separately.
Frequently asked questions
Is a high incline a chest exercise or a shoulder exercise?
It sits on a continuum where the upper pectoralis major, anterior deltoids, and triceps all work. As the angle rises the role of the anterior deltoid can grow, so it is hard to call it an isolation exercise for the upper chest.
How far down should the barbell go?
Generally to a controllable point on the upper chest rather than the collarbone itself. Your personal standard is the depth where the wrists sit over the elbows, both shoulders stay on the pad, and there is no pain.
Evidence and references
- 1. NASM — Incline Barbell Bench Press Exercise Library
- 2. ACE — Incline Chest Press Exercise Library
- 3. Trebs et al. — Upper-body muscle activity by bench angle
- 4. Rodríguez-Ridao et al. — Pectoralis major, deltoid, and triceps activity across five bench angles
- 5. Noteboom et al. — Bench press technique variations and shoulder joint loading