MACHINE CHEST PRESS
The machine chest press is not about pushing the levers as far as they go—it is about matching your body to the machine's axis
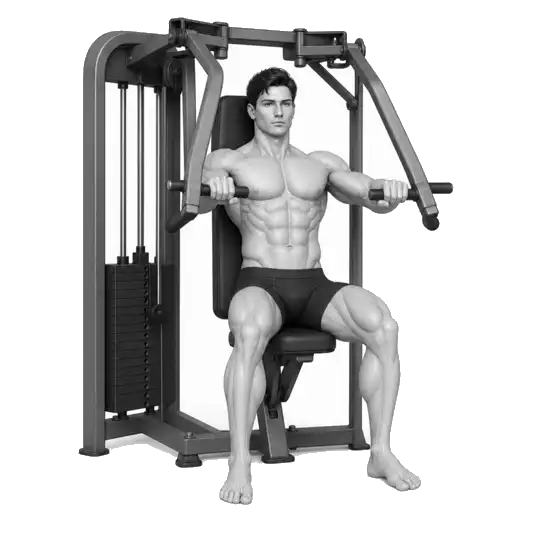
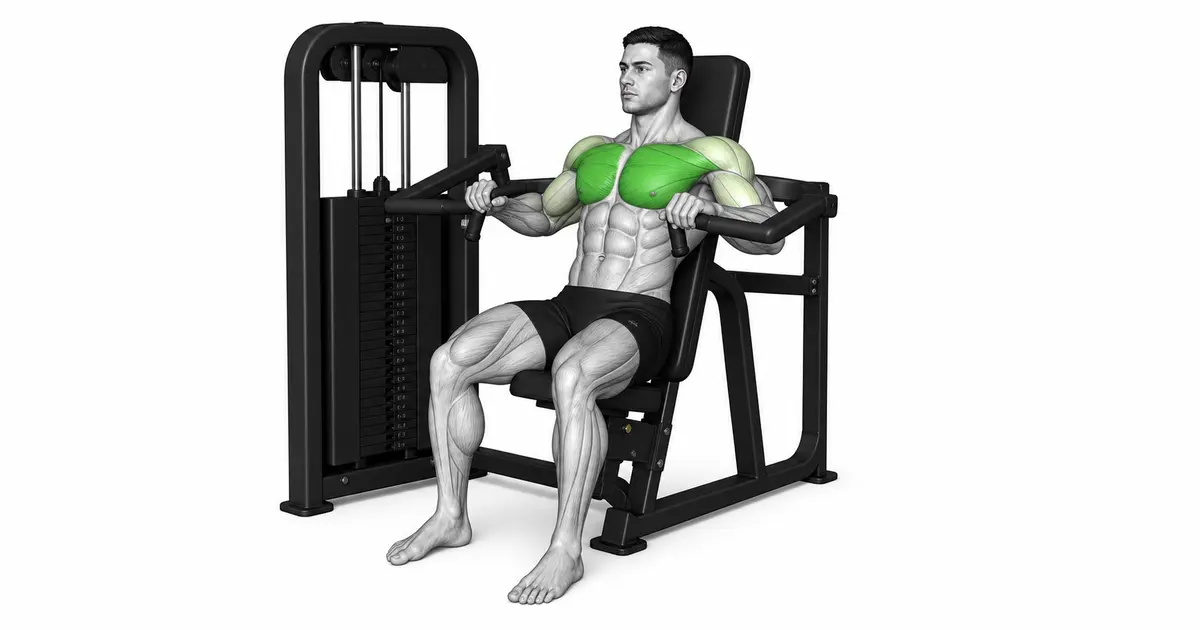
The machine chest press is a horizontal pressing exercise in which you press both levers forward with your trunk supported by the backrest. The machine in the movement demonstration has a converging design: as the handles travel forward they also move slightly closer together. Even when the machine guides the path, a mismatched seat height or starting depth can fold your wrists or push your shoulders forward. Set the handles to mid-chest height first, keep your back and pelvis against the pad, and work within a range you can control.
- Primary muscles
- Pectoralis major
- Secondary muscles
- Triceps · anterior deltoids
- Difficulty
- Beginner
- Movement type
- Horizontal press
Is the machine chest press safer than the bench press?
A machine can reduce the balance demand of an external load and the risk of dropping a barbell, but a mismatched seat, starting depth, or load can still cause shoulder and wrist discomfort. Rather than assuming an absolute safety advantage, choose based on your goal, experience, and whether anything hurts.
STEP BY STEP
5 Steps for One Complete Rep
- 1
Check the weight pin and lever position
With the machine at rest, confirm the weight pin is fully seated and test the path with the lightest load. If the machine has a start-position adjustment, begin at a setting where your elbows do not travel far behind your torso when you take the handles.
- 2
Set the handles to mid-chest height
Once seated, adjust the seat so the handles fall between mid-chest and slightly below the shoulders. Check that they are not so high that your shoulders ride toward your ears, or so low that your wrists and elbows fall out of line.
- 3
Build support with the backrest and both feet
Rest your pelvis, upper back, and if possible your head comfortably against the backrest, with both feet flat on the floor. Wrap your thumbs around the handles and line the wrists up with the forearms, then stabilize the shoulders back and down and brace so the ribs do not flare.
- 4
Press the handles forward and inward
Exhale and press both handles forward at the same speed. Follow the converging arc the levers guide you through without letting the shoulders travel forward, and stop just short of hard elbow lockout when the arms are nearly straight.
- 5
Return to a depth that keeps your back on the pad
Inhale and return the levers along the same path over two to three seconds. Keep the plates from clashing, and start the next repetition while the chest is open—before the handles travel far behind the torso or the front of the shoulder becomes uncomfortable.
SEAT & SUPPORT
Seat height determines where the handle, wrist, and elbow start
The ACE and NASM coaching guidelines both describe setting the handles at mid-chest height with the back supported by the backrest. If the seat is low enough that the handles sit above your shoulders, it is easy to shrug and flare the elbows high. If the seat is too high, the handles are pushed downward, which can fold the wrists or let your body slide forward.
Sit, take the handles, and check from the side: start where the wrist and elbow take the load at similar heights. The backrest is not a tool for flattening you against the pad. Allow a natural curve in the low back while keeping the pelvis and upper back in contact, and if there is a footplate, press evenly across all of it.
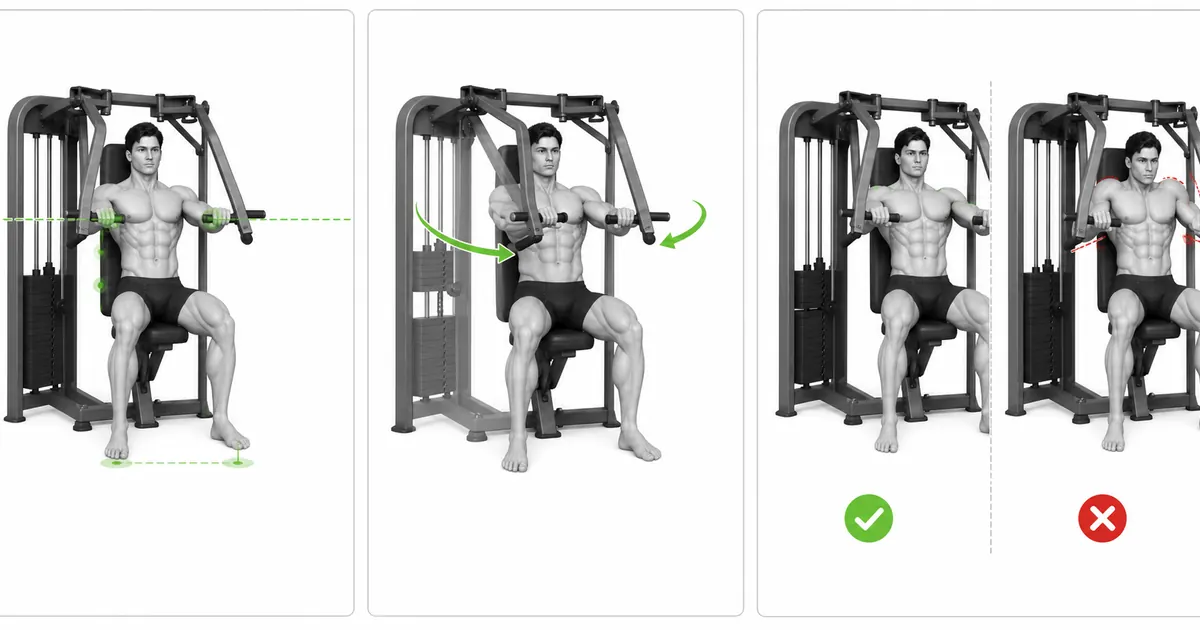
Key point: Practical cue: “Handles at mid-chest → pelvis and upper back on the pad → both feet on the floor.”
CONVERGING PATH
The handles follow the machine's converging arc, not a straight line
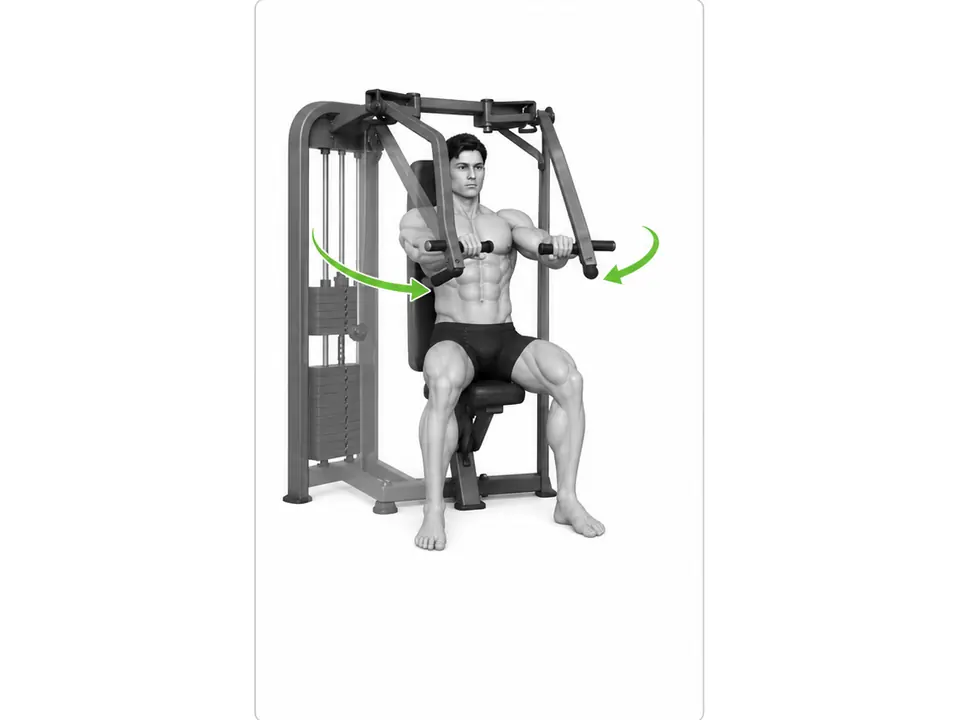
On the machine shown here, the gap between the handles narrows slightly as the levers travel forward. Rather than forcing the two levers together with your hands, let the elbows track behind the handles and keep both levers moving at the same speed. Hold the wrist straight between the handle and the forearm, and keep the shoulders from lifting off the pad even at the top.
A small EMG study comparing chest press machines and the bench press across several grips found that no single grip was consistently superior across all muscles. Rather than judging the stimulus by handle shape alone, it is more practical to choose the grip and load that let you work without pain and hold your target repetitions.
SHOULDER & RANGE
Protect the relationship between shoulder and backrest before the end range
The elbows can finish nearly straight, but you do not need to shrug toward the ears or peel the shoulder blades off the pad to send the handles further. ACE recommends that beginners keep the shoulder blades against the backrest and finish under control with neutral wrists and without locking the elbows.
The depth you return to is set by your own controllable range, not by the machine's mechanical stop. The elbows may come slightly behind the torso, but if the handles travel well behind the chest line and the front of the shoulder pulls or your body leaves the pad, reduce the starting depth. A machine lowers the balance demand; it does not guarantee the same joint path for every user.
TROUBLESHOOTING
Fix the cause of a mistake, not just its appearance
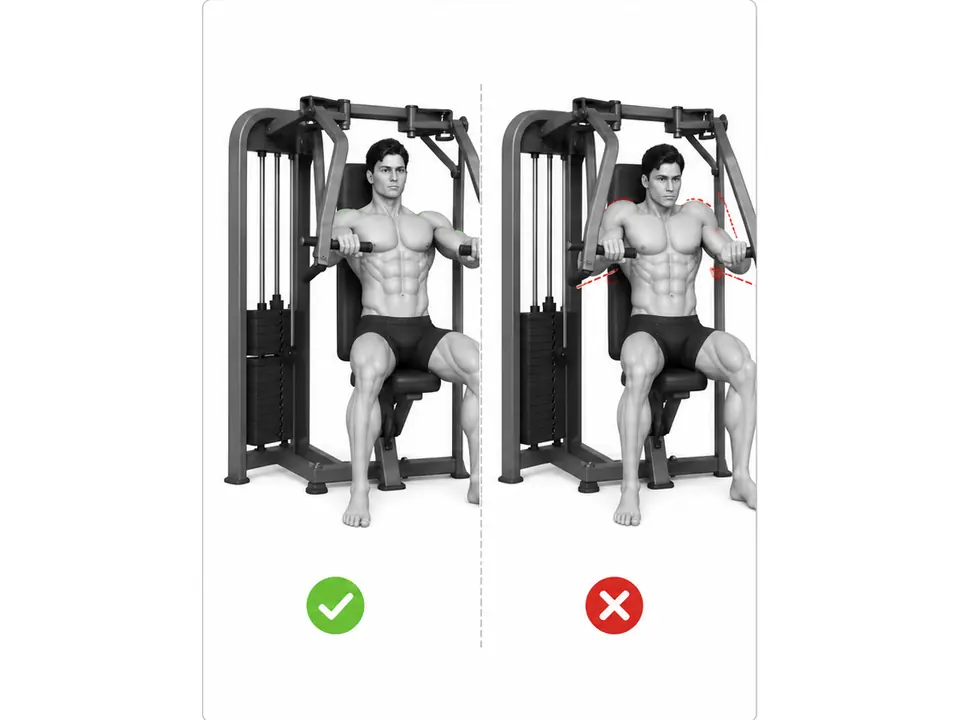
The handles sit above shoulder height
- What you see
- The shoulders ride toward the ears from the start and the elbows flare wide near the shoulder line.
- Likely cause
- The seat may be too low, or you may have picked a load the moment you sat down.
- How to correct it
- Raise the seat one notch at a time until the handles reach mid-chest height, then recheck the path with a light load.
The wrists fold backward
- What you see
- The heel of the palm lifts off the handle and the wrist joint drifts behind the elbow.
- Likely cause
- Often the handle is held toward the fingers, or the load is too heavy to hold forearm alignment.
- How to correct it
- Wrap the thumb, seat the handle deep in the palm, and line the wrist up with the forearm. Reduce the load if needed.
Lifting the chest and over-arching the low back
- What you see
- The ribs flare sharply as you begin to press and the pelvis or back leaves the pad.
- Likely cause
- You may be moving an unmanageable load with trunk momentum, or your foot position may be unstable.
- How to correct it
- Press both feet into the floor and stack the ribs over the pelvis. Drop to a load that lets you keep pad contact.
Pushing the shoulders forward at the top
- What you see
- The head comes forward as the arms extend and the shoulder blades and upper back leave the backrest.
- Likely cause
- You may believe the handles should travel as far as possible, or you may be adding the last of the range with shoulder protraction.
- How to correct it
- Keep the chest open and the shoulders toward the pad, and stop where the elbows are nearly straight. Shorten the top of the range slightly.
The plates clash on every repetition
- What you see
- The return phase speeds up and the plates hit loudly at the end of each rep.
- Likely cause
- You may not be resisting the return, or you may be releasing all tension between repetitions.
- How to correct it
- Reduce the load and return the levers over two to three seconds. Change direction just before the plates touch, without shortening the range too much.
REGRESSION & PROGRESSION
Match the difficulty before adding load
Light two-arm machine press
Set the seat and handle height at the lightest load and match the speed of both levers.
Slow-return machine press
Take two to three seconds to return while holding backrest contact and wrist alignment to the end.
Paused machine press
Hold for one second at a controllable start depth, then press again without rebound.
Independent-arm press
Only when the machine has independent levers, work one arm at a time with a light load to compare paths side to side.
BEGINNER PROGRAM
A practical starting framework
You can use it as your main chest movement or as an accessory after the bench press, once or twice per week. At first, leave two or three repetitions in reserve while keeping backrest contact and wrist alignment through the last rep. Because lever ratios differ between machines, do not compare the displayed load directly with other equipment.
Reps
8–12
Hold the same seat, depth, and speed
Sets
2–3
Rest 90–150 seconds between sets
Load
+1 step
Only when all 12 reps are stable
- If both levers move at the same speed for all 12 reps and your back, pelvis, and feet stay supported, move the pin up one step next session.
- If your wrists fold or your shoulders leave the pad after adding weight, go straight back to the previous load and reset your tempo.
- The number printed on a machine feels different depending on its lever length and pulley configuration. Do not convert it one-to-one against another machine or your barbell numbers.
Frequently asked questions
What height should the handles be?
Start between mid-chest and slightly below shoulder height. The more useful personal standard is whether your shoulders stay down when you take the handles and whether the wrists and elbows line up straight at similar heights.
Can I convert the machine's weight into a bench press number?
Not accurately. Lever length, pulleys, friction, starting angle, and each manufacturer's labeling all differ. Fix the seat and range on one machine and track changes in your repetitions and technique instead.
Evidence and references
- 1. NASM — Chest Press Machine Exercise Library
- 2. ACE — Seated Chest Press Exercise Library
- 3. Rodríguez-Ridao et al. — Muscle activity by grip in the bench press and seated chest press
- 4. Figueiredo et al. — Free-weight press and chest press machine activity in bodybuilders
- 5. Schwanbeck et al. — Hypertrophy and strength with free-weight versus machine training