MEDICINE BALL PUSH-UP
The medicine ball push-up is not a balancing trick on a ball—it is a pressing skill that holds whole-body alignment while controlling a narrow, moving base
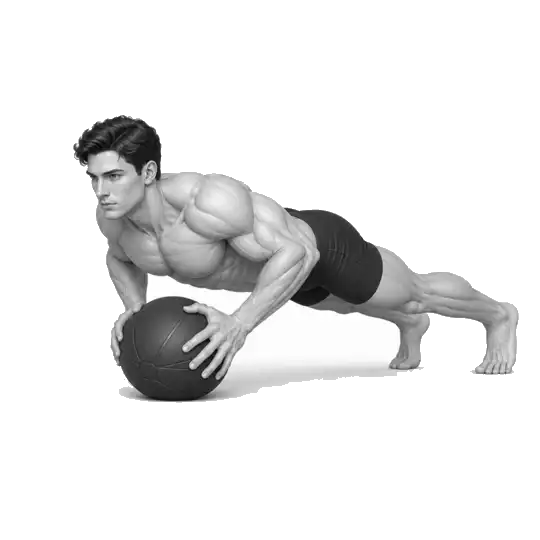
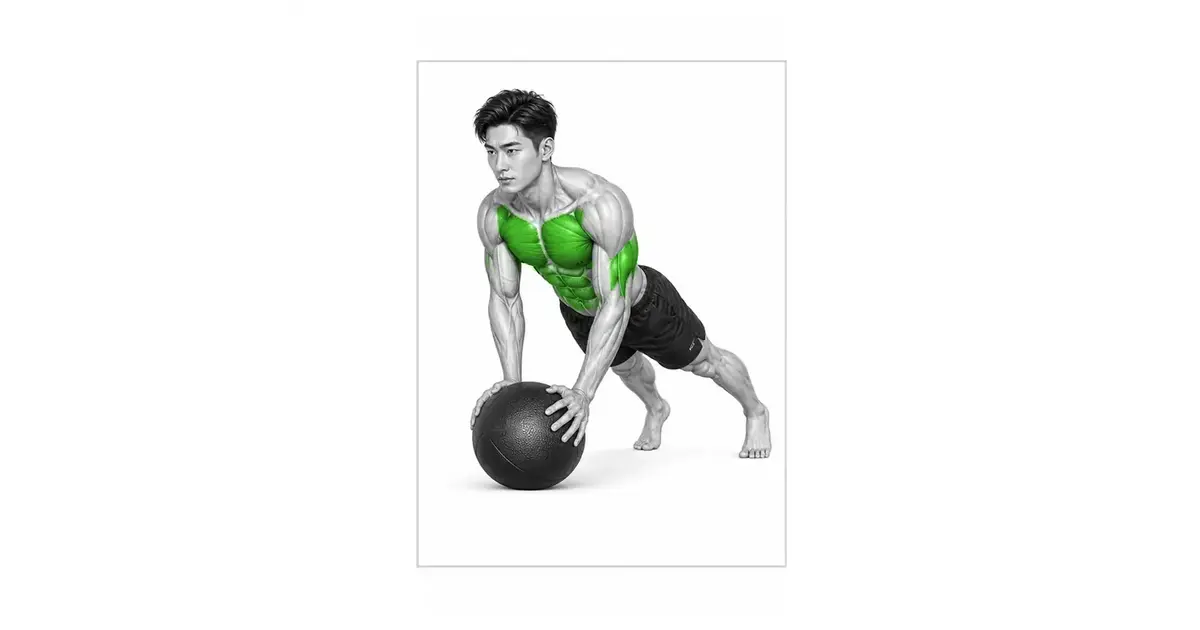
The medicine ball push-up is a variation in which both hands come together on a single ball, the pectoralis major, triceps, and anterior deltoids press the body, and the serratus anterior and trunk muscles control the wobble. Because the hands are close together and the ball can roll, the stability demands on the wrists and shoulders are higher than in a standard push-up. That said, an unstable surface does not make every muscle work harder or automatically produce better strength gains—research has found responses varied by equipment and by muscle. As in the demonstration, the key is to place both hands symmetrically on the same ball and move the chest and hips together within a range where the ball stays beneath the chest.
- Primary muscles
- Pectoralis major · triceps
- Secondary muscles
- Anterior deltoids · serratus anterior · core
- Difficulty
- Intermediate
- Movement type
- Narrow-base horizontal press · instability control
Is the medicine ball push-up always better than a standard push-up?
No. An unstable base changes the demand for postural control, but it does not increase activity in every muscle or guarantee greater strength gains. Use it as an accessory variation for practicing a narrow base and wobble control rather than as a replacement for the standard push-up.
STEP BY STEP
5 Steps for One Complete Rep
- 1
Check for a ball that will not roll, and your floor
Choose a medicine ball with a textured surface that is not overinflated. Avoid smooth balls and ones that bounce or roll easily, and on flat ground clear of obstacles, first confirm the ball does not roll away side to side.
- 2
Place both hands symmetrically on one ball
Set the ball beneath the center of your chest and press the upper sides with both hands as if cupping it. Spread the fingers wide and find an angle where the wrists do not collapse inward. If the height or pressure of the hands differs, the ball can drift to one side from the start.
- 3
Widen the feet a little and build a full-body plank
Step back one foot at a time and set the feet slightly wider than in a standard push-up. Brace the abdomen and glutes and align the ribs and pelvis so the head, back, hips, and heels form one long line.
- 4
Lower the chest slowly over the ball
Inhale and bend the elbows diagonally backward from the torso. Keep the ball beneath the center of the chest and let the chest and hips descend at the same speed. Stop at a depth before the wrists collapse or the shoulders ride toward the ears.
- 5
Press inward on the ball and push away from the floor
Keeping symmetrical pressure with both hands, extend the elbows to return to your starting plank. At the top, do not slam the elbows into lockout or push the shoulders forward—confirm the ball and your trunk are steady before the next repetition.
BALL & HAND POSITION
Equal hand position and pressure keep the ball beneath the chest
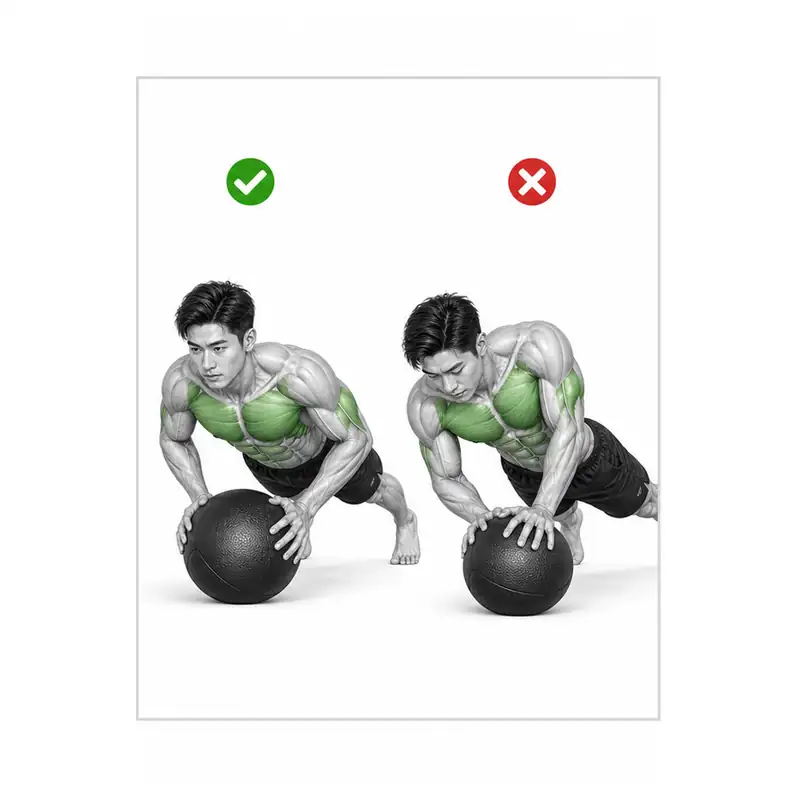
This is not the variation with a hand on each of two balls—it is a narrow-base push-up with both hands together on one medicine ball. Placing the ball below the sternum and cupping the upper sides with both hands lets the palms and fingers control it from several directions. Stacking the hands on top of the ball or setting one hand higher makes the pressure uneven and the ball rolls easily.
Small studies have found higher pectoralis major and triceps activity in narrow-hand push-ups than in wide-hand versions, but that does not mean any region is fully isolated. A position where both wrists are comfortable and you can bend the elbows diagonally backward matters more than forcing the hands together.
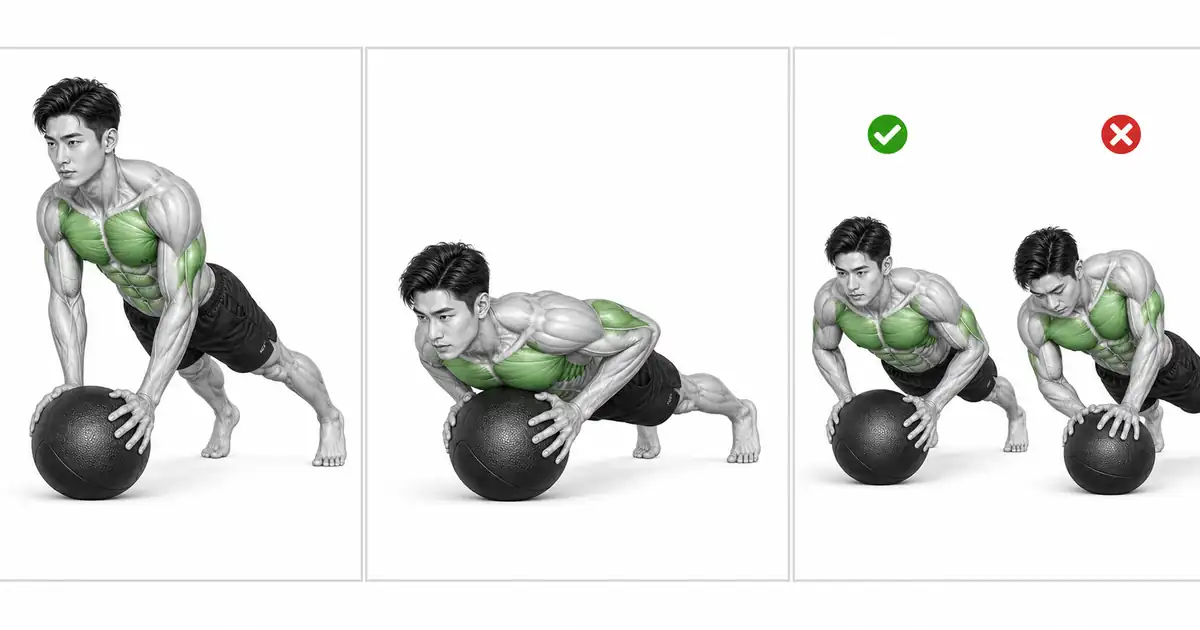
Key point: Practical cue: “Ball under the chest → equal pressure from both hands → wrists that do not collapse.”
CONTROL THE INSTABILITY
Instability is an added condition to control, not the point of the exercise
On an unstable base, the trunk and shoulder muscles constantly adjust your position to prevent small movements of the ball. However, studies comparing several unstable devices found that activity did not increase equally across all equipment and all muscles, and in an eight-week training study an unstable surface did not improve strength or muscular endurance more than a stable floor.
So do not make a wobblier ball or faster repetitions your goal. Use it as an accessory variation for practicing control of small instabilities while holding standard push-up alignment, and when the ball starts moving side to side, it is better to end the set than to add repetitions.
CONTROLLED BOTTOM
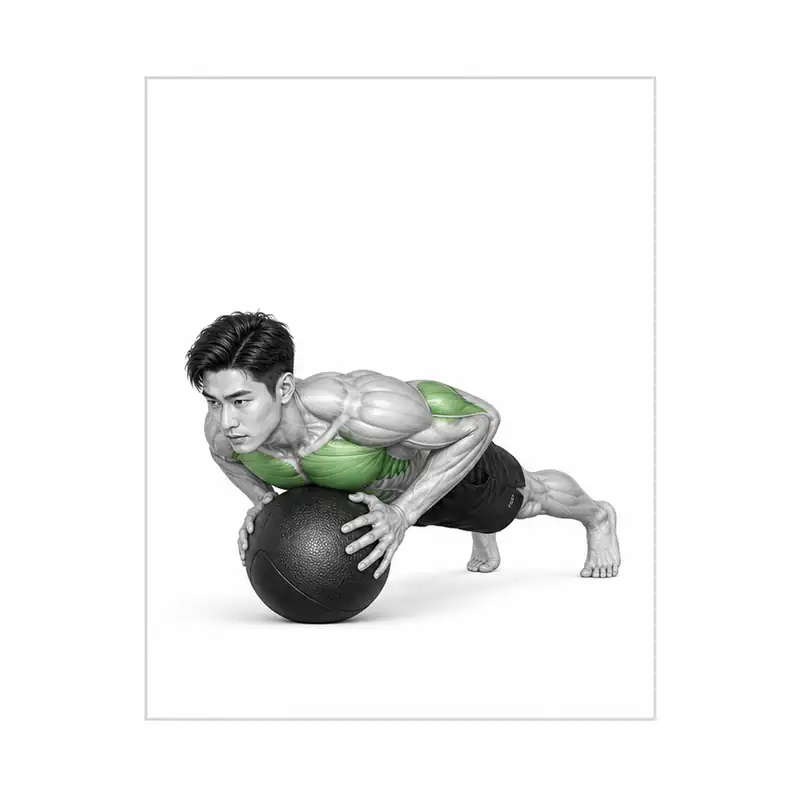
Wrist, shoulder, and trunk alignment come before touching the chest to the ball
As you descend, do not flare the elbows fully out to shoulder height—send them roughly 30–60 degrees diagonally backward from the torso. The forearms should point toward the ball and both shoulders should descend at the same speed. You do not need to roll the shoulders forward or crane the neck to force the chest onto the ball.
The wrists can take pressure in a more extended position than on flat ground. If the palms lift or you feel sharp pressure on the inside of the wrist, reduce the depth and go back to a stable narrow push-up. The depth at which the chest and hips can move together is your effective range for that day.
TROUBLESHOOTING
Fix the cause of a mistake, not just its appearance
The ball keeps rolling side to side
- What you see
- The ball ends up in a different place each repetition and the load piles onto one hand or shoulder.
- Likely cause
- There may be too little friction between the ball and the floor, or your hand position and pressure may be asymmetrical.
- How to correct it
- Switch to a ball that does not roll, reset it beneath the center of your chest, and match both hands to the same height.
The wrists collapse inward on the ball
- What you see
- The outer edge of the palm lifts and you feel pressure or pain on the inside of the wrist.
- Likely cause
- The ball may be too small or the hands too close together, or your wrists may not yet tolerate a curved surface.
- How to correct it
- Use a larger ball or return to a stable narrow push-up and build a comfortable wrist range first.
The shoulders ride toward the ears
- What you see
- The space between the neck and shoulders narrows at the bottom and one shoulder sits higher than the other.
- Likely cause
- The depth and instability may exceed your shoulder-blade control, or the ball may have drifted forward.
- How to correct it
- Pull the ball back beneath the chest and reduce the range, keeping the sensation of continuously pressing the ball away with both hands.
The hips sag or pike first
- What you see
- The chest and hips move at different speeds so the low back bends or the hips rise into a peak.
- Likely cause
- Trunk tension may have released, or you may be compensating for insufficient arm strength with your position to hit a rep target.
- How to correct it
- Reduce the repetitions and widen the feet slightly, working only in the range where the ribs and pelvis move together.
Bouncing quickly off the ball
- What you see
- The speed spikes at the bottom and the ball shifts or the hands slip.
- Likely cause
- You may be too fatigued to control it, or treating an unstable base like an explosive push-up.
- How to correct it
- Descend over three seconds and change direction at the bottom without rebound. End the set if you cannot hold the tempo.
REGRESSION & PROGRESSION
Match the difficulty before adding load
Standard push-up
Learn the full-body plank and elbow path on flat ground first.
Narrow-hand push-up
Narrow the hands on a stable floor to adapt to the load on the wrists and triceps.
Fixed low-handle push-up
Take a narrow grip on handles that do not move to practice a neutral wrist and trunk alignment.
Medicine ball push-up
Place both hands on a single ball with the feet wide and start with a short range.
BEGINNER PROGRAM
A practical starting framework
Use it once or twice per week as an accessory in chest and triceps training. Set the repetitions lower than for a standard push-up and leave about two in reserve each set. Whether the ball's position and your wrist alignment hold through the final repetition matters more than hitting a target rep count.
Reps
6–10
End before the ball and body start to wobble
Sets
2–4
Rest 90–150 seconds between sets
Tempo
3s descent
Press from the bottom without rebound
- If the ball stays centered and wrist, shoulder, and pelvic alignment hold on every repetition, add one rep next session.
- Do not increase repetitions and depth at once—stabilize the rep count at the same depth first, then widen the range gradually.
- If the ball rolls or your hands slip, end the set immediately and recheck your equipment and the floor.
Frequently asked questions
Is a bigger, heavier ball better?
What matters more than size and weight is whether you can rest both hands comfortably on it and whether it stays put on the floor. Too small a ball can force a larger wrist angle, and a ball that bounces or is very smooth raises the risk of slipping.
Does my chest have to touch the ball for the rep to count?
It does not have to. The right depth is one where both shoulders and wrists stay stable and the chest and hips can move together. Do not roll the shoulders or arch the low back to reach the ball.
Is this the same as the push-up using two balls?
No. This page covers the narrow-base variation with both hands on one ball. Using one ball per hand changes the width of support and the direction of instability, and should be treated as a separate progression.
Evidence and references
- 1. Cogley et al. — Pectoralis major and triceps activity by push-up hand position
- 2. Calatayud et al. — Push-up muscle activity under stable and unstable conditions
- 3. Lehman et al. — Shoulder and trunk activity in the Swiss ball push-up
- 4. Chulvi-Medrano et al. — Eight-week comparison of stable and unstable push-up training