PENDLAY ROW
The Pendlay row is not a row where you hold the barbell continuously, but a row where you start each repetition from the floor.
The pendlay row in the video is a movement where the barbell disk is placed on the floor, the body is made almost parallel to the floor, and the barbell is quickly pulled toward the upper abdomen and lower ribs, then lowered to the floor again to reset each repetition. This is distinct from the regular bentover row, where you hold the bar in the air and maintain continuous tension throughout the set. Although direct Pendlay row studies are limited, in the standing and bending row study, the largest back load was observed among the compared movements along with greater muscle activation across the back, and in the load-velocity study of the barbell bent-over row, bar speed systematically decreased as the weight increased. Therefore, the floor dead stop should not be used as a time to collect recoil, but as a time to recreate the same hip hinge and torso tension every repetition.
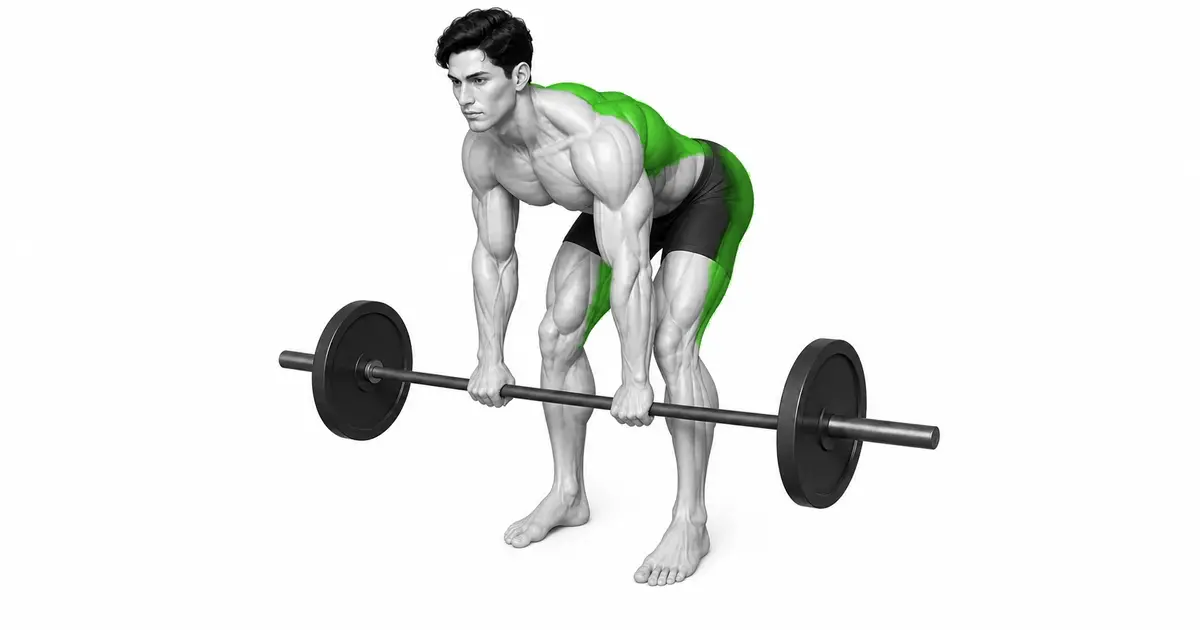
- Primary muscles
- Latissimus dorsi, middle trapezius, rhomboids
- Secondary muscles
- Rear deltoid, biceps brachii, erector spinae, glutes, hamstrings
- Difficulty
- Advanced
- Movement type
- Bottom dead stop horizontal pull, hip hinge
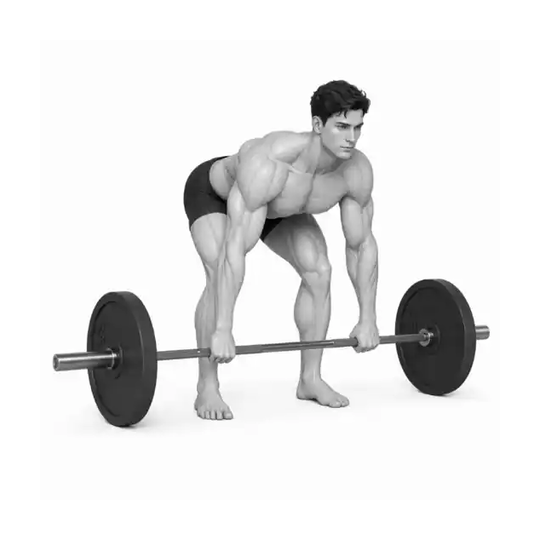
What is the difference between Pendlay rows and barbell rows?
For the Pendlay row, reset by lowering the disc completely to the floor with your torso almost parallel to the floor and each repetition. Regular bentover rows allow your torso to be more erect and often keep the bar in the air throughout the set.
STEP BY STEP
6 Steps for One Complete Rep
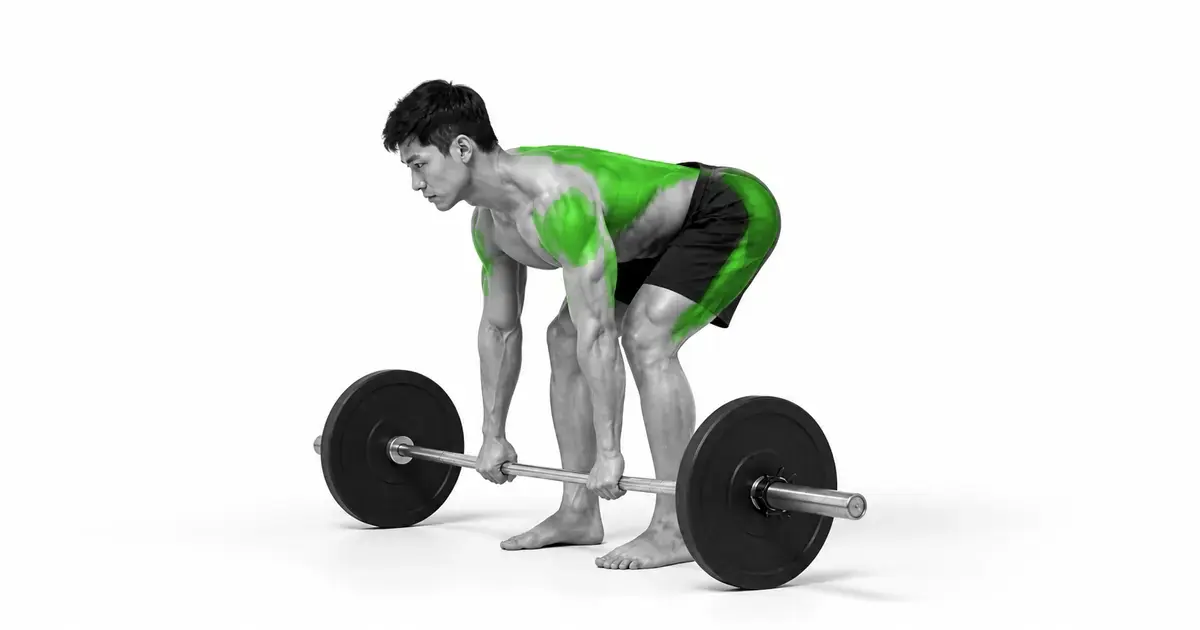
- 1
Checking the flat floor and disc height
Select a flat area where the barbell will not roll and use disks of the same diameter on both sides. These discs are smaller than standard bumper plates. If the bar gets too low, level it with blocks or secure rests.
- 2
Stand with the bar on your middle feet
Place your feet between hip-width and shoulder-width apart and place the bar over your mid-foot, close to your shins. If the bar is towards your toes, the distance from your lower back to the load increases.
- 3
Send your hips back to be almost horizontal.
Bend your knees just as much as necessary and send your hips back so your torso is roughly parallel to the floor. Keep your ribs and pelvis stacked and your back and neck long and neutral.
- 4
Grab an overgrip slightly wider than your shoulders
Hold the bar with your palms facing backwards and wrap your thumbs around them. Choose a width that allows your wrists to be straight and your elbows at the top to be next to and behind your torso, and create tension in your armpits and stomach before lifting the bar.
- 5
Quickly pull from the floor to your stomach
Support your feet on the floor, maintain your torso angle, and send your elbows back. Raise the bar close to your shins and close to vertical so that it touches or is close to your upper abdomen and lower ribs.
- 6
Take control down to the floor to completely reset
Lower it down the same path so that the disc touches the floor stably. Make sure the bar stops before bouncing up, and if necessary, take another breath before starting the next repetition.
DEAD-STOP RESET
The moment the disk touches the floor, the repetition ends and the setting for the next repetition begins.
The most obvious feature of the Pendlay Row is the deadstop, where the disc rests on the floor for each repetition. If the bar is in the air, it's more like a regular bentover row, and if you bounce the disc hard, it's a different movement that takes advantage of the bottom bounce. After contacting the floor, release all tension and, rather than collapsing your lower back, maintain your foot and grip position and re-establish breathing and torso pressure.
Rather than bouncing several times in one set, each repetition should look like a separate starting position. If the bar rolls, do not force it, but return it over your midfoot. Use a disc of the same diameter as the lifting platform to reduce noise and impact.

Key point: Repetition criteria: Stop the disc → Check torso tension → Pull the elbows → Return to the same position.
TORSO & BAR PATH
As the torso is lifted, the bar path is shortened but the conditions for the Pendlay row are eliminated.
If you raise your chest the moment you pull the bar, your lower body and hips will gain speed against the bar, making it easier to reach the top. However, with each repetition, the body angle changes and the point of contact also swings from bottom to top. When photographed from the side, make sure your shoulder and hip height doesn't change much between the start and the top.
The bar starts above the midfoot, passes near the shins and thighs, and moves to the upper abdomen and lower ribs. Starting at the toes or moving the bar further forward at the top will lengthen the lever between your lower back and the load. If the bar catches on your knees, readjust your hips and starting position rather than bending your knees further and bringing them forward.
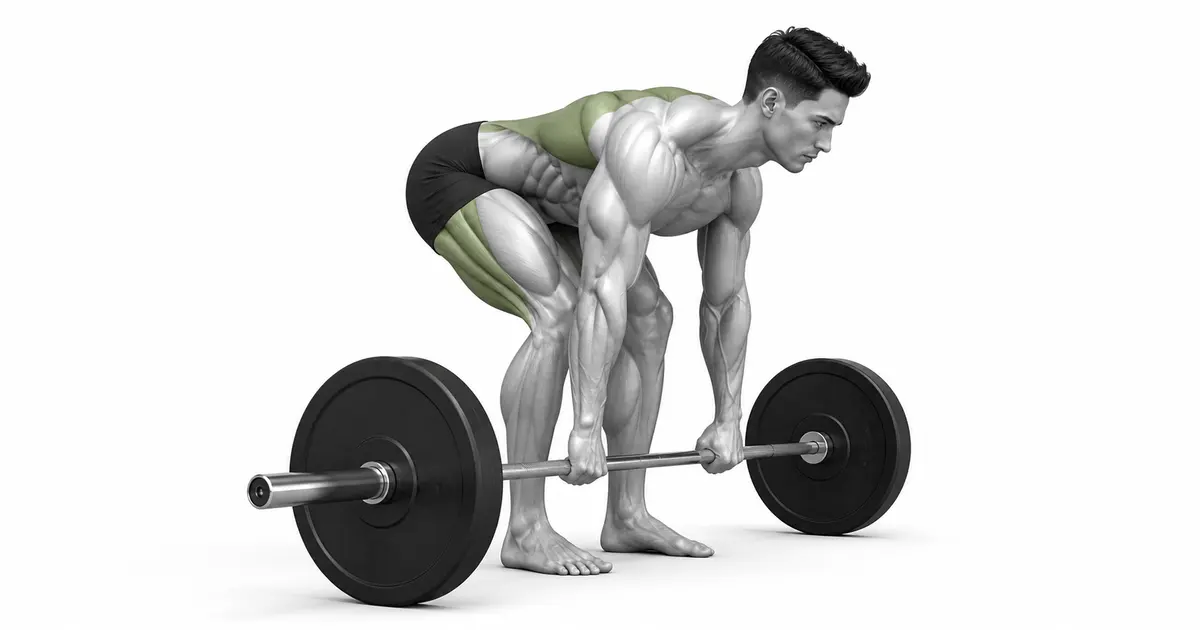
BRACE & SPEED
A quick rise is not a signal to loosen your back, but is the result of building on a solid torso.
The Pendlay Row is great for relatively fast pulls off the floor, but being as fast as possible doesn't mean throwing your torso. Load–velocity studies involving barbell bentover rows have shown a clear relationship with lower bar speeds as weight increases. A sudden slowdown in speed and lower body kick can be seen as a sign that it is difficult to maintain the intended technique at the current weight.
Inhale before pulling the bar to tighten your stomach and sides, then breathe again when necessary after the bar returns to the floor. Standing and bending rows train the entire back, but also require a lot of back support. If your reset position changes due to back fatigue, finish the set even if there are reps remaining.
TROUBLESHOOTING
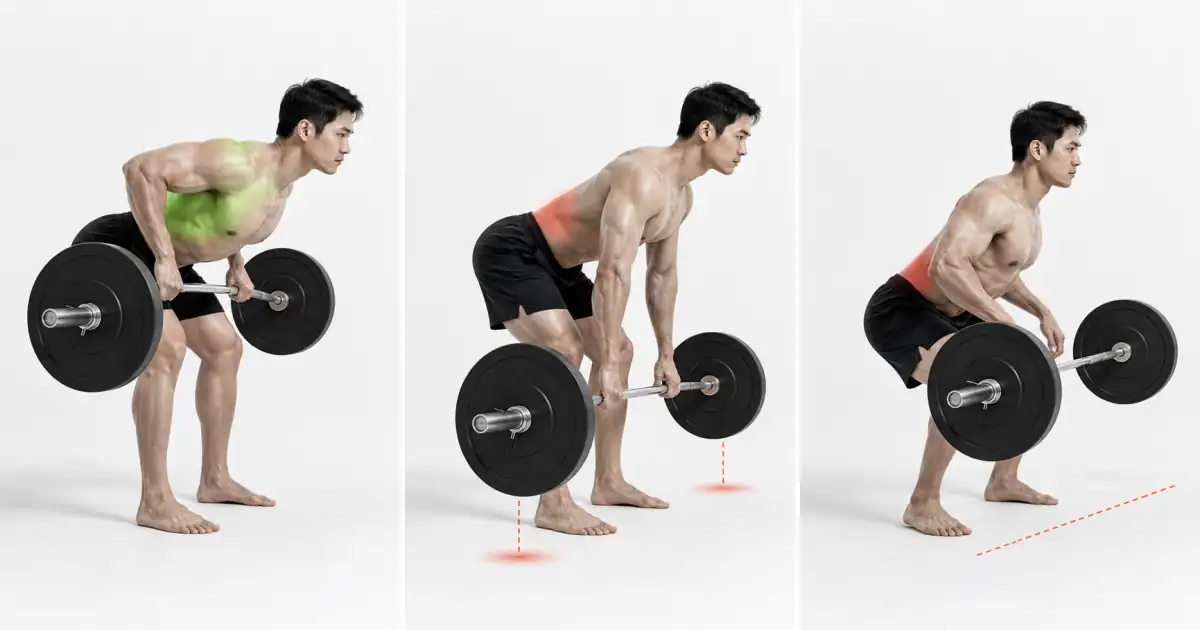
Fix the cause of a mistake, not just its appearance
The disk continues to float on the floor.
- What you see
- Between repetitions, begin the next pull with the bar remaining in the air in front of your shins and your back resting.
- Likely cause
- I tried performing the Pendlay row like a regular bentover row or trying to avoid floor noise.
- How to correct it
- Use a disk of the same diameter on a shock-absorbing platform and lower it completely to a stop for each repetition. If you can't do it on the floor, the exercise name is Bent Over Row.
Raise your body and throw the bar
- What you see
- As you pull, your shoulders rise significantly, your hips move forward, and the point of contact rises toward your chest.
- Likely cause
- I moved the weight, which I couldn't control with my back, with my lower body and back extension.
- How to correct it
- Lower the weight by 10–20% and shoot from the side. Only count repetitions that do not significantly change shoulder and hip height.
The lower back is rounded on the floor.
- What you see
- When you lower the disc, your pelvis curls and your back curves more rounded before the next repetition.
- Likely cause
- The floor height is below your personal range of motion or you lack hamstring and torso support.
- How to correct it
- Raise the bar and lower the weight with standard diameter discs or blocks. Start with a neutral torso as high as possible with your hips back.
Lower your hips and start like a squat.
- What you see
- Your knees are far in front of the bar and your torso is erect so that the bar rests on your knees.
- Likely cause
- I used the same deadlift starting position to lift the weight off the floor.
- How to correct it
- Straighten your knees slightly and send your hips back so that your torso is almost horizontal. Place the bar close to your midfoot and shins.
Bar starts from the toes
- What you see
- The distance between the bar and your shins is wide, and the bar draws a large curve toward your body as you rise.
- Likely cause
- The bar rolled between sets or you didn't check your foot placement.
- How to correct it
- Before each repetition, return the bar over your midfoot and tense your lats to move the bar closer to your legs.
Bounce the disk on the floor and immediately reverse it
- What you see
- As soon as it touches the floor, the disc bounces and the next repetition begins without setting the body.
- Likely cause
- I changed the dead stop to a quick touch and go to increase the number of repetitions.
- How to correct it
- After the disc comes to a complete stop, breathe and stabilize your torso again. Lower the weight where the impact cannot be controlled.
REGRESSION & PROGRESSION
Match the difficulty before adding load
Block hip hinge low setting
First learn mid-foot, shin, and hip positions and a neutral torso on an elevated bar.
Chest Supported Row
Train the pulling pattern of the elbow and shoulder with reduced torso support.
Empty Bar Block Pendlay Row
Repeat each repetition with a stop and torso angle at a height that matches your personal range of motion.
Bumper Plate Pendlay Low
Maintain 4–8 quick rises and controlled resets from standard floor height.
Heavy Pendlay Row
Only make small increases when your starting point and torso angle are the same for all repetitions, and finish the set before your speed starts to deteriorate.
BEGINNER PROGRAM
A practical starting framework
Place them 1–2 times a week on the front part of your back exercise as they require quick pulls and rep resets. In the first week, after 8 reps, learn floor position and breathing with a weight that remains for at least 3 reps, and if lumbar support fatigue appears before your back, fill in the remaining sets with chest supported rows.
number
4–8 times
Each repeat disc is completely stopped
set
3–5 sets
2–3 minutes recovery between sets
speed
Fast ascent, controlled descent
Maintain torso angle and floor position
- Before your first work set, use an empty bar or light disc to check your floor height, mid-foot position, and upper belly contact.
- If you maintain a full bottom stop, the same torso angle and close leg path on every repetition, add one repetition to the next session.
- Increase the weight slightly only after hitting the top of your reps on every set, and immediately return to the previous weight if the disc bounces or your torso lifts.
Frequently asked questions
Do I have to put the bar down on the floor every time?
yes. Deadstop reset is the key to distinguishing a Pendlay row. If you want to repeat with the disk floating, it is more accurate to record it as a different variation closer to a regular bent-over row, rather than a mistake in itself.
Does the torso have to be completely horizontal?
An almost parallel posture is basic, but there are small differences depending on body type and floor height. Prioritize a starting point such as a neutral torso by elevating the bar with blocks rather than curling your back and forcing it to be horizontal.
Do I need to rise quickly?
The intention to pull quickly is appropriate, but not the recoil that throws the torso and hips. From a fixed position, quickly bring your elbows back and end the set when you slow down significantly or lift your body.
Where should the bar touch?
For an overgrip that is slightly wider than the shoulders, the upper abdomen and lower ribs are a practical standard. It varies slightly depending on your body type. Do not force contact by bending your wrists or raising your torso.
Is it wrong to have strength in your lower back?
The erector spinae muscles support a nearly horizontal torso, so they can become fatigued. However, if you feel your back arching after each repetition, sharp pain in a specific area, or tingling that spreads to your legs, do not treat it as normal muscle fatigue and stop immediately.
Evidence and references
- 1. Fenwick et al. — Trunk muscle activity, back movement and load by row variation
- 2. Loturco et al. — Load–velocity relationships for row variations including barbell bentover rows.
- 3. Nieto-Acevedo et al. — Gender/load–speed profiles of three rows.
- 4. Büll et al. — Trapezius and serratus anterior muscle activity according to grip of bent-over row