SEATED CABLE ROW
The seated cable row is not an exercise where you lean back, but rather an exercise where you pull the handle towards your torso.
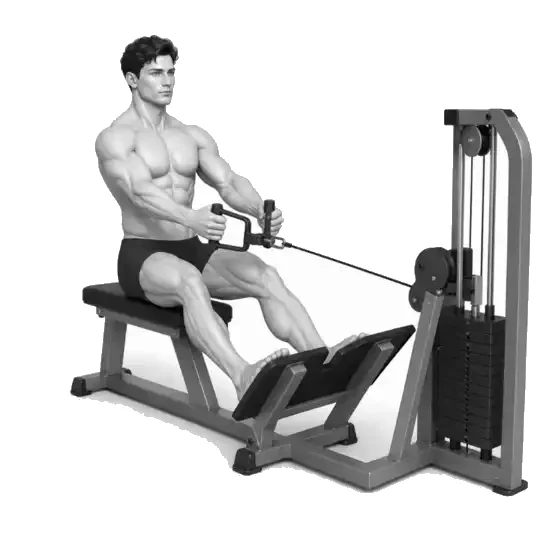
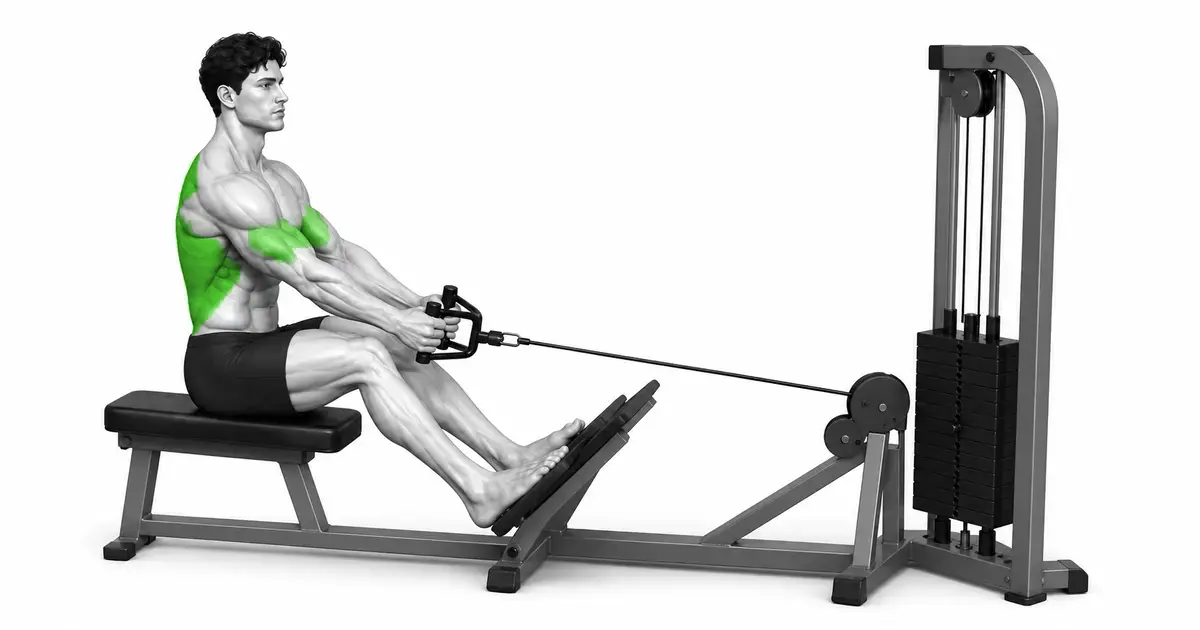
Seated cable rows are a horizontal pulling exercise where you place your feet on a footrest and pull a neutral grip handle toward your body, as shown in the video. The tension of the cable continues throughout the movement, making it great for training the lats and upper back, but if you rock your upper body back and forth sharply to move the weight, the recoil from your lower back and hip joints takes the place of the pull. Keep your torso crossed by your pelvis and ribs, and allow your shoulder blades to naturally move forward when you extend your arm and then back when you pull it back. Allowing controlled movement is closer to the actual row than forcing the shoulder blades to tighten from start to finish.
- Primary muscles
- Latissimus dorsi, trapezius, rhomboids
- Secondary muscles
- Rear deltoid, biceps brachii, rotator cuff
- Difficulty
- Beginner
- Movement type
- Sit and pull horizontal cable
Can't you move your upper body at all?
Small natural movements can occur, but there should not be significant rocking back and forth with each repetition to pull the weight. The relationship between the ribs and the pelvis should be maintained and the handle should be at the same point.
STEP BY STEP
5 Steps for One Complete Rep
- 1
Check pins, cables, and handles
Check that the weight pin is fully inserted and that the cable and carabiner are undamaged. Connect the handles securely so that you can hold them with a neutral grip with both hands facing each other, and leave a clear area around the weight stack.
- 2
Secure your body to the footrest and seat
Place both feet in the center of the footrest and gently bend your knees. Keep your buttocks stable on the seat and push against the footrest with the soles of your feet to prevent your body from being dragged toward the cable.
- 3
Keep your torso upright and take a neutral grip.
After holding the handle, fold your pelvis and ribs and do not lift your chest excessively. Keep your arms almost straight, but don't force your shoulders back and keep your neck and wrists long and neutral.
- 4
Pull your elbows back to your sides
Exhale and lower your elbows back. Pull the handle between your lower ribs and upper abdomen without shrugging your shoulders, and don't let your upper body fall back to meet the handle.
- 5
Rotate slowly while maintaining tension
At the top, pause briefly without arching your shoulders back too much. Extend your arms for 2–3 seconds, allowing your shoulder blades to move forward naturally, but begin the next repetition before your lower back arches or the weight stack hits you.
STABLE BASE
Make sure your feet and seat are firm so you can transfer the cable tension to your back.
If you only push the footrest with the tips of your toes, it's easy for your knees to wobble and your pelvis to move around the seat. Press the entire sole of your foot into the footrest and keep your knees unlocked. Sit with the cable pointing under your chest in a position where your hips do not slide back and forth.
The torso does not need to be completely rigid, but there should be no significant angular changes during one repetition. Leaning slightly forward at the start and then leaning back as you pull makes it difficult to distinguish between a purely horizontal pull created by your back muscles, even when moving heavier weights.
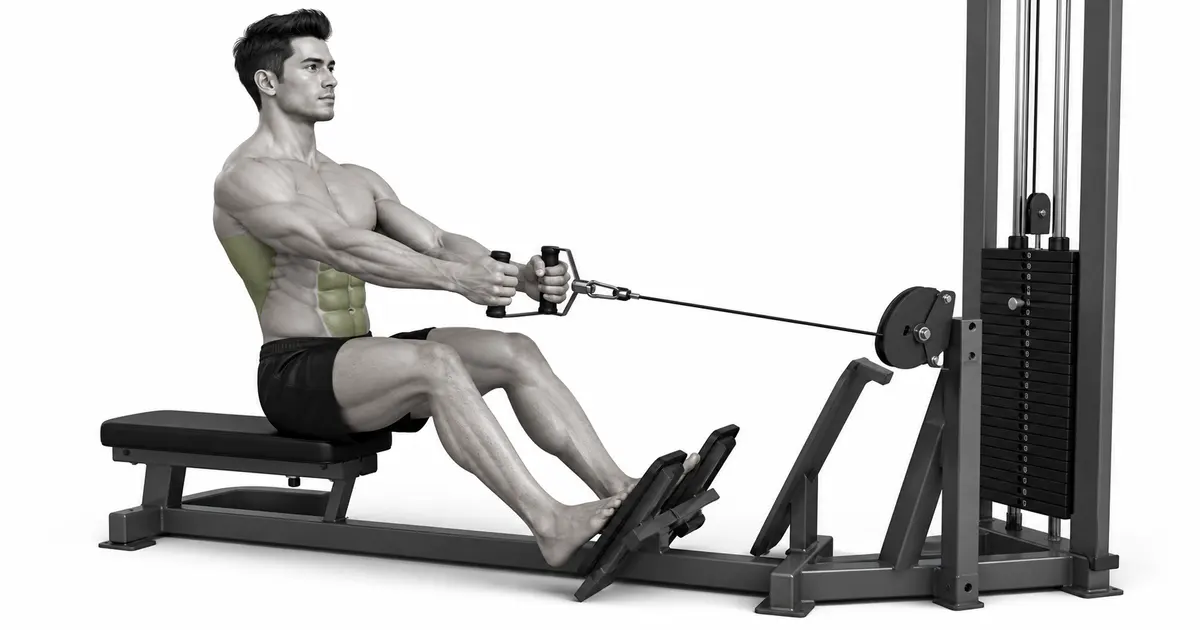
Key point: Cue to try right now: “Push on the footrest, ribs on the pelvis.”
SCAPULAR MOTION
The shoulder blades are not fixed but move controlled over the torso.
During the arm extension section, the shoulder blade naturally slides forward along the ribs, and during the pull section, it returns together with the elbow. If you force your shoulder blades together from start to finish, your actual range of motion will decrease and it will be easy to bend only your elbows.
A study comparing seated rows with fixed and free shoulder conditions found that overall muscle activity was similar, with differences only seen in some upper back muscles. Therefore, rather than unconditionally tying the shoulder blades in one position, prioritize a path that moves forward and backward smoothly without pain and control that does not cause the shoulder to rise toward the ear.
HANDLE PATH
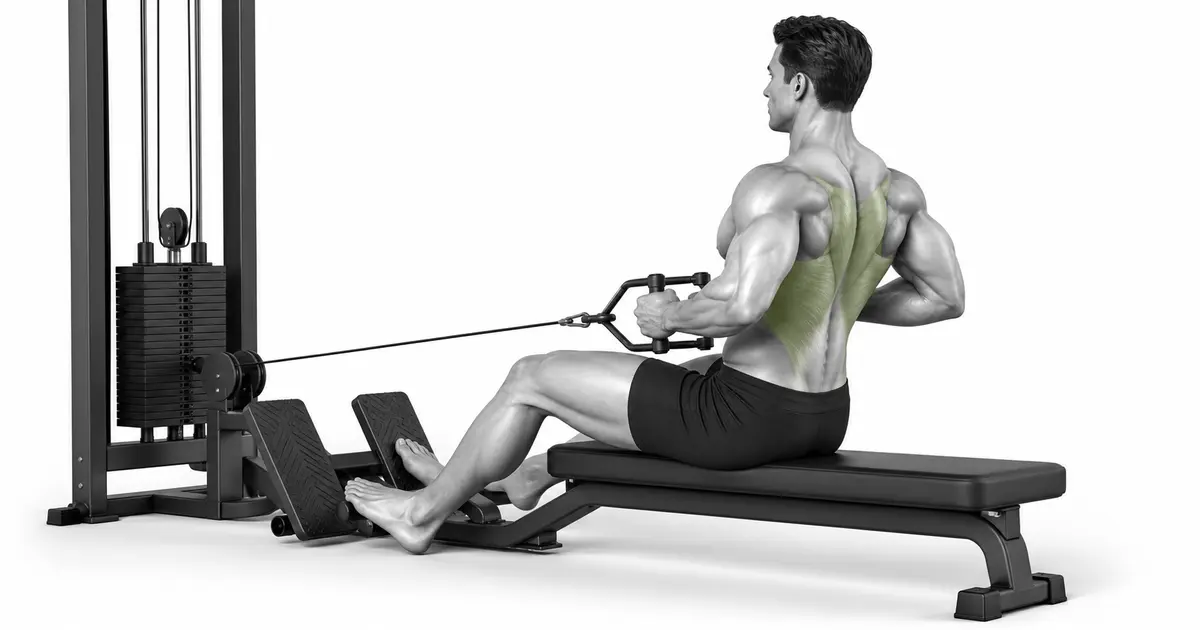
The handle comes to the body along the path of the elbow, not the hand.
A neutral grip handle makes it easier to keep your elbows closer to your sides. Rather than curling your wrist and pulling on the handle, move your elbow back while keeping your hand and forearm in a straight line. The basic starting point is the height at which the handle touches between the lower ribs and upper abdomen.
Excessively opening your elbows and pulling them toward your chest can increase the role of your rear deltoids and upper back. Conversely, there is no need to force your elbows to your body. Adjust the path slightly to suit your target muscles and shoulder comfort, but repeat the same point of contact without torso kick.
TROUBLESHOOTING
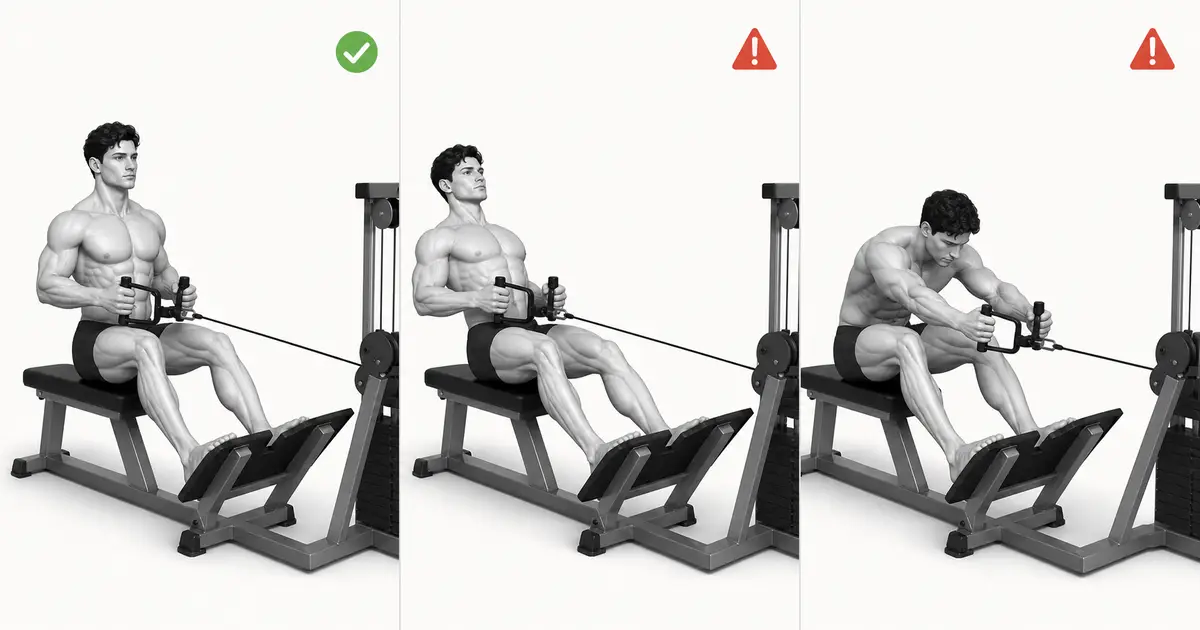
Fix the cause of a mistake, not just its appearance
Lean your body back sharply
- What you see
- As you pull, your chest and head move back, your knees straighten, and the handle comes to your body by inertia.
- Likely cause
- The weight is heavier than your back can control or the repetition rate is too fast.
- How to correct it
- Lower the weight and continue pressing the footrest. Send only your elbows back as long as your torso angle remains almost unchanged.
Your lower back is rounded when you extend your arms.
- What you see
- As I try to move the handle away, my pelvis rolls and my chest collapses into my knees.
- Likely cause
- Instead of the natural extension of the shoulder blades, the range of motion was created by bending the waist.
- How to correct it
- Keep your ribs and pelvis spaced and move only your arms and shoulders forward. Stop just before the shape of your waist changes.
Shoulders rise toward ears
- What you see
- As you pull, your neck shortens and your shoulders move up before your elbows.
- Likely cause
- Pull the handle too high or let your upper trapezius muscles take over the weight.
- How to correct it
- Lower the handle toward your upper abdomen and place your elbows behind your sides. Keep your neck long.
Pull the handle with your wrist
- What you see
- At the top, the wrist bends and the handle rotates towards the fingers.
- Likely cause
- If your grip is loose or your elbow path stops, increase your reach with your hands.
- How to correct it
- Close your thumbs and keep your wrists and forearms aligned. I think the elbow goes back before the hand.
Hitting the weight stack every time.
- What you see
- Every time you extend your arm, the disk lands with a loud sound and the tension on the cable disappears.
- Likely cause
- Let go of the lowering or the seat is too close to the stack.
- How to correct it
- Spin for 2–3 seconds and start the next repetition just before the disc touches. If necessary, readjust your seat and foot position.
REGRESSION & PROGRESSION
Match the difficulty before adding load
lightweight cable row
Practice 12–15 gentle pulls and returns while keeping your torso still.
Suspended Seated Row
Stop for one second at the point where the handle is close to your body and get the feeling of holding on with your back without recoil.
standard working set
Perform 8 to 12 reps, leaving 2 reps to spare, and repeat the same contact points.
Single arm cable row
Practice using a light weight to check the difference between left and right, but without rotating your torso.
BEGINNER PROGRAM
A practical starting framework
It can be used 1–3 times a week as a basic horizontal pull for back exercises. If you already do exercises that support your lower back for long periods of time, such as barbell rows, seated cable rows may be an option to add exercise to your back while lowering the load on your torso.
number
Episodes 8–12
Maintains the same point of contact without recoil
set
2–4 sets
1–2 minutes recovery between sets
speed
2–3 second return
Maintain tension before stack hits
- If your torso angle and handle contact point are the same for all sets, add one repetition to the next session.
- Only increase the pin when you've reached the top of your target reps on every set and have about 2 reps to spare.
- If you have to lean back or round your back to pull, finish the set and lower the weight instead of adding additional repetitions.
Frequently asked questions
Can I move my shoulders forward when I extend my arms?
yes. It is normal for your shoulder blades to naturally move forward along your ribs while maintaining your torso and lower back. However, do not stretch to the point where your shoulders are pulled sharply or your back is rounded.
Which handle is best?
A narrow neutral grip like the one shown in the video is easy to learn basic movements. Wide bars and different grips can change the elbow path and the relative role of the muscles, so choose a handle that is comfortable for your shoulders and wrists and allows you to control your target path.
How far into the boat should the handle be pulled?
The distance between the lower ribs and the upper abdomen is the basic standard. This may vary slightly depending on arm length and handle, but it should be in a position where your wrists are not bent, your shoulders are not shrugged, and your torso is not tilted back.
Evidence and references
- 1. Lehman et al. — Comparison of back and arm muscle activity between seated rows and lat pulldowns
- 2. Comparison of muscle activity around the shoulder in seated rows under fixed and free shoulder conditions
- 3. Schoenfeld et al. — Comparison of muscle activity of rear deltoid exercises including seated rows
- 4. Study on the effects of 8 weeks of cable chest press and seated row training
- 5. Study on upper trapezius muscle activity feedback during seated rows