SMITH MACHINE BENCH PRESS
Align the bench, set the stops, and press controlled on the stationary rails.
This conservative setting emphasizes checking, alignment, and intentional execution. Before hanging weights, check hooks, rail movement, bench stability, machine locks, collars/discs, and floor level/clear. Position the bench flat so the bar can follow a comfortable path without having to twist your shoulders or torso to meet the rail. Set and test safety stops with an empty bar to catch the bar before it gets out of control. Practice hook rotations and bar hook movements in an actual bench position before your work sets. Use a full grip with your thumbs around, steady feet, and a firm torso. Retract and stabilize the shoulders, lower under control within the pain-free range, and intentionally rotate the hook to hang the bar. If the bar path isn't right, the bench is wobbly, the hooks don't hang reliably, or you can't set a safety stop, don't proceed—adjust, reduce the weight, or choose a different exercise. A fixed bar path does not mean that this exercise is spotter-free, universally safer, or automatically better than free weights. Rationale: Schick et al. (2010) compared the Smith machine and free weight bench press at 70% and 90% of 1RM for each method in skilled and unskilled subjects. Although medial deltoid activity was higher in the free weight condition, the study did not demonstrate that either method was universally better in terms of hypertrophy, performance, or safety. Fixed rails may reduce some stabilization needs, but may not match every individual's comfortable path. EMG results should not be overinterpreted, and this study cannot diagnose or predict an individual's risk of injury.
- Primary muscles
- Pectoralis major
- Secondary muscles
- Triceps · Front deltoid
- Difficulty
- Beginner
- Movement type
- Inductive Horizontal Press
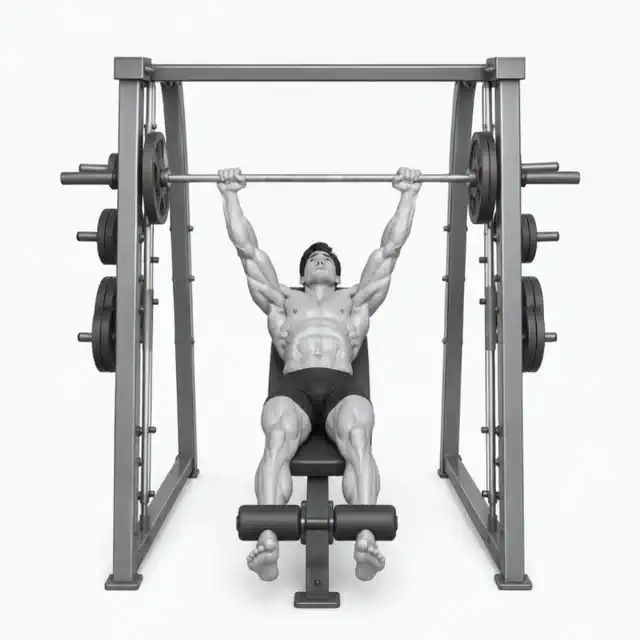
Is the Smith Machine Bench Press Safer than Free Weights?
Not per se. Fixed rails may reduce some stabilization needs, but they do not ensure safety or suitability for everyone. Safety depends on setup (stops, hooks, bench stability), technique, load selection, and fatigue management. Schick et al. (2010) reported higher medial deltoid activity on the free weight bench press, but no tool appeared to be universally better for hypertrophy, performance, or safety. Use stops, have a clear plan for hanging the bar, and stop if the path feels forced or painful.
STEP BY STEP
6 Steps for One Complete Rep
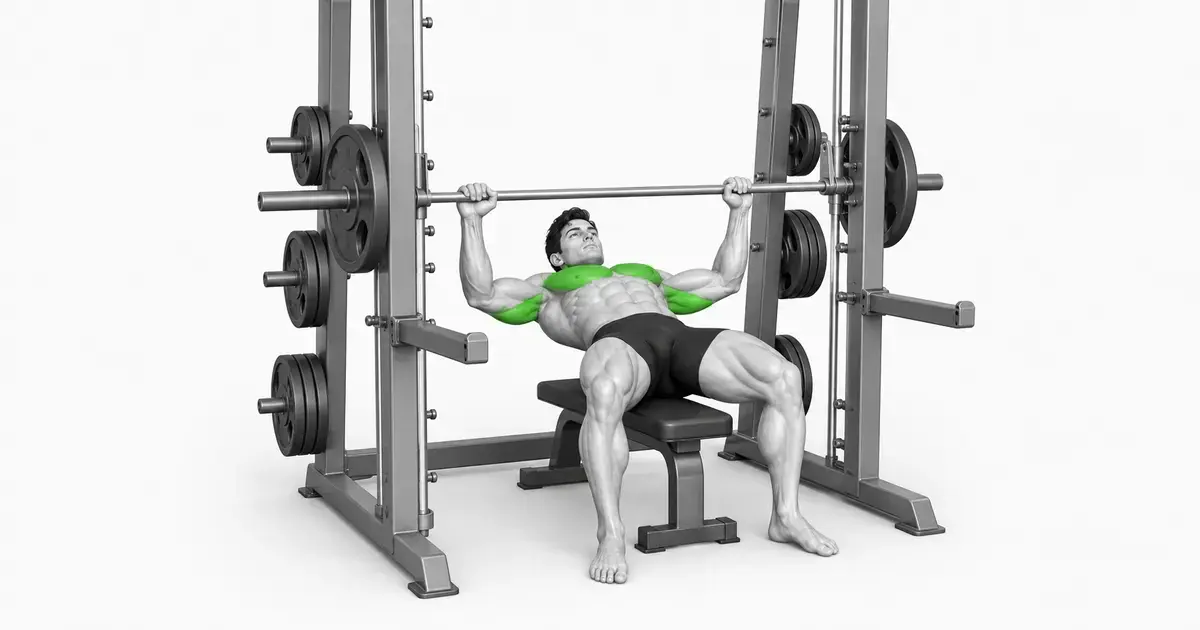
- 1
Station Check
Check whether the hook, rail movement, and locking mechanisms of the machine operate smoothly and symmetrically. Check that the bench is undamaged and stable, that the collars/discs are properly secured and that the floor is level and level. Do not use damaged equipment.
- 2
Position your bench to fit your path
Fine-tune the flat bench so that the bar is about mid-lower to the sternum when lying down. Place the bench centrally and at a right angle between the rails and keep it from shaking. Aim for a comfortable bar path—don't force your shoulders or torso to twist to align with the rail. Adjust until it feels natural.
- 3
Safety Stop Setup and Testing
With an empty bar, set the stop to catch the bar just above the uncontrollable depth. Lightly touch the bar to the stop to make sure both sides are working evenly and can be safely released when the repetition stops. If you cannot set a stop, do not proceed.
- 4
Creating a solid setup
Lie down with your eyes close to the bar, shoulder blades back and feet firmly planted. Use a full grip with your thumbs slightly wider than shoulder width, with your wrists aligned vertically over your forearms and your torso braced tightly. Keep your glutes and upper back in contact with the bench.
- 5
Control and press after unlocking
Rotate the bar to release it from the hook, balance it over your shoulder joints, and inhale. Lower towards the lower sternum, controlling it within the pain-free range to avoid bouncing on the chest or stop. Keeping your shoulders down and ribcage aligned, press your elbows to the top in a controlled manner without trying to lock them excessively.
- 6
Intentionally Hanging Bars
After the last repetition, bring the bar to a controlled upper position, guide it to the hook line and rotate your wrists to hook both sides. Make sure the bar is fully secured before releasing the tension. If the hook does not engage reliably, stop, adjust and recheck the setting.
SAFETY STOPS
Configure, Verify and Practice Safety
Before loading, check that the machine's stops, hooks, and rails are smooth and operate symmetrically. Using an empty bar, set a safety stop to catch the bar just above where you are out of control, then practice lightly touching the stop from a bench press position to make sure both sides are working evenly.
The goal is an ultimate safety device that prevents crushing while allowing comfortable, pain-free depth. If you can't set the stop to a protective height, the bar or hook feels inconsistent, or the bench is unstable, don't proceed—rearrange, simplify your setup, or choose a different exercise.
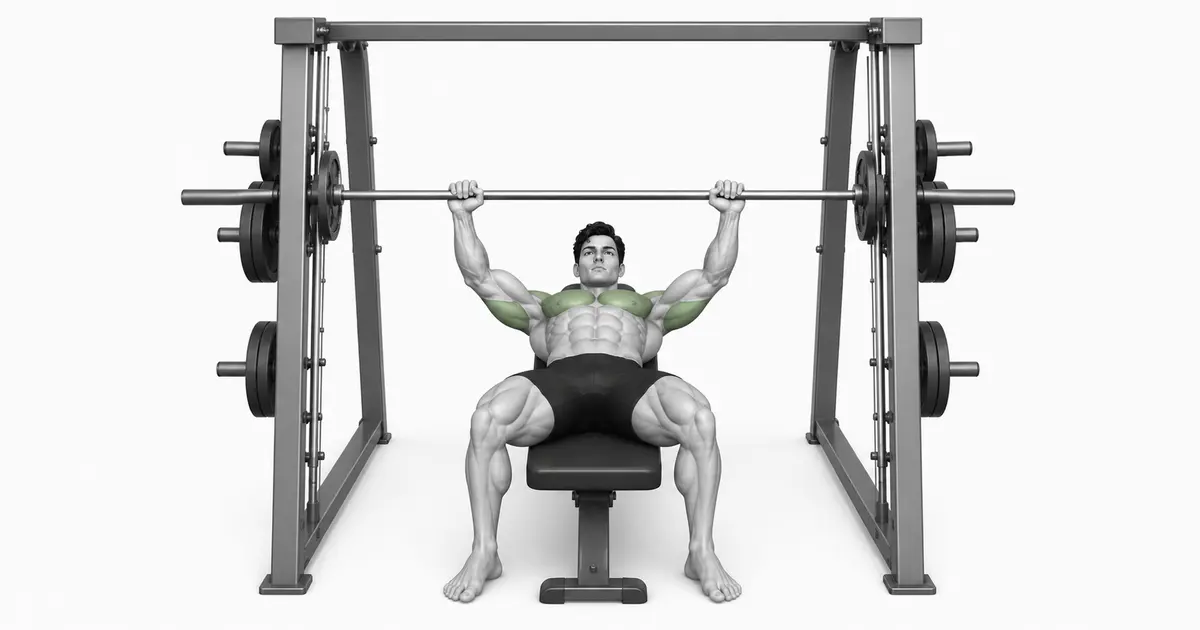
Key point: Set the stop so that it rests just above your maximum safe depth.
BENCH ALIGNMENT
Don't let your shoulders fit the rails, let the bench fit you
Center the bench and set it at a right angle and stability so that the bar is aligned near the bottom of the sternum and the shoulders maintain their natural position. Adjust the bench back and forth so that your forearms are close to vertical at the bottom point, keeping your shoulder blades retracted and your ribcage aligned to avoid excessive lifting or hyperextension.
Fixed rails may not match everyone's preferred arc. If the path feels forced, the bench is wobbly, or your shoulders feel uncomfortable despite adjustments, change the bench position, lighten the load, or choose a different press variation.
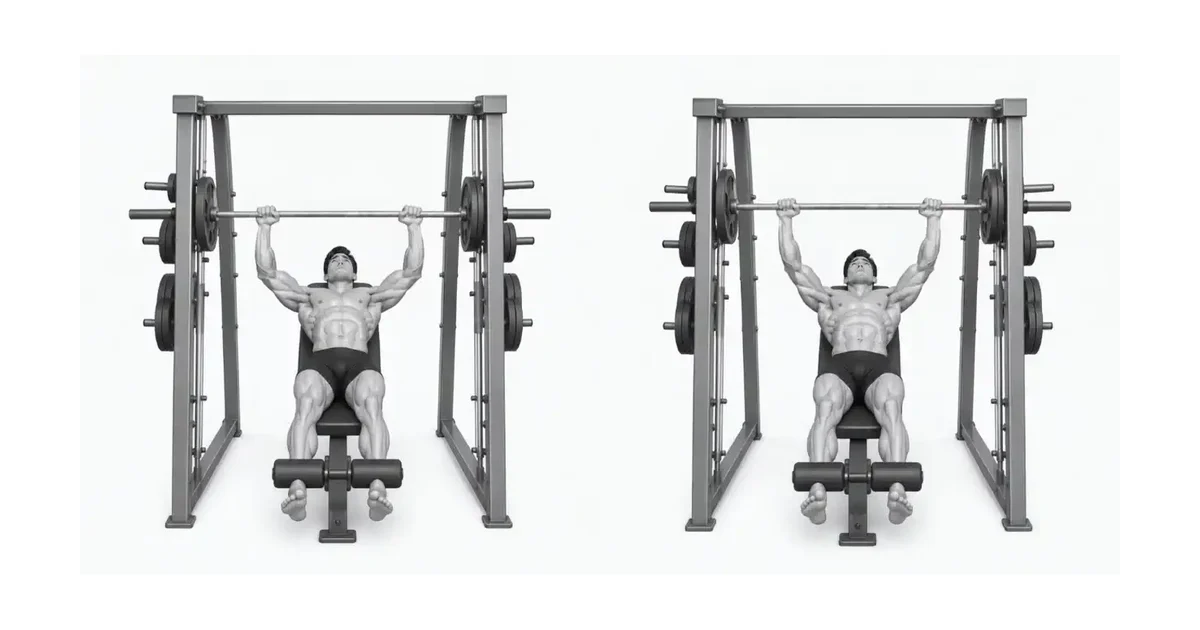
Key point: Move the bench until the bar tracks comfortably above the lower sternum.
RE-RACK
Test hook rotation and hand position before work set
Rehearse the unlocking and bar hooking movements in an actual bench position: Find the hook line at the top under control, then rotate the bar back and forth to get the feel of a firm hook on both uprights. Make sure you can return to the hook without shrugging or losing shoulder position.
Have a clear plan for using stops when reps stop—having rails doesn't make this exercise spotter-free or automatically safer. If hook engagement is unstable or inconsistent, correct bar angle and adjust grip width, or stop and reconfigure before loading.
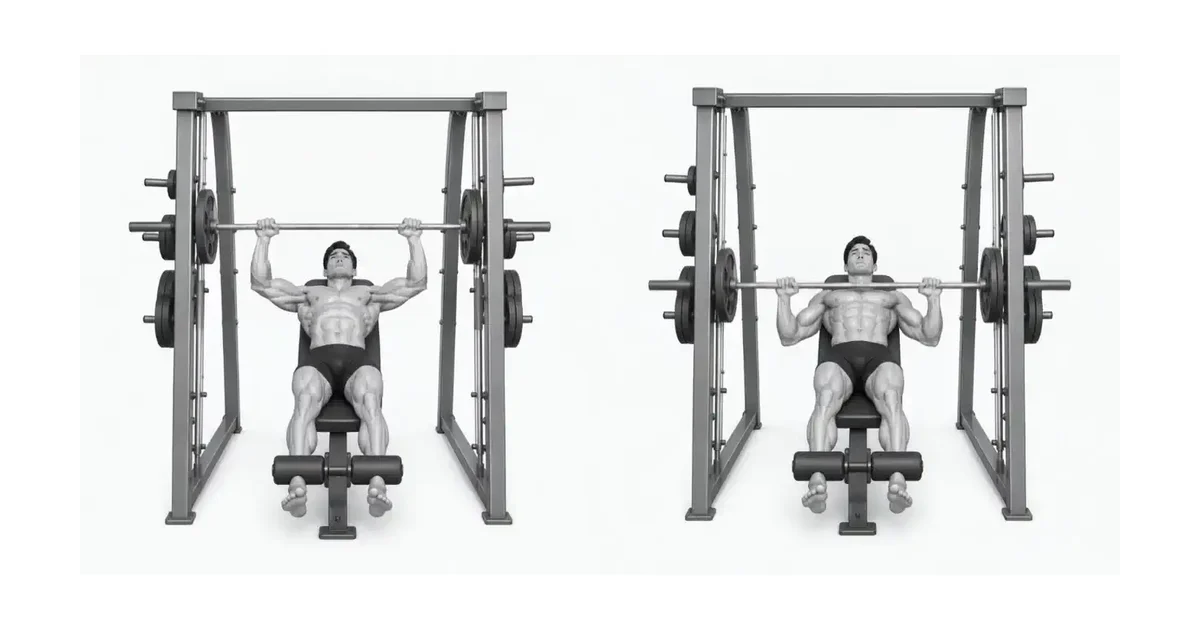
Key point: Practice hook rotation before loading.
TROUBLESHOOTING
Fix the cause of a mistake, not just its appearance
Safety stop omitted or incorrectly set
- What you see
- No support when bar is lowered to chest or bench level; Left and right stop contact is uneven.
- Likely cause
- Stops set too low, asymmetrically, or not tested in actual bench position.
- How to correct it
- With an empty bar, set both stops so that they are supported just above the maximum safe depth and touch lightly to ensure that the left and right sides operate evenly.
Follow the pain path forced by the rail
- What you see
- Pinched shoulder, excessive elbow extension, feeling “pinched” by the rail.
- Likely cause
- Place the bench in a position where the fixed path forces shoulder or torso alignment.
- How to correct it
- Re-center and adjust the bench fore and aft so that the bar tracks comfortably above the lower sternum; If discomfort persists, change the exercise.
Unreliable bar hanging angle
- What you see
- Misses or slips off hook after set; The bar just spins and doesn't get caught.
- Likely cause
- Not practicing hook rotation in a controlled top position or misjudging the hook line.
- How to correct it
- In the warm-up load, practice swinging onto the hook from a controlled upper position and visually check that both sides are hooked properly.
Loose grip and bent wrist
- What you see
- Bar across fingers, wrists hyperextended, bar not aligned under forearms.
- Likely cause
- A grip that does not cover the thumb or a loose grip; Grip width or wrist position does not match body type.
- How to correct it
- Use a full grip with your thumbs wrapped around your wrists, resting your wrists neutrally on your forearms, and adjust the width so that your forearms remain close to vertical at the bottom point.
Bounce on chest or safety
- What you see
- Acceleration from bottom to rebound; Jagged in depth; Stop and noisy contact.
- Likely cause
- Chasing momentum over control; Set the stop to a position that induces recoil.
- How to correct it
- Lower under control in the pain-free range and pause briefly at the bottom; Set the stop as a final safety measure, not as a reactionary target.
REGRESSION & PROGRESSION
Match the difficulty before adding load
Increase number of repetitions in range
If all sets are stable and pain-free, add 1–2 repetitions throughout the set (e.g. 10,10 → 11,10). Once all sets are at the top of the range and your form is firm, increase the weight slightly.
Tempo and Pause Control
Controlled descent for 2–3 seconds, pause near the bottom for 1 second, then gently push up to the top without recoil.
Bench Fine Tuning
As load increases, modify your bench position slightly (in centimeters, not inches) to maintain a comfortable bar path. Retest safety stop and hook engagement after changes.
Grip Width Variation
Distribute joint stress by periodically alternating between a standard grip and a slightly narrower or wider grip, while maintaining pain-free and controlled range.
BEGINNER PROGRAM
A practical starting framework
Use calm, repeatable settings. Choose a load that will allow you to maintain stable form without pain throughout your target repetition range. Allow 1–2 reps on most sets while you work on your alignment and bar loading.
Repeat count
8–12
Perform within the pain-free range, pausing near the bottom to gain control.
Set
2–3
Rest 2–3 minutes between sets to maintain the quality of your technique.
Progress
+1–2 times
Once all sets reach the top of the range, slightly increase the load the next session.
- Set and verify safety stops and hook engagements before the first load set, and recheck if the bench has been adjusted.
- Leave room for 1–2 repetitions in most sessions; Prioritize smooth bar control and shoulder comfort over the load.
- If the path feels forced, the bench wobbles, or you experience pain, stop and adjust, reduce the load, or switch exercises.
Frequently asked questions
How should I set the bar path and grip?
Choose a full grip with your thumbs slightly wider than shoulder width, with your wrists positioned neutrally over your forearms. Keeping your shoulder blades retracted and your ribcage aligned, lower yourself toward the lower sternum to a pain-free range. Adjust the bench back and forth so your forearms are close to vertical at the bottom point, making sure the rails don't force your shoulders. If it's still awkward, reposition it or choose a different press variation.
Do the EMG differences mean better muscle growth with a particular option?
No. Schick et al (2010) reported higher medial deltoid activation with the free weight bench press at the same relative intensity, but EMG alone cannot demonstrate superior hypertrophy, exercise performance, or safety. Choose an option that allows you to train consistently with comfort, available equipment, and good technique.