SMITH MACHINE ROW
The Smith Machine Row is not an exercise where you align the bar with your body, but rather, it is an exercise where you align your body with a fixed bar path.
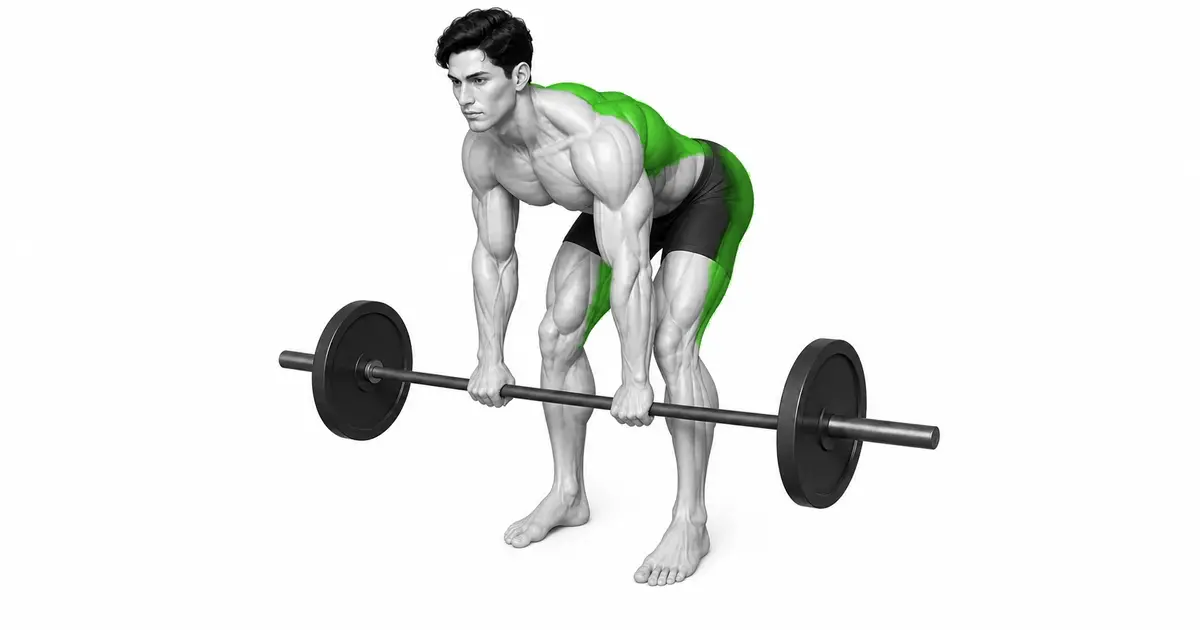
The Smith Machine Row in the video is an overgrip bentover row that pulls the bar just below the knees toward the upper abdomen and lower ribs. The Smith Machine simplifies the path by limiting the bar's forward and backward movement, but it does not replace hip hinge and torso support. In a study involving the Smith Machine Bentover Row, bar speeds predictably decreased as the load increased, and in a separate study comparing rows, the standing and bending row activated the entire back significantly while also placing the greatest back load among the movements compared. So rather than thinking of the fixed trajectory as an 'automatic path that is safe for your back', you should first align your foot position and safety stoppers and maintain the same torso angle throughout the repetition.
- Primary muscles
- Latissimus dorsi, middle trapezius, rhomboids
- Secondary muscles
- Rear deltoid, biceps brachii, erector spinae, glutes, hamstrings
- Difficulty
- Intermediate
- Movement type
- Fixed orbit horizontal pull/hip hinge
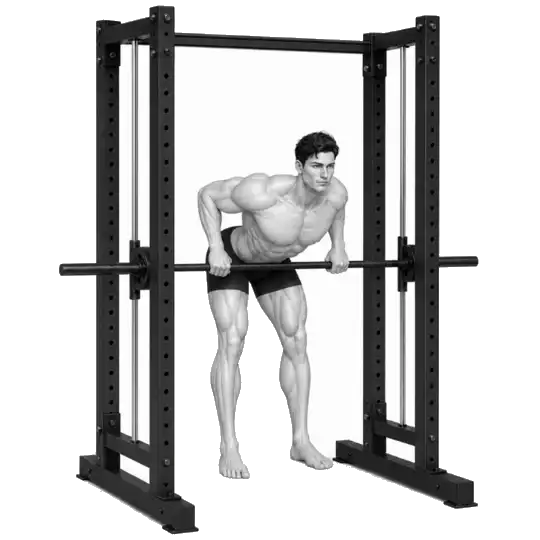
Are Smith Machine Rows Safer than Free Barbell Rows?
Although it has the advantage of reducing the back and forth sway of the bar and using safety stoppers, it does not eliminate back and torso support. If your feet are not positioned on a fixed path, your body may compensate, so don't simply divide the two movements into safe and dangerous.
STEP BY STEP
6 Steps for One Complete Rep
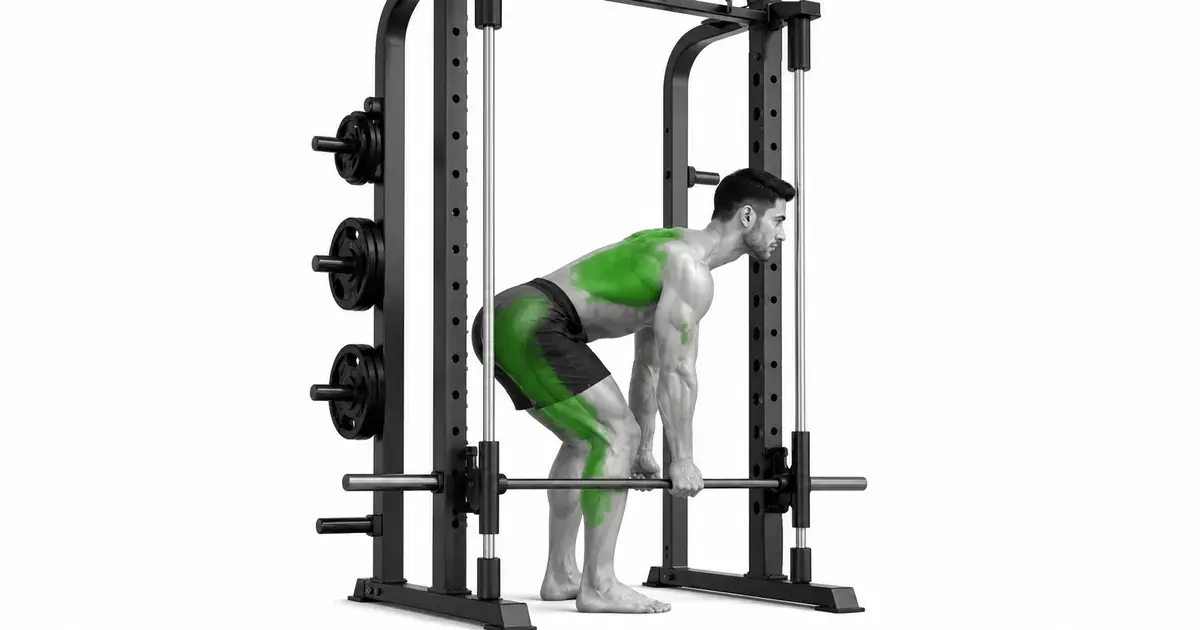
- 1
Adjust bar and safety stopper height
Place the bar at a height that allows you to grip it just below your knees and set the safety stopper slightly lower than your starting point. Practice the bar rotation method and emergency locking position on an empty bar first.
- 2
Align your feet with the path of the bar
Find a position with your feet hip-width apart and your shins not too close to the vertical path of the bar. At both the start and the top, the bar should be able to move closer to the legs and reach the upper abdomen and lower ribs.
- 3
Send your hips back and do a hip hinge
Bend your knees slightly, send your hips back, and lower your torso. Keep your ribs and pelvis stacked, your back and neck long, and support your posture with your hamstrings and glutes.
- 4
Release the bar with a shoulder-width overgrip.
Hold your thumb with an overgrip with your palm facing backwards and keep your wrist straight. Without moving your torso, lift the bar slightly to unlock the rotation and check your balance at the starting point.
- 5
Send your elbows back and pull them up to your stomach
Exhale and bring your elbows to the sides and back of your torso. Instead of raising your shoulders toward your ears or raising your chest suddenly, keep the bar close to your upper abdomen and lower ribs on a fixed vertical line.
- 6
Lower your knees down for 2–3 seconds.
Slowly straighten your elbows and lower them in the same vertical line. Allow room for your shoulders to move forward but control them so you don't roll your lower back or hit the bar against the stopper, and make sure to rotate and lock the bar after the last repetition.
FIXED BAR PATH
In a vertical trajectory, foot position determines bar contact point
A free barbell can move slightly back and forth along the path created by the body, while a Smith bar does not deviate from the line established by the rails. If your feet are too far forward, the bar will move away from your knees and create a long lever in your lower back. If your feet are too far back, the bar will interfere with your shins and knees or force you to raise your torso at the top. Move the empty bar from under your knees to your upper abdomen, first finding a natural foot position for both points.
Depending on the machine, the rails are either fully vertical or slightly inclined. On an inclined Smith machine, you should stand in the direction the bar moves toward your body as it rises. Do not copy foot positions from other machines without checking the manufacturer's construction.
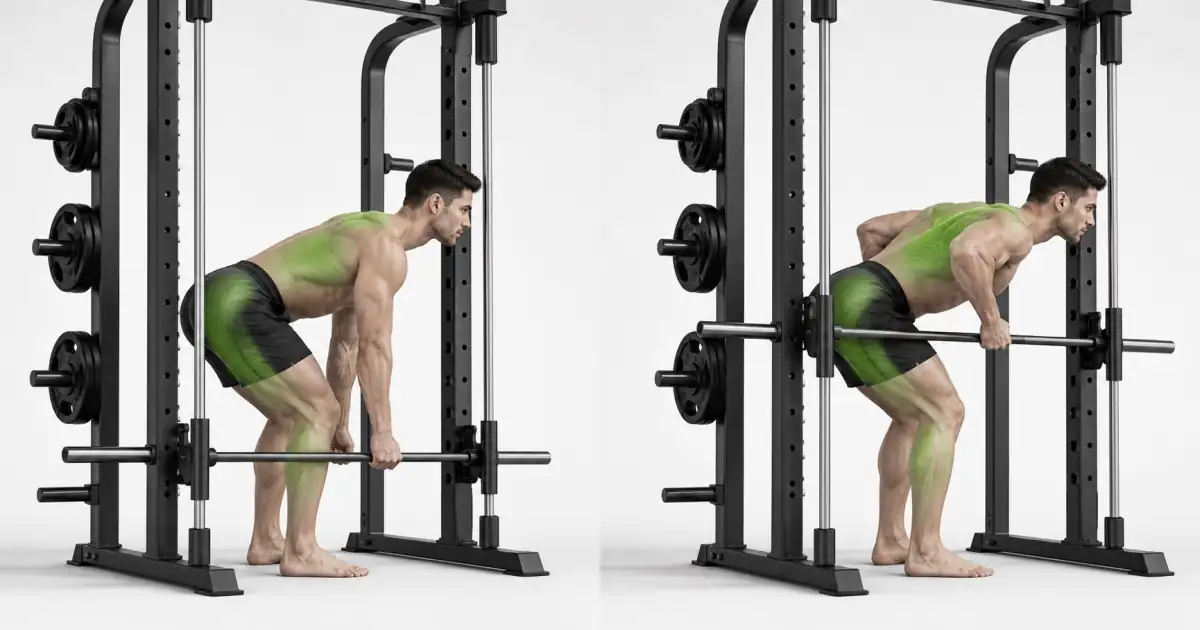
Key point: Check before the set: When I connect the starting point and the top with an empty bar, do I need to change my torso angle to avoid my knees?
HIP HINGE & BRACE
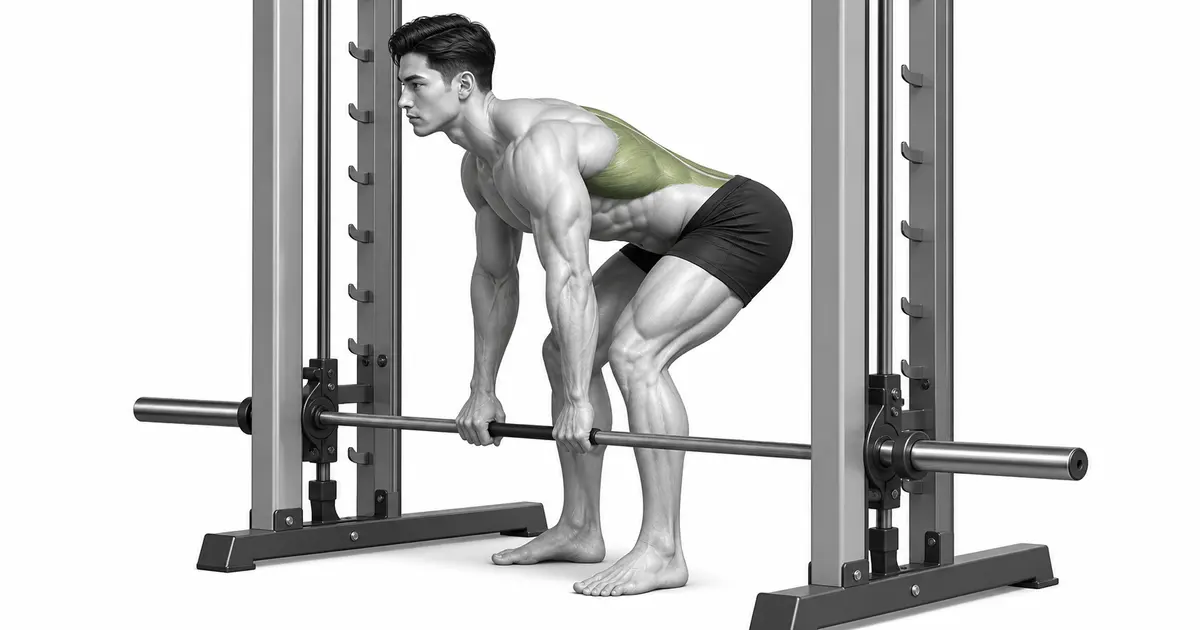
While you pull your back, your lower body and torso become a stationary support.
Even though the Smith Machine stabilizes the bar, your torso must support the load in the air. A small study comparing standing and bending rows showed greater symmetrical activation of the entire back, but also had the highest back load. The study wasn't limited to the Smith Machine, so the numbers aren't literal, but it's practical to note that lumbar endurance and hip hinge control can be limiting factors for this movement.
Bend your knees slightly and send your hips back to find a position that tenses your hamstrings. Firm your stomach and sides and keep your ribs and pelvis away from each other throughout the set. If your torso is increasingly erect due to back fatigue, your postural support capacity has reached its limit before your back muscles, so reduce the weight or repetitions.
ELBOW & SCAPULA
Move your elbows and shoulder blades but don't shrug your shoulders to create range.
At the bottom, the arms are extended and the shoulder blades can naturally move forward over the ribs. As you rise, send your elbows back and bring your shoulder blades together behind you, but do not pull your shoulders toward your ears or force your shoulder blades into place from start to finish. It is sufficient as long as the bar is close to the upper abdomen and lower ribs and the elbows pass through the torso.
Wider hands and wider elbows will increase the bar contact point and increase rear shoulder and trapezius involvement, but this video shows a shoulder-width overgrip and elbow path close to the torso. Rather than spreading your elbows mid-path to create the stimulus of another row variation, choose a separate variation that suits your purpose.
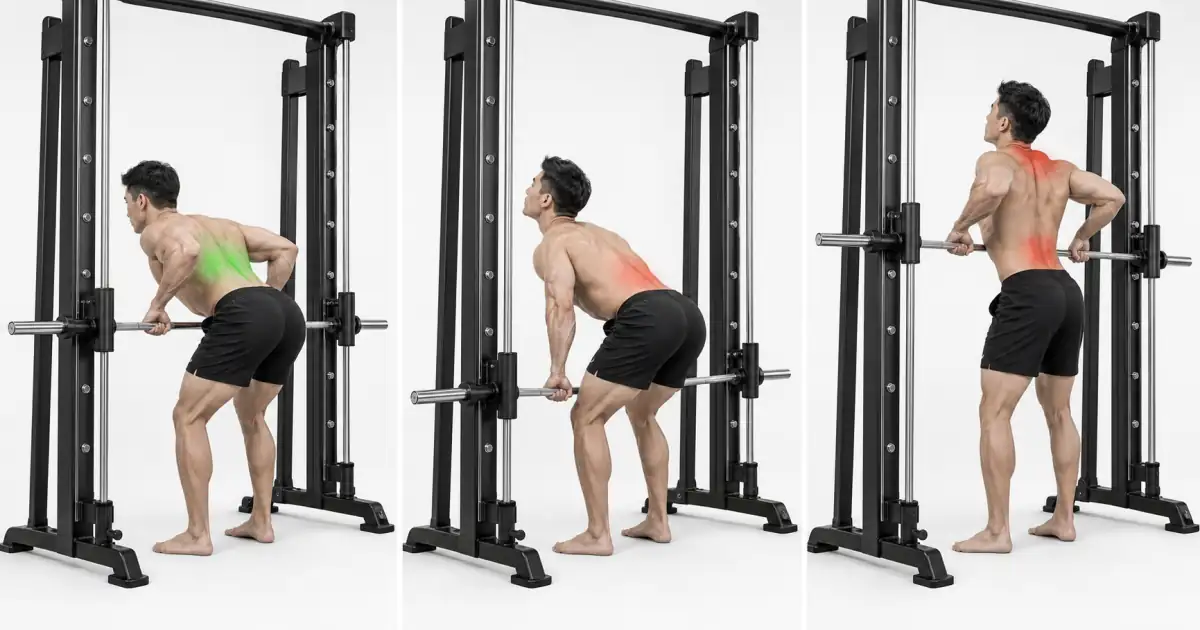
TROUBLESHOOTING
Fix the cause of a mistake, not just its appearance
Feet not aligned with bar path
- What you see
- Move your torso back and forth so that the bar moves away from your knees at the bottom or doesn't touch your stomach at the top.
- Likely cause
- Without checking the fixed trajectory of the Smith bar, I stood in the same position as the free barbell.
- How to correct it
- Try connecting the starting point and the top with an empty bar, moving your feet a few centimeters until both points feel natural.
The lower back arches with each repetition.
- What you see
- As you lower the bar, your pelvis curls, the curve of your back changes significantly, and only your neck rises.
- Likely cause
- The hip hinge depth exceeds the current hamstring mobility or torso support capacity, or the weight is too heavy.
- How to correct it
- Raise the bar starting point a little and lower the weight. Use only the range that allows you to keep the distance between your ribs and your pelvis while keeping your hips back.
Raise your body and bounce the bar
- What you see
- The moment you pull, your knees and hips straighten, your chest lifts, and the bar bounces upward quickly.
- Likely cause
- The weight that I could not control with my back was moved by lower body reaction.
- How to correct it
- Lower the weight by 10–20% and film your torso angle. Only count reps where your shoulder height doesn't change significantly at the start and top.
Shrug your shoulders towards your ears
- What you see
- At the top, the neck shortens and the shoulders rise before the elbows.
- Likely cause
- I increased my range of motion by pulling the bar too high or pulling my shoulder blades up.
- How to correct it
- Lower the point of contact to your upper abdomen and lower ribs and send your elbows back. End the repetition just before your shoulders rise.
Wrists are bent and the bar is curled.
- What you see
- At the top, fold the backs of your hands toward your forearms, stop your elbows, and raise the bar further with your hands.
- Likely cause
- The grip is on the finger side or you are trying to create end range with your biceps.
- How to correct it
- Hold the bar deep in your palms and keep your wrists and forearms in one line. Stop at the point of contact before your wrist bends.
Incomplete locking of the bar after a set
- What you see
- When you try to let go, the bar slides towards the stopper or only hooks on one side.
- Likely cause
- The rotation lock position of the bar was not checked while fatigued.
- How to correct it
- After the last repetition, rotate the bar at a stable height with your arms extended until both hooks are hooked. After confirming that the load is applied, release your hands.
REGRESSION & PROGRESSION
Match the difficulty before adding load
Hip hinge wall touch
Learn the pedestal position, sending your hips back toward the wall and maintaining knee angles and a neutral torso.
Chest Supported Row
First practice the elbow and shoulder pulling pattern in an environment with a bench supporting your torso.
Empty Bar Smith Machine Row
Align your foot position with the safety stopper and repeat the same vertical path from below your knees to your upper abdomen.
smith machine row
Gradually progress to a weight that allows you to maintain the trunk angle and lower for 2 to 3 seconds for 6 to 12 reps.
Free weight barbell row
It reliably controls the Smith path and hip hinge, then extends to self-controlled variations of the fore and aft bar path as needed.
BEGINNER PROGRAM
A practical starting framework
Place in the front or middle of your back workout 1-2 times a week. For the first week, learn your foot position and torso angle with an empty bar or a weight with 3 to 4 spares left after 12 reps, and if lumbar support fatigue appears before back pulls, split your sets with chest supported rows.
number
Episodes 6–12
Maintain the same torso angle and point of contact
set
2–4 sets
2–3 minutes recovery between sets
speed
1–2 second rise / 2–3 second fall
Controlled along the rail without kickback
- Before your first set of work, check the locking mechanism, safety stopper, foot position and contact points with an empty bar.
- If you maintain torso angle, wrist alignment, and 2–3 second descent for all repetitions, add one repetition to the next session.
- Increase the weight slightly only after hitting the top of your target reps for every set, and immediately return to the previous weight as soon as you straighten your torso or curl your back.
Frequently asked questions
Should your torso be parallel to the floor?
This doesn't have to be the case. You can also perform it at a torso angle of about 35–45 degrees as shown in the video. The important thing is that the starting angle is maintained throughout the set, that the lower back is not curled, and that the bar moves naturally from under the knees to the upper abdomen.
Where should the bar land on the boat?
For a shoulder-width overgrip and an elbow path close to the torso, the area near the upper abdomen and lower ribs is a practical starting point. It will vary slightly depending on your body type and machine trajectory. Do not force contact by raising your torso or bending your wrists.
Should I keep my shoulder blades together?
no. When the arm is extended at the bottom, the shoulder blades can naturally move forward and come back together again when pulled. If you force it from start to finish, your comfort range may decrease.
If your back is tight, is your posture wrong?
The erector spinae muscles support a bent torso, so they can become fatigued. However, if you feel your back arching after each repetition, sharp pain at a specific point, or tingling that spreads to your legs, do not treat it as normal muscle fatigue and stop immediately.
How heavy should it be?
Maintain the torso angle, upper abdomen contact point, and descent for 2 to 3 seconds for 6 to 12 reps, and use a weight that allows you to do 2 to 3 reps. The Smith Machine row study also showed a clear relationship between weight and bar speed, so stop the set when the speed slows down and kickback occurs.
Evidence and references
- 1. Loturco et al. — Load–velocity relationships for row variations, including Smith Machine bent-over rows.
- 2. Fenwick et al. — Trunk muscle activity, back movement and load by row variation
- 3. Büll et al. — Trapezius and serratus anterior muscle activity according to grip of bent-over row
- 4. Nieto-Acevedo et al. — Gender and load–speed profiles of the three rows.