BARBELL SQUAT
The squat is not simply sitting down—it is the skill of moving a loaded bar over a stable base
This guide covers the barbell back squat. Because limb lengths, hip structure, and ankle mobility differ, there is no single stance width or torso angle for everyone. The practical standards are keeping the whole foot supported, allowing the knees to track with the toes, controlling the torso, and keeping the bar balanced over the midfoot throughout the repetition.
- Primary muscles
- Quadriceps · gluteus maximus
- Secondary muscles
- Hamstrings · trunk stabilizers
- Difficulty
- Beginner to Intermediate
- Movement type
- Knee and hip flexion
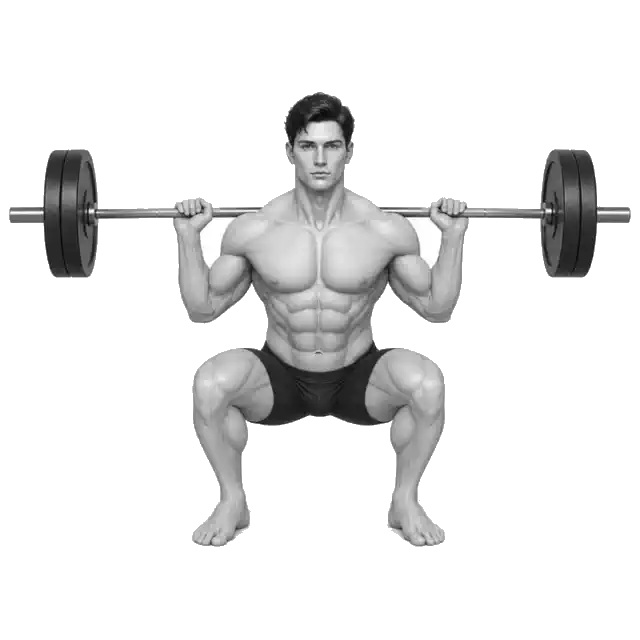
How deep should I squat?
Use the deepest position where the whole foot stays planted, the knees track with the toes, the torso remains controlled, and the bar stays balanced over the midfoot. Your appropriate depth can improve with practice and may differ from another lifter's.
STEP BY STEP
5 Steps for One Complete Rep
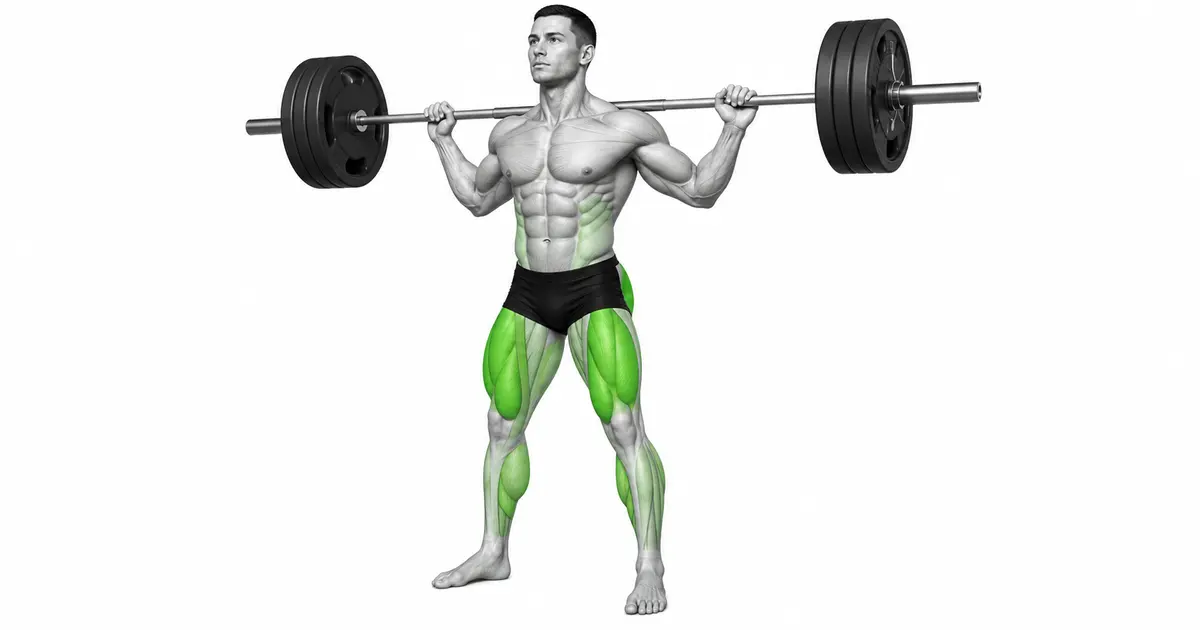
- 1
Set the rack height and safety arms
Place the bar around upper-chest height so you can unrack it without rising onto your toes or shrugging. Set the safety arms just below your controlled bottom position and center the bar evenly across the upper back or rear shoulders.
- 2
Unrack with both feet under the bar
Step under the bar, brace the torso, and stand by extending both legs together. Take only one or two steps back, then settle into a comfortable stance around shoulder width with the toes turned slightly outward as needed.
- 3
Inhale and brace before descending
Breathe into the abdomen, sides, and back of the trunk to create pressure around the entire torso. Maintain that pressure without shrugging the shoulders or forcing an exaggerated low-back arch.
- 4
Bend the hips and knees together
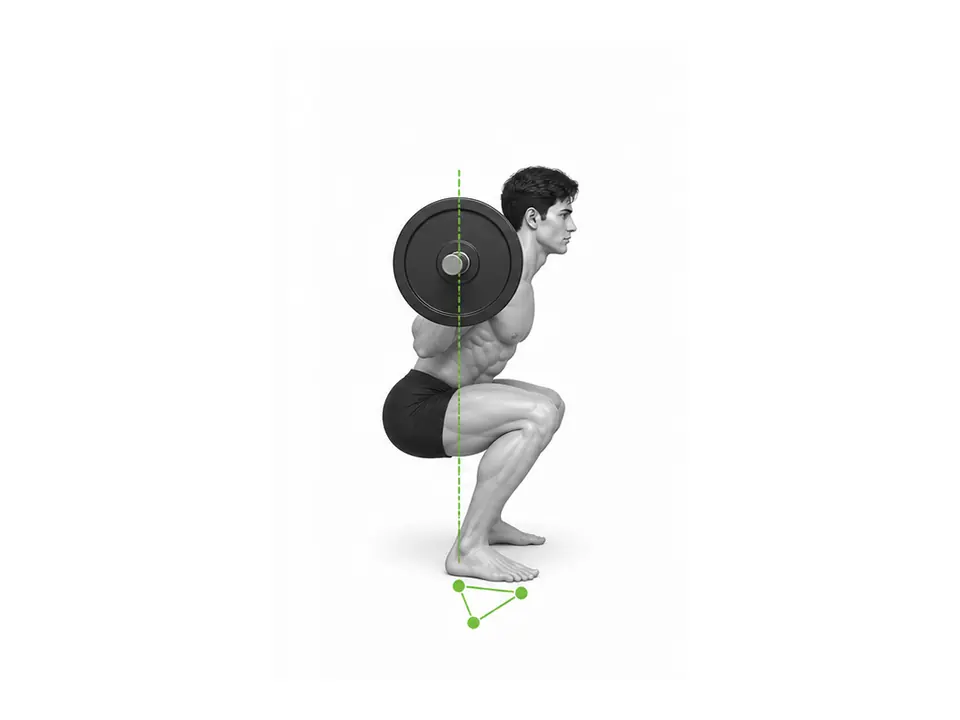
Keep the big-toe mound, little-toe mound, and heel on the floor while the hips and knees bend together. Let the knees track with the toes and keep the bar moving close to vertically over the midfoot.
- 5
Press the floor away on the same path
Reverse at the deepest position you can control. Drive through the whole foot and let the shoulders and hips rise at similar speeds instead of lifting the chest or hips alone. Exhale after passing the hardest part of the ascent.
BREATH & BRACE
Breathing sets the timing; bracing creates the support
Inhale before each repetition and make the entire trunk firm rather than pushing only the abdomen forward. Maintaining pressure through the descent, bottom position, and early ascent helps the torso resist unwanted movement under the bar.
Exhale once you are nearly standing, regain balance, and take the next breath before descending again. Do not force several repetitions into one breath. Rack the bar if you become dizzy or excessively short of breath.
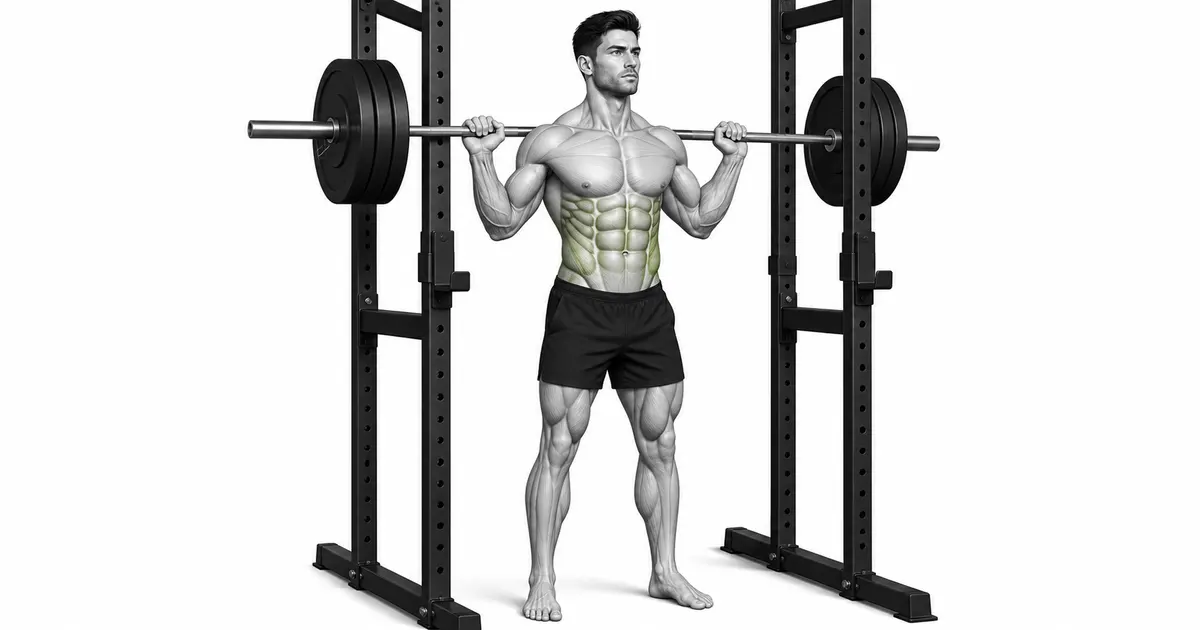
Key point: Practical cue: “Inhale → brace the trunk → descend → press the floor away → exhale near the top.”
RANGE OF MOTION
Use the deepest position you can control, not the deepest position you can force
A useful bottom position keeps the whole foot on the floor, the knees tracking with the toes, the torso controlled, and the bar balanced over the midfoot. Hip anatomy, femur length, and ankle mobility change how wide you stand and how much the torso leans.
The knees may naturally travel past the toes, especially in a deeper squat. Forcing them behind the toes can shift excessive demand toward the hips and back. Judge the repetition by combined foot, knee, torso, and bar-path control rather than one landmark alone.
KNEE TRACKING
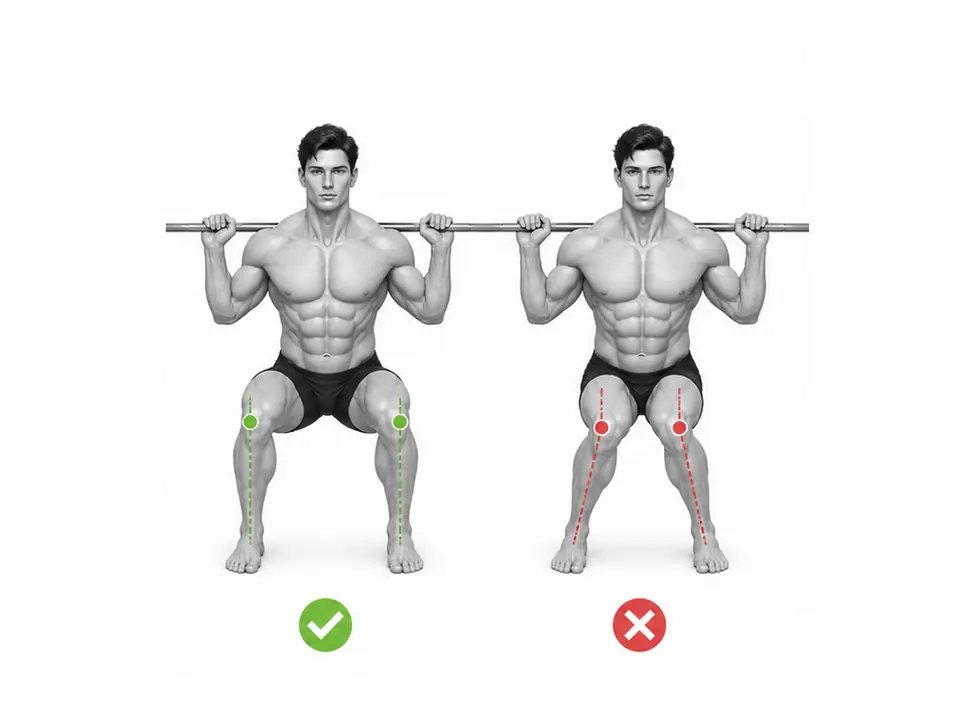
The knees and toes should travel in compatible directions
The knees do not need to remain perfectly still or point straight ahead. They should travel in a direction that matches the stance and remains controlled over the feet.
A brief small amount of inward motion is not automatically an injury, but a sudden uncontrolled collapse under load is a reason to reduce weight or depth and restore control.
TROUBLESHOOTING
Fix the cause of a mistake, not just its appearance
The knees collapse inward
- What you see
- The knees move sharply toward each other during the descent or ascent.
- Likely cause
- The load may be too heavy, or foot support and hip control may be deteriorating.
- How to correct it
- Reduce the load and practice keeping the knees and second toes moving in compatible directions while maintaining all three points of foot pressure.
The heels lift
- What you see
- Pressure shifts toward the forefoot and the heels leave the floor near the bottom.
- Likely cause
- Check ankle mobility, stance width, descent speed, and whether the bar has drifted forward.
- How to correct it
- Try a slightly wider stance and adjusted toe angle, then use only the depth where the whole foot stays planted. Weightlifting shoes can assist but do not replace control.
The lower back rounds or overextends
- What you see
- The pelvis tucks abruptly at the bottom, or the ribs flare and the low back overarches from the start.
- Likely cause
- You may be exceeding your current controlled depth or losing the brace.
- How to correct it
- Maintain the torso shape established at the start and stop just before it changes substantially. Relearn bracing with a lighter load.
The hips shoot up first
- What you see
- The hips rise while the bar and chest pause, turning the ascent into a good-morning pattern.
- Likely cause
- The load may be excessive or the quadriceps may not be maintaining the intended leverage.
- How to correct it
- Reduce the weight and use tempo or paused squats to practice raising the shoulders and hips together.
Bouncing without control at the bottom
- What you see
- You drop rapidly and rely on an uncontrolled rebound to reverse direction.
- Likely cause
- Descent speed and depth are no longer controlled, often because the load or target depth is too ambitious.
- How to correct it
- Use a two- to three-second descent and a short pause. Build control at a manageable depth and load before progressing.
REGRESSION & PROGRESSION
Match the difficulty before adding load
Box squat
Use the box height to limit depth while learning balance and the sitting path.
Bodyweight squat
Practice whole-foot support and knee tracking without external load.
Goblet squat
Hold a dumbbell at the chest to learn external loading while keeping the torso organized.
Barbell back squat
Begin with an empty bar and add weight only while the same path and speed remain repeatable.
BEGINNER PROGRAM
A practical starting framework
Practice twice per week with at least one recovery day between sessions. Begin with an empty bar or a light load that preserves your technique, and finish each set with roughly two or three repetitions in reserve.
Reps
8–10
Use a range that preserves speed and depth
Sets
2–3
Rest 2–3 minutes between sets
Load
+2.5–5%
Only when every repetition remains stable
- Increase the load slightly next session only when foot pressure, knee tracking, and torso control remain consistent through the final repetition.
- If technique deteriorates, stop adding load and reduce the weight by 5–10% to finish with clean repetitions.
- Distinguish normal muscular fatigue from sharp or persistent joint pain. Do not continue a set through joint pain.
Frequently asked questions
Is it wrong for my knees to pass my toes?
No. Knee travel past the toes can be a normal part of squatting depending on depth and body proportions. Look at controlled foot pressure, knee tracking, torso position, and bar path together.
Should I use a belt as a beginner?
A belt can provide additional feedback and support, but it does not replace learning to brace or using an appropriate load. First establish consistent technique and safe rack setup.