STEP DOWN
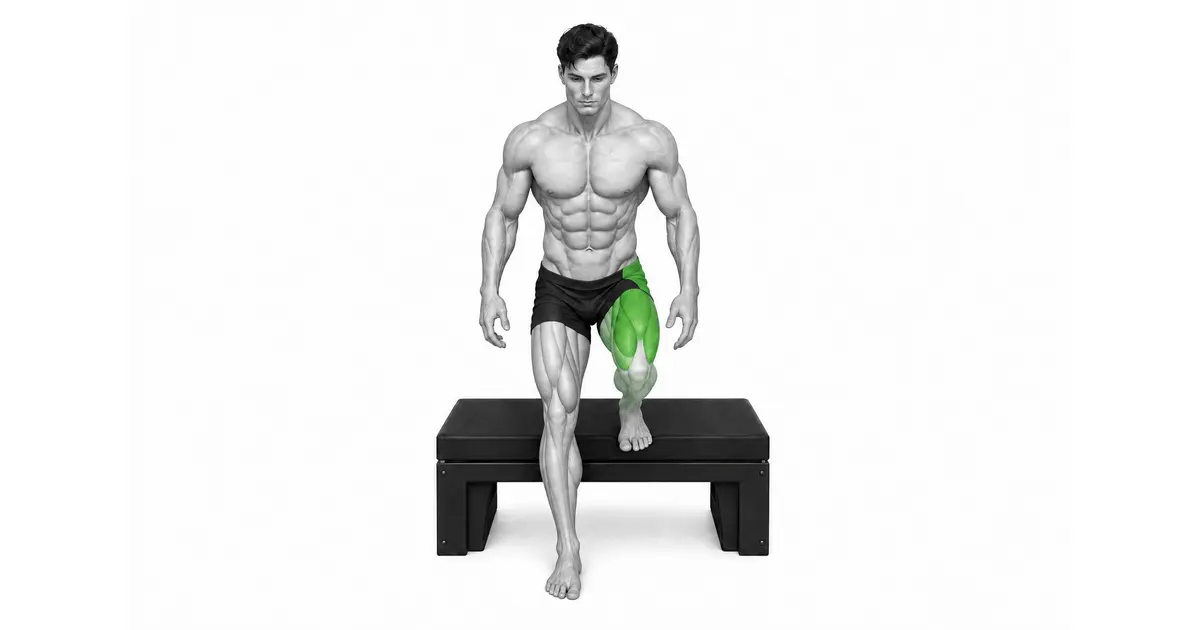
Step down is not an exercise in which you find the floor with your descending foot, but rather a unilateral control exercise in which you slowly lower your body with your supporting leg on a box.
Standing with one leg on a box and lowering the opposite heel toward the floor can train eccentric control of the quadriceps and glutes, as well as pelvic stability. If you push up with your feet on the floor or the box is too high, your goal will be lost. Start with a low height and support, and only use ranges that keep your supporting knee pointed toward your toes.
- Primary muscles
- Quadriceps and gluteus maximus
- Secondary muscles
- Gluteus medius, hamstrings, calves, ankle stabilizers
- Difficulty
- Intermediate
- Movement type
- Unilateral eccentric squat
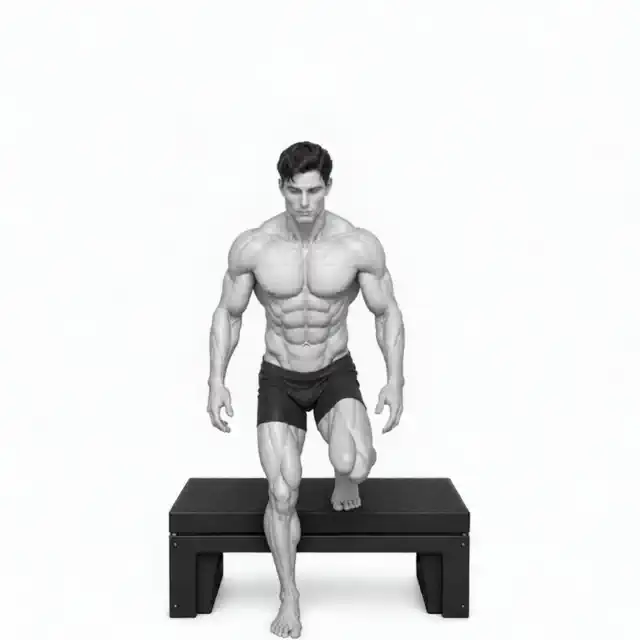
Can I place my bottom foot completely on the floor?
You can lightly touch your heel or foot, but the key is not to put your weight on it or push up.
STEP BY STEP
4 Steps for One Complete Rep
- 1
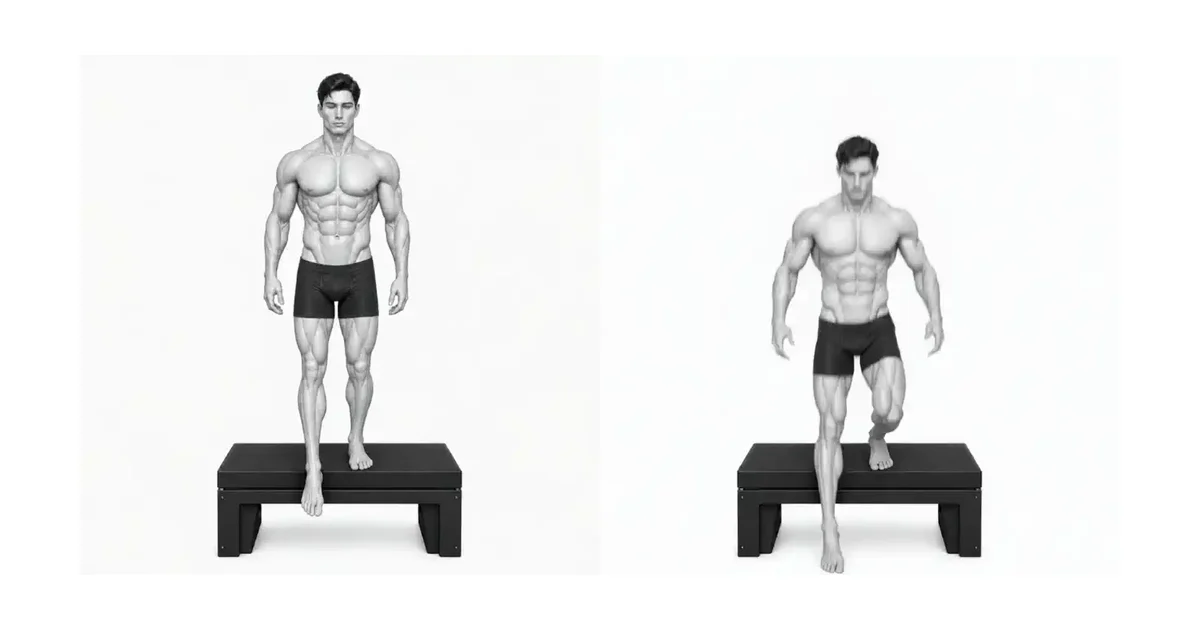
Choosing a low, steady box
Use low steps of about 10 to 20 cm at first. Make sure the entire support foot is raised and the box does not slip.
- 2
Aligning Supporting Feet and Pelvis
Stand close to the edge of the box and press the foot tripod into the floor. Keep your torso long and keep your gaze forward so that the opposite pelvis does not fall.
- 3
Bend support knee and lower slowly
For 2 to 4 seconds, bend the supporting knee and hip joint and send the opposite heel toward the floor. Your knees follow the direction of your second toe and your heels only touch.
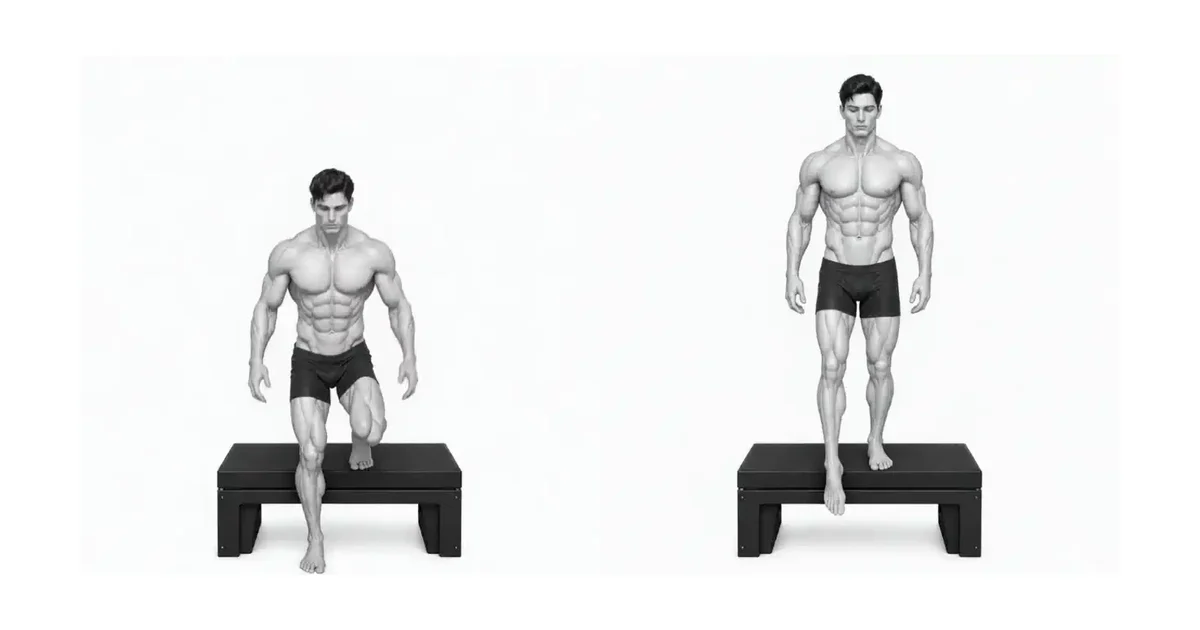
- 4
Push with foot on box to return to starting position
Push the box up with your entire support foot without putting your weight on the foot that touches the floor. Straighten your knees and hips, regain your balance, and repeat.
OWN THE SUPPORT LEG
The movement is created by the leg above the box, the foot below only provides depth information.
Unilateral eccentric control disappears when you push on the floor with your lower foot. As soon as your heel touches quietly, change direction with your foot on the box.
It is sufficient as long as the support knee and pelvis are aligned without touching the floor.
Key point: Cue to use right away: “Touch with the bottom foot, keep working with the top foot.”
PELVIS & KNEE
Pelvis level and knee orientation are more important than box height
When the opposite pelvis falls, the supporting knee is also likely to shift inward. Check your pelvic height in a mirror or with your hands.
If alignment is disrupted, reduce the balance demands by lowering the box height or supporting it.
TROUBLESHOOTING
Fix the cause of a mistake, not just its appearance
Push up off the floor with your bottom foot
- What you see
- Put your weight on the bottom foot and return like a two-legged jump.
- Likely cause
- The box is too high or the support leg strength is insufficient.
- How to correct it
- Lower the height, lightly touch your heel, and then come up with your upper foot.
Support knee collapses inward
- What you see
- During descent, the knee moves inward towards the big toe and the arch of the foot drops.
- Likely cause
- Pelvic control and foot pressure are loose or over-ranged.
- How to correct it
- Hold the support and move your knee toward your second toe, reducing the depth.
Pelvis drops to opposite side
- What you see
- The pelvis toward the lower leg is lowered and the torso is tilted to the side.
- Likely cause
- Prioritized depth over gluteus medius control.
- How to correct it
- Lower the box and use only the range that keeps both pelvic bones at the same height.
REGRESSION & PROGRESSION
Match the difficulty before adding load
Weight transfer on one side of support
Learn the pressure of one foot and the level of your pelvis.
Low box step down
Controls short eccentric range.
High box step down
Increase range when alignment is maintained.
Dumbbell Step Down
Lightly add load when left and right are at the same speed.
BEGINNER PROGRAM
A practical starting framework
Start with the weak side and apply equal heights and repetitions on both sides. For rehabilitation purposes, the pain criteria and scope take precedence over the plan of the attending specialist.
Count
6–12 times each
Descent 2-4 seconds, only touch the lower foot
Set
2–4 sets each
60–120 seconds recovery after both sides
Frequency
2–3 times a week
Considering knee response and lower body volume
- If pelvic level and knee alignment are maintained, increase either height or number of repetitions.
- If you experience pushing with your lower foot, knee collapse, or pain, immediately lower the box.
- The difference between the two is adjusted based on the control range of the weaker side.
Frequently asked questions
How high should the box be?
Start from a height that you can slowly lower while maintaining a level pelvis and knee orientation. Low boxes are difficult enough.
Can't your knees be in front of your toes?
You can move forward. It is more important that the entire foot stays together, the knee follows the direction of the toe, and there is no pain.