T-BAR ROW
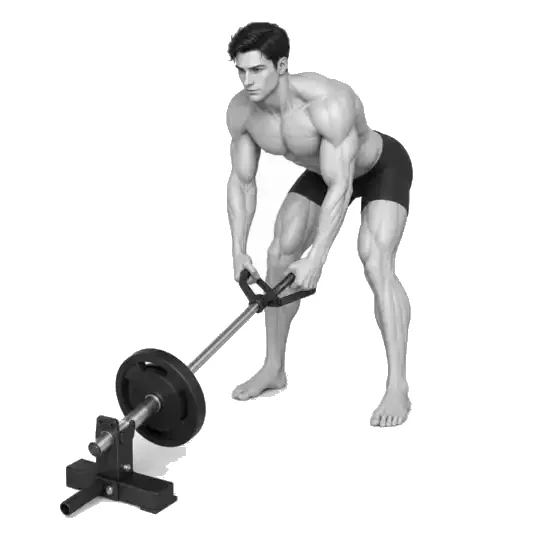
The T-bar row is an exercise that involves maintaining the torso angle while pulling along the arc of a fixed barbell.
The name T-bar row sometimes refers to both chest-supported machines, dedicated T-bar machines, and Landmine barbell variations. The movement shown on this page involves placing a barbell between your feet without chest support and pulling with the V handle attached to a bar fixed to a landmine. Therefore, you cannot leave your torso on the support like on a chest support machine, and you have to maintain hip hinge and torso tension with your hips back throughout the set. There is limited research directly comparing the posture of the T-bar row itself. Among the evidence below, the unsupported bent over row study provides the closest torso conditions for this movement, while the chest supported front barbell row study provides a reference for understanding the range of motion for horizontal pulls. Because the equipment and posture are not exactly the same, specific muscle activation values cannot be directly translated into T-bar rows.
- Primary muscles
- lats
- Secondary muscles
- Central trapezius, rhomboids, rear deltoids, biceps brachii, erector spinae, gluteus muscles, hamstrings
- Difficulty
- Intermediate
- Movement type
- Maintain hip hinge and pull both arms horizontally
What is the difference between T-bar rows and barbell rows?
The T-bar row in this video uses an arc with one end of the barbell fixed to a landmine and a neutral V handle. Barbell rows involve the entire bar moving freely and are usually held overhand or underhand. Both use an unsupported hip hinge, but the direction of force, wrist and elbow path, and equipment stability are different.
STEP BY STEP
6 Steps for One Complete Rep
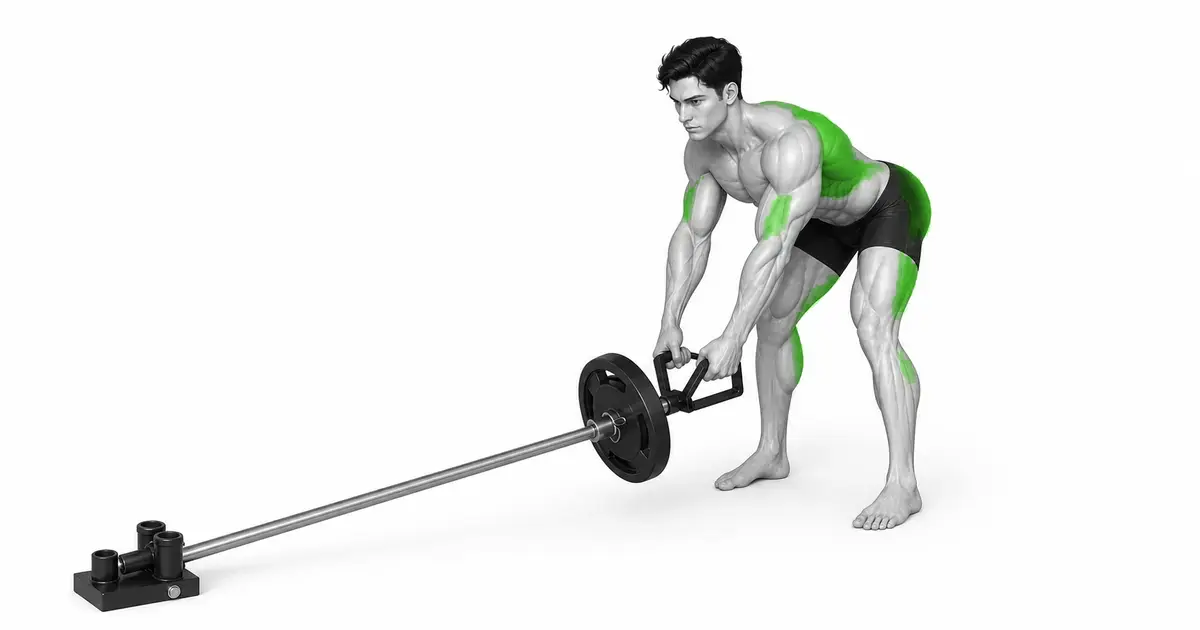
- 1
Check that the landmine, handle, and disc are fixed.
Make sure the tip of the barbell is fully inserted into the dedicated landmine shaft, the V-handle is hung symmetrically under the bar, and the disc is locked with the collar that matches the bar. Avoid impromptu leaning the bar against the edge of the wall as this may cause the bar to move and damage the installation.
- 2
Stand wide with the bar between your feet
As shown in the video, stand on the extension of the bar with your feet between the bars. Place your feet slightly wider than your hips, with your toes in a comfortable direction, and bend your knees slightly to make sure the bar and disc are not touching your shins or feet.
- 3
Send your hips back to create a hip hinge
Instead of just lowering your chest, tilt your torso by sending your hips back. Maintain a near-neutral length from head to pelvis, and make your stomach tight to prevent your torso from being pulled in the direction the bar is pulled.
- 4
Hold the V-handle with a neutral grip
Hold both handles in the same position with your palms facing each other. At the bottom of your arms, keep your neck long enough to keep your shoulders from rising to your ears, and set a controllable starting height just before the disc touches the floor.
- 5
Pull your elbows back to your sides
Press the soles of your feet into the floor, maintain an angle to your torso, and send your elbows back and close to your body. Aim the handle between your lower sternum and upper abdomen, but do not raise your chest or arch your back to touch the handle to your body.
- 6
Put it down in the same arc for 2–3 seconds.
At the top, take a short, controlled movement without shrugging your shoulders, straighten your elbows, and lower the bar along the arc of the landmine axis. Start the next repetition without bouncing the disc on the floor or relaxing your torso.
SETUP & BAR PATH
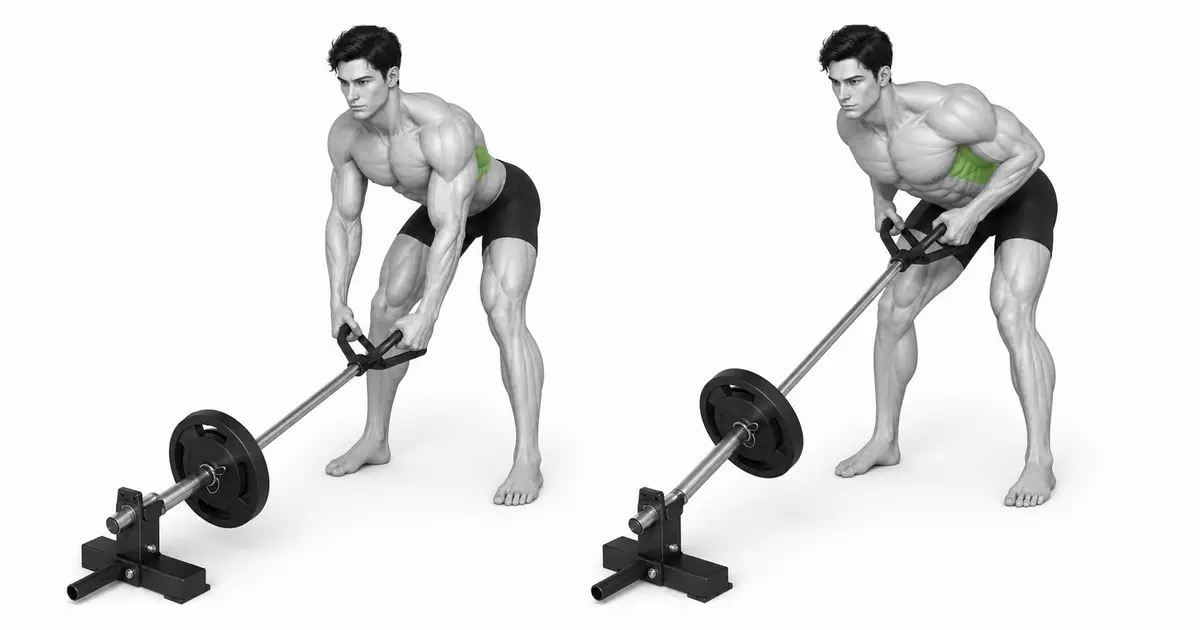
A barbell with a fixed point draws an arc around the landmark axis rather than a straight line.
When one end of the barbell is secured, the handle does not rise and fall completely vertically like a free weight barbell row. If your body is too far from the anchor point, the bar will drag you forward as you get closer to the top; if it's too close, the discs and handles may hit your legs or torso. Slowly check the bottom and top with an empty bar or light disc to find the natural distance between the handle and your lower sternum and upper abdomen.
If you overlap multiple large-diameter disks, the disks may contact the floor or body first, shortening the lower range of motion. If the total weight is the same, use a disk with a smaller diameter if necessary, but the manufacturer's allowable load and collar fixation must be observed. It is not recommended to stand on unstable footing to increase range of motion.
HIP HINGE & TRUNK
T-bar rows without chest support require back pull and torso support at the same time.
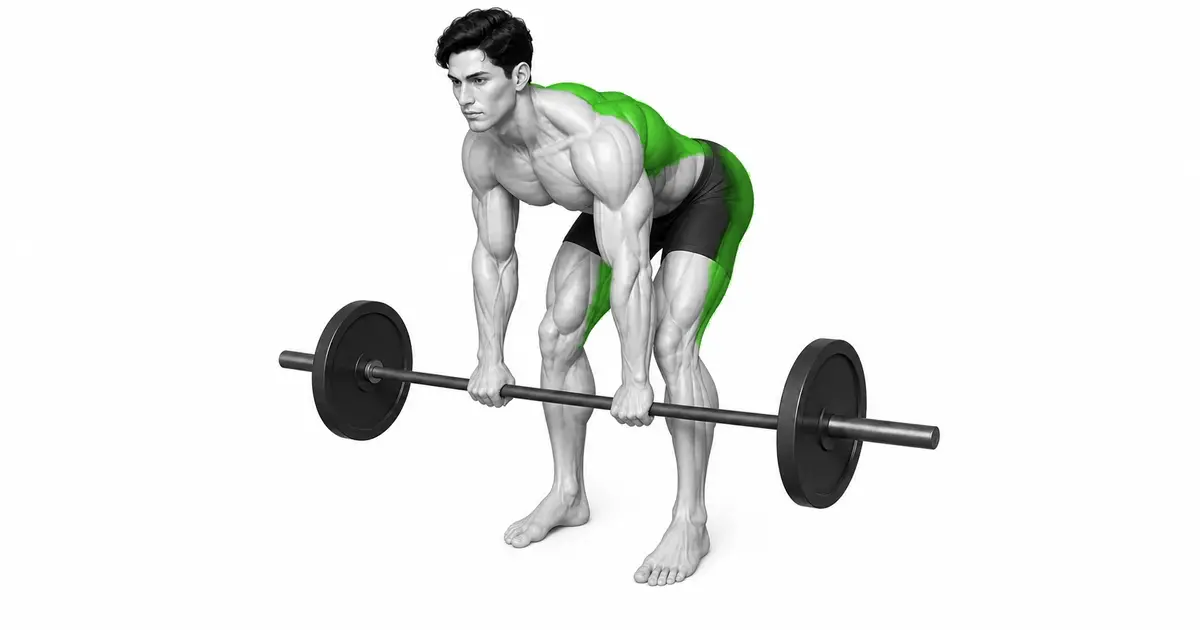
A study comparing unsupported bent over rows to other rows showed the greatest lumbar load along with greater muscle activation across the back. Although this study is not the exact same landmark as the T-bar row, it supports the idea that torso control must take precedence over weight in squat rows without chest support.
Instead of locking your knees, drive your hips back and let your glutes and hamstrings support your position. If your chest lifts loudly and your hips stick forward with each repetition, you are moving the bar through lower body reaction rather than pulling it to your back. It is a good idea to take a side profile photo before the set to check whether the relationship between the head, ribs, and pelvis and the angle of the torso are similar for each repetition.
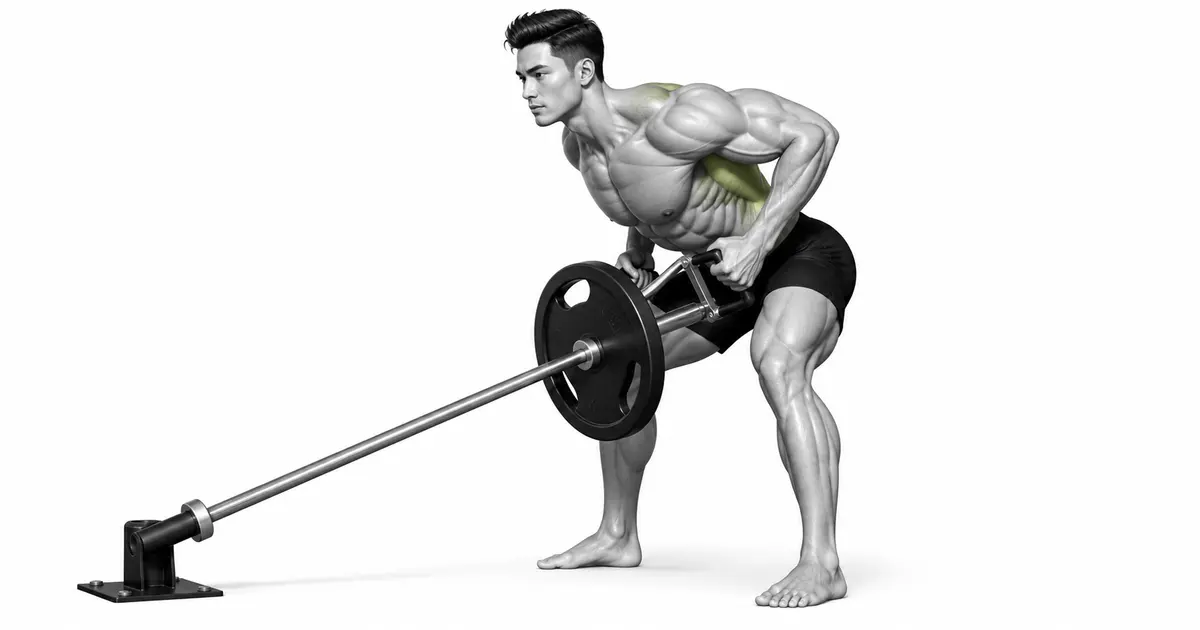
Key point: If your lower back tires first: Lower the weight and shift your load to chest-supported rows or place T-bar rows at the front of the session.
ELBOW & SCAPULA
Neutral V handles keep your elbows close to your body but without forcing your shoulders back.
In the near neutral grip shown in the video, the elbows are moved back so as to graze the sides and the handle is closer to the upper abdomen. Spreading your elbows wide apart to shoulder height can change the proportion of your back and upper back and the feel of your shoulders. This page is based on the near elbow path mapped in the image.
When you extend your arms, your shoulder blades naturally move forward over your ribs, and then back when you pull them back. There is no need to tighten your shoulder blades all the way from the beginning or pull your shoulder up to your ear at the top. If the elbow path and torso angle collapse before the handle touches the body, that point is the current controllable top.
TROUBLESHOOTING
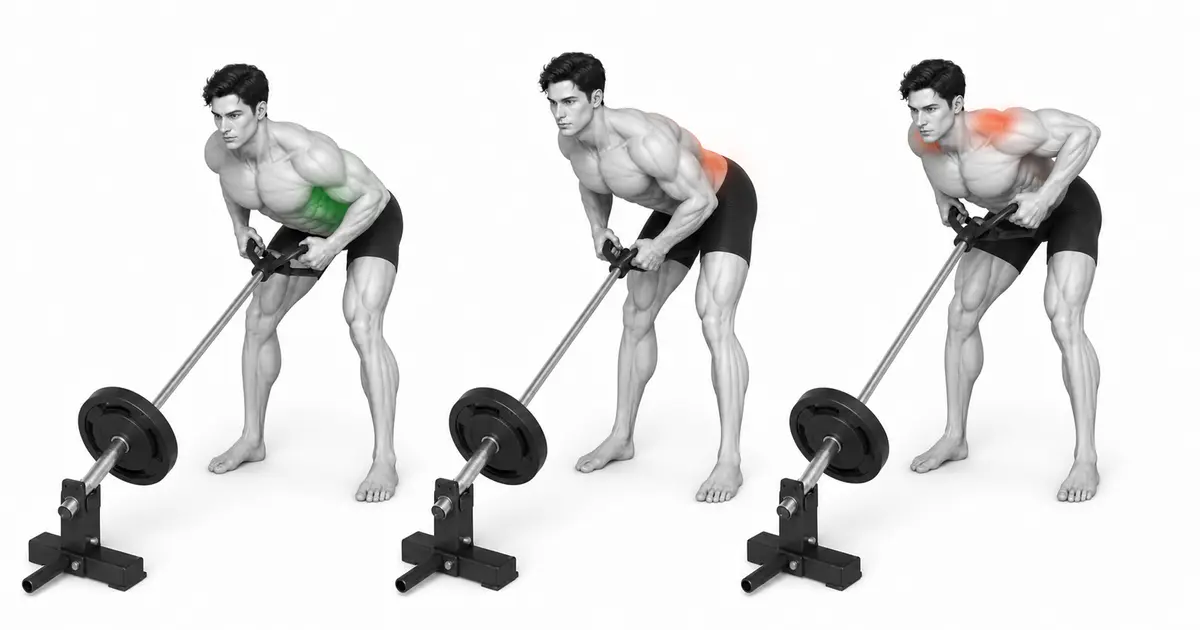
Fix the cause of a mistake, not just its appearance
Pull the torso upright with each repetition.
- What you see
- Towards the top, your chest lifts, your hips push forward, and the speed of the bar suddenly increases.
- Likely cause
- The weight exceeds your ability to control your back and torso, or you want to make sure the handle touches your body.
- How to correct it
- Lower the weight, set your torso angle at the bottom, and pull only within that angle. You can lower the top height a little.
rounded back
- What you see
- As you lower yourself to the bottom, your pelvis rolls, the center of your back rounds, and you lift your neck to look forward.
- Likely cause
- There may be a lack of hip hinge range of motion, or you are creating range in the spine to lower the disc further.
- How to correct it
- Bend your knees a little more and send your hips back. Lower only as high as you can maintain neutrality, and use a smaller diameter disc if necessary.
Shrug your shoulders and spread your elbows
- What you see
- The neck is shortened, the elbows are spread apart at shoulder height, and the handle is raised above the chest.
- Likely cause
- You may feel like you need to squeeze harder at the top, or you'll only be pulling the bar up with your arms.
- How to correct it
- Keep your neck long and your elbows behind your sides. Relearn the route with light weights with the handle pointing toward your upper abdomen.
Disc bounces on the floor
- What you see
- There is an impact sound at each bottom, and the next repetition begins with a kickback, with a brief release of torso tension.
- Likely cause
- The descent speed is too fast or the range of motion is excessive compared to the current disc diameter.
- How to correct it
- Lower for 2–3 seconds and stop just before you hit the floor. If the goal is to reset each repetition, come to a complete stop, then strain and pull again.
Skip fixing the landmark, handle, and collar.
- What you see
- The anchor points may move, the V-handle may shift to one side, or the disk may be pushed outward.
- Likely cause
- I thought it was ok because it was a light prep set, but I didn't check the equipment specifications.
- How to correct it
- Check dedicated landmarks, handle centers and disc collars before every set. Do not start the set with moving equipment.
REGRESSION & PROGRESSION
Match the difficulty before adding load
chest support machine row
First learn horizontal pulls and shoulder movements using torso support.
Seated Cable Row
Use footrest and cable resistance to familiarize yourself with your elbow path but limit torso kickback.
Light Landmine T-Bar Row
On equipment like the video, 2–3 second descents and a fixed torso angle are prioritized.
Top 1 second stop T-bar low
Hold a light weight at the top for one second to reduce shoulder shrug and torso kick.
Standard weight T-bar row
Increase in smallest increments when the same path and speed are maintained for all target repetitions.
BEGINNER PROGRAM
A practical starting framework
It can be used 1–2 times a week as a two-arm horizontal pull for back exercise. Because of the unsupported hip hinge, your lower back and grip may tire before your lats, so on days like deadlifts or barbell rows, calculate total hip hinge fatigue as well.
number
Episodes 6–12
A weight that leaves about 2 reps to spare.
set
2–4 sets
1.5–3 minutes recovery between sets
speed
1 second pull up, 2–3 second down
Maintain body angle and arc
- The first set of preparations is a blank bar or light disc to check your gear anchorage, foot placement, and disc impact point.
- Increase in smallest increments only when you achieve the top of your reps on every set and maintain torso angle, elbow path, and rate of descent.
- If you start to curl your back, lift your torso, or bounce the disc, end the set on that rep and lower the weight or number of reps for the next set.
Frequently asked questions
Where do you pull the handle: your chest or your stomach?
In a close neutral grip like the one shown in the video, the space between the lower sternum and the upper abdomen is natural. If you have to raise your torso or shrug your shoulders to reach the handle, stop at the control point before you reach it.
Should your torso be parallel to the floor?
They don't necessarily have to be parallel. The angle may vary depending on the individual's hip hinge range of motion and the arc of the equipment. The important criteria are that your back shape and torso angle do not change significantly during the set and that the bar passes safely over your legs and torso.
Is there a reason to use a small disk?
A large disc may touch the floor first at the bottom, reducing the range of motion. If you use the same weight with a smaller diameter disc, you can create a longer range, but if your lower back curls the deeper you lower it, it is better to shorten the range.
What should I do if my back hurts or gets tired first?
Lower the weight and reach and re-establish hip hinge and tummy tension. If the pain is sharp or spreading rather than simple muscle fatigue, stop. To reduce back strain and gain more back training, you can switch to chest-supported rows or seated machine rows.
Evidence and references
- 1. Fenwick et al. — Comparison of trunk muscle activity, spine movement and load by row variation
- 2. Saeterbakken et al. — Comparison of core muscle activity in two-arm, one-arm and unstable conditions
- 3. Fischer et al. — Comparison of muscle activity by range of motion for chest-supported front barbell rows
- 4. Youdas et al. — Back and trunk muscle activity by grip and support conditions for inverted rows
- 5. Krings et al. — Effect of thick grip on muscle activity and maximal strength in bent over rows