TRICEPS PUSHDOWN
Pushdowns are not a push with the torso—elbows are locked, controlled, and extended
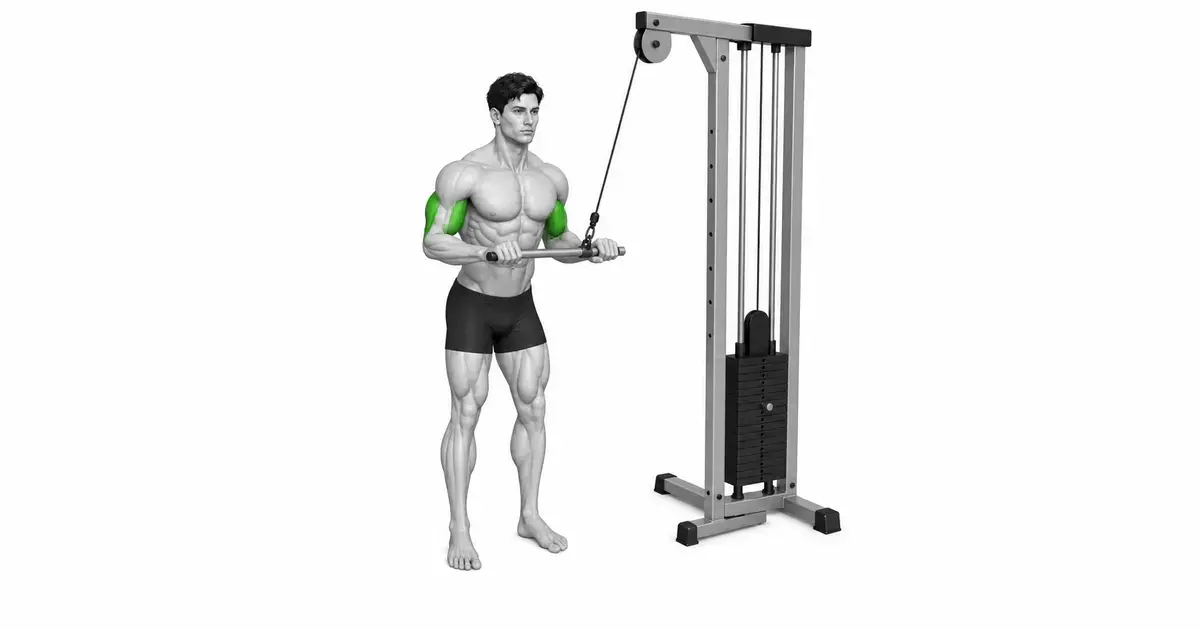
Use a rope on a high cable, keep your torso straight and extend only at the elbows. Keep your torso tight, your wrists neutral, and control each repetition. The practical criterion is not a heavier weight or locking your elbows all the way, but a cable path and range of motion that are stable and comfortable for you.
- Primary muscles
- Triceps brachii
- Secondary muscles
- Forearm muscle, abdominal stabilizer muscle
- Difficulty
- Beginner
- Movement type
- Elbow extension
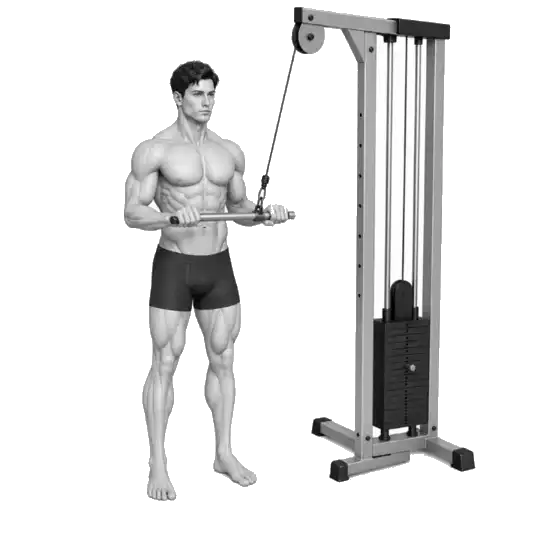
How high should the cable be set?
Set the pulley above head height. A higher line of pull keeps your torso vertical and makes it easier to press straight down with your elbows close to your sides.
STEP BY STEP
6 Steps for One Complete Rep
- 1
Set cable high
Attach the rope to a pulley set above head height. Make sure the selector pin is secure and choose a weight that will control your target reps.
- 2
Taking a stable stance
Stand with your hips width apart or use a staggered stance slightly spread forward and backward. Keep your torso firm, maintain the natural curve of your lower back, keep your torso vertical and your shoulders pulled back and down.
- 3
Grip and Alignment
Grip the rope firmly with your entire hand, with your palms facing each other. Place your upper arms close to your sides, your wrists neutral and your elbows slightly in front of your hips.
- 4
Extend elbow and press
Exhale and straighten your elbows to press down on the rope. Keep your upper arms next to your body, do not shrug, and do not lock your elbows all the way to the floor.
- 5
Return control
Inhale and bend your elbows to slowly and controlledly raise the rope for about 2 seconds. Stop rising just before your elbows begin to move forward away from your torso.
- 6
Repeat until end of set
Maintain posture, neutral wrists, and steady breathing. Maintain form and tempo and finish the set with 1–3 reps to spare.
CABLE SETUP
Height, stance and grip settings for clean mechanics
Start by placing the attachment above head height so the line of pull is in a straight downward pressure path. Hold the rope firmly with all hands, and stand in a hip-width or slightly staggered stance for balance. Keep your torso firm, maintain the natural curve of your lower back, and keep your torso straight and vertical. Before starting the set, pull your shoulders back and set them down before the first repetition to minimize shoulder movement during the set.
Keep your upper arms close to your sides with your elbows pointing down, keeping your wrists neutral the entire time. This alignment places the tension squarely on the triceps and reduces strain on the wrists. Choose a load that you can control without tilting or rocking your upper body and without letting your elbows leak forward as the weight rises.
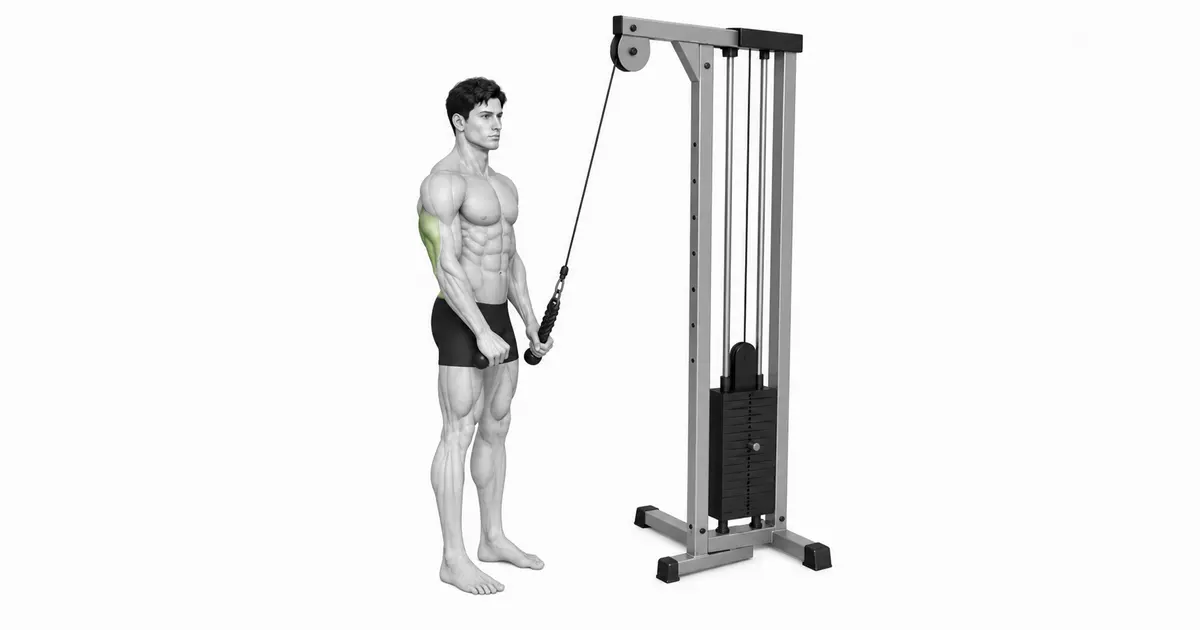
Key point: Height straight, torso tight, wrists neutral—rope above head height.
ELBOW PATH
Fix elbows and move only hinges
With your upper arms by your sides, press down on the rope with your elbows extended. Avoid spreading your elbows or rolling your shoulders forward. Rather than ending with a bang by locking your elbows hard all the way, keep your elbows soft at the bottom and think of “the feeling of extending your arms.” Opening the rope slightly at the bottom will help keep your wrists neutral on the finish.
Maintain control over the handlebars for about 2 seconds while coming up, and immediately stop the return the moment your elbows start to move forward away from your torso. Forward elbows result in greater lat involvement and less triceps stimulation, often leading to torso sway. To move your elbows into a clean hinge, keep your torso vertical and your shoulder blades set down.
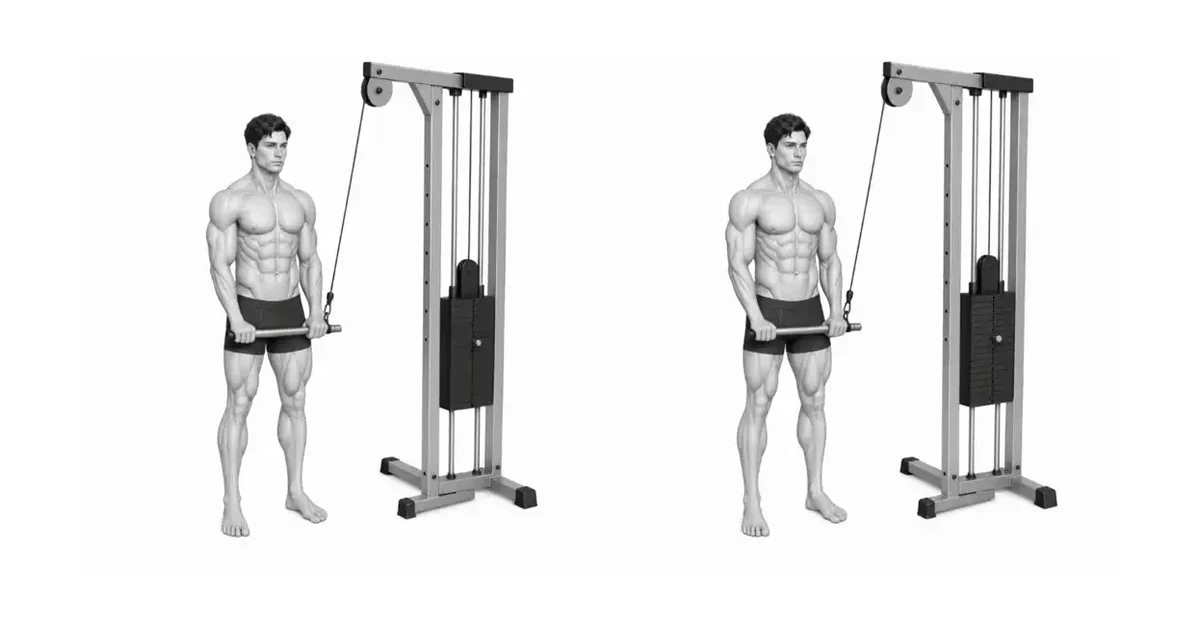
Key point: Keep elbows next to ribs; Stop before it leaks forward.
LOAD CONTROL
Guiding the load with tempo and constant tension
Choose a weight that allows you to perform and control the lowering section in about 2 seconds and the pressing section in about 1 second without leaning, shrugging, or bending your wrists. This stable tempo serves as a baseline for repeatable checks of range of motion, wrist position, and torso control. Complete each set with 1–3 reps to spare, and don't lock your elbows all the way. Use a controlled and comfortable near-full extension range.
2025 In a within-participant comparison study in untrained adults, unilateral pronated grip cable pushdowns were compared under strict form versus external momentum conditions, performed for 4 sets of 8–12 reps twice a week for 8 weeks. They reported similar hypertrophy changes despite greater volume loading in the momentum condition. This does not prove that Momentum is safer, necessary, or appropriate for any individual. The rigorous conditions of the study involved participants holding the torso vertically and using about 2 seconds of descent and about 1 second of press at 0° of shoulder flexion/abduction—use this as a practical baseline if you're unsure about repetition tempo.
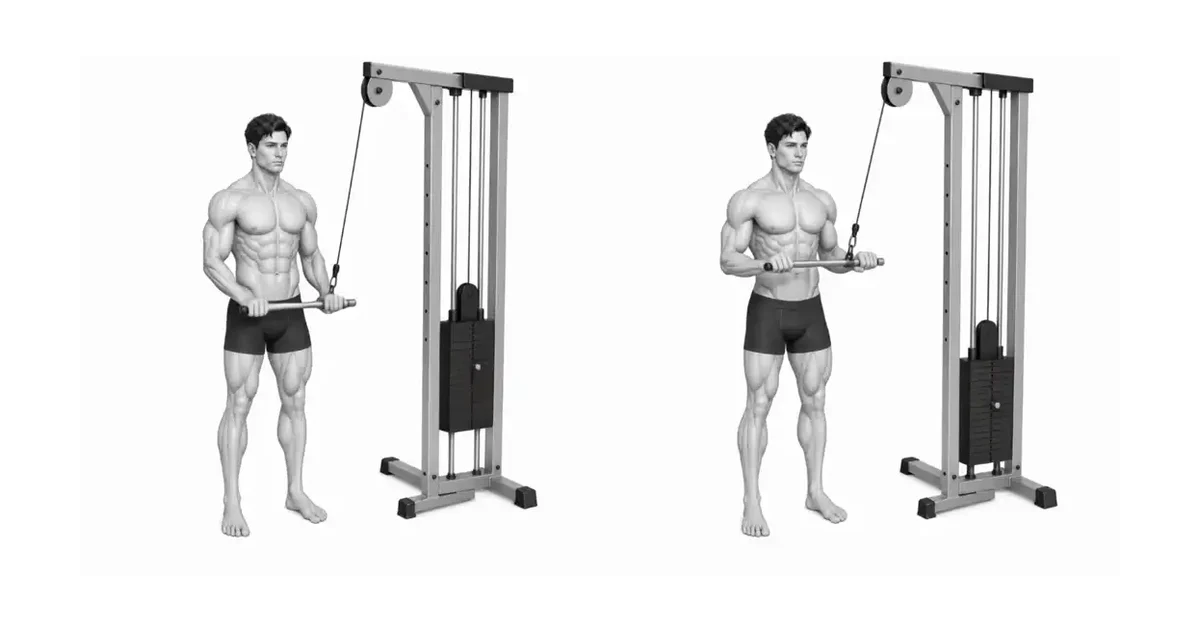
Key point: Control all sections and do not lock your elbows too hard all the way.
TROUBLESHOOTING
Fix the cause of a mistake, not just its appearance
Lean or shake your torso
- What you see
- Lean forward or bounce your hips as you begin to press.
- Likely cause
- Too heavy or lacking bracing.
- How to correct it
- Reduce the load, adopt a hip-width or staggered stance, keep your torso firm and torso vertical.
Elbows leaking forward
- What you see
- At the top, the elbows slide in front of the body and the shoulders move.
- Likely cause
- Allows shoulder flexion or return too far up to aid lifting.
- How to correct it
- Stop the return just before the elbow moves forward; Keep your upper arms close to your sides.
Elbows flared outward
- What you see
- During the press, the upper arm is angled away from the ribs.
- Likely cause
- Grip or load induces shoulder abduction, or shoulder setting is poor.
- How to correct it
- Pull your shoulders back and set down, use a rope to keep your wrists neutral, and choose a controllable load.
Wrist twisted or hyperextended
- What you see
- Wrist cocks back or rolls forward under load.
- Likely cause
- Excessive grip, bar path too far from body, attachment height too low.
- How to correct it
- Use a tight full grip with neutral wrists; Keep the pull line close to your body and set the cable above head height.
Excessive elbow lockout
- What you see
- It goes from the bottom to the end range with a ‘snug’ lock.
- Likely cause
- Chasing the sensation of being ‘squeezed’ with excessive force or speed.
- How to correct it
- Finish the bottom with your elbows almost fully extended, but don’t slam them into the end range. Control the last few degrees and use a range that remains comfortable.
REGRESSION & PROGRESSION
Match the difficulty before adding load
Standard Rope Pushdown (Baseline)
Two-hand rope, strict elbow extension, 2-second descent, 1-second press. Master the posture and route first before proceeding.
Single arm rope or D-handle
Train one side at a time to refine elbow position and reduce compensation. Keep the load light so you can maintain control.
Reverse Grip Pushdown
Use a supinated or semi-supinated grip, slightly altering the forearm demands but keeping your elbows close to your side.
Tempo Emphasis
Increase the tension time by increasing the descent to 3–4 seconds, but maintaining the same range and position.
BEGINNER PROGRAM
A practical starting framework
Use a manageable load, keep your elbows close to your sides, and control each repetition. Increase the number of repetitions before increasing the weight.
Number of repetitions
10–15
2 second descent · Press for about 1 second and finish 1-3 times with some time to spare.
Set
2–3
Rest 60–90 seconds between sets.
Progress
+1–2 times
Add repetition per session; Once you're past the top of the range in a controlled manner, slightly increase the load.
- Select a load that allows for a controlled 2-second descent and approximately 1-second push without torso swing.
- Set your upper arms close to your body, wrists neutral, and shoulders pulled back and down.
- Maintain triceps focus by stopping the return just before the elbows leak forward. To maintain rigor, restart the next iteration where necessary.
Frequently asked questions
Can I lock my elbows underneath?
No. Don’t ‘just’ lock your elbows all the way, but finish at almost full extension. Use a controlled, comfortable range, keeping your upper arms close to your sides.
Rope and Straight Bar—Is there a difference?
The rope allows for a path that leaves the wrist neutral and slightly outward at the bottom, which is often easier on the wrist and helps keep the elbows together. A straight bar can also be used as long as you can keep your wrists and elbows in a neutral position.