WIDE GRIP PULL-UP
Wide pull-ups are not an exercise that necessarily widens your hands, but are a technique of choosing a path that your shoulders can handle.
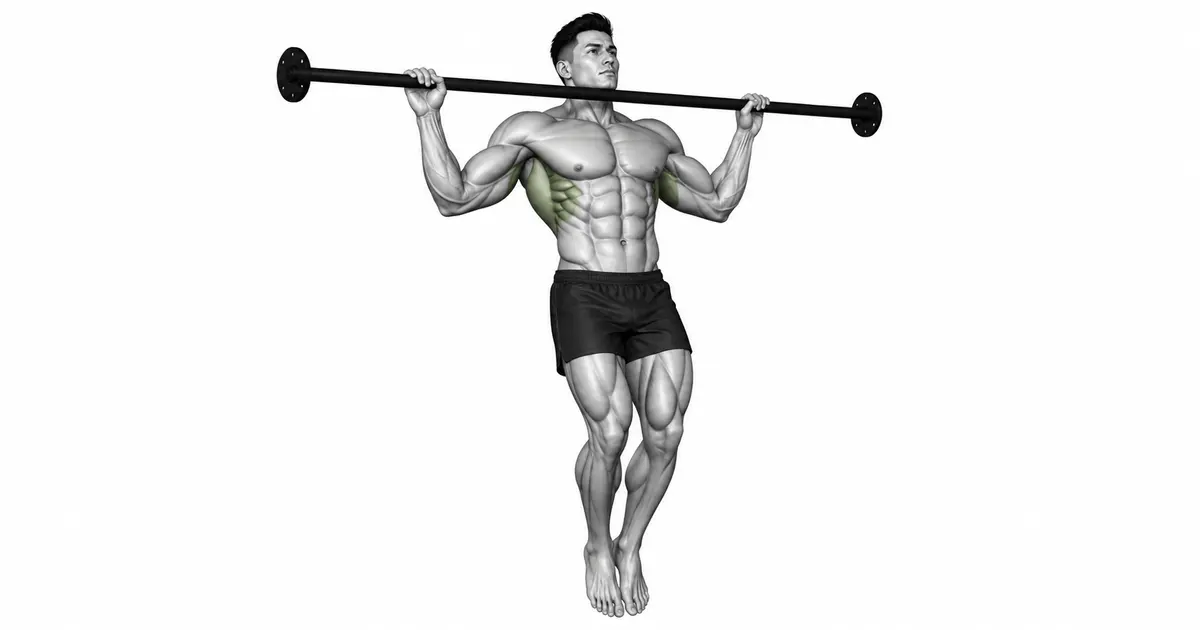
The movement shown on this page is a behind-the-neck wide pull-up where you hang with a wide overgrip and place the bar behind your head and neck. This is a different variation from the typical wide pull-up where you pull up to the front of your face and chest. A study analyzing 11 experienced participants observed a pattern of wide pull-ups in which the arms were externally rotated at approximately 90 degrees and the range of motion of the shoulder forward and backward was reduced, which the researchers interpreted as a kinematics that could be associated with the risk of subacromial impingement. This does not mean you will be injured once you do it, but it is a red flag from a small observational study. Therefore, when following this demonstrated path, pain-free overhead mobility and sufficient pulling strength are required, and it is practical for most learners to start with wide pull-ups by pulling the bar in front of the face and upper chest.
- Primary muscles
- Latissimus dorsi, middle, lower trapezius
- Secondary muscles
- Biceps brachii, brachialis, rotator cuff, forearm, core
- Difficulty
- Advanced
- Movement type
- Wide overgrip vertical pull / body weight exercise
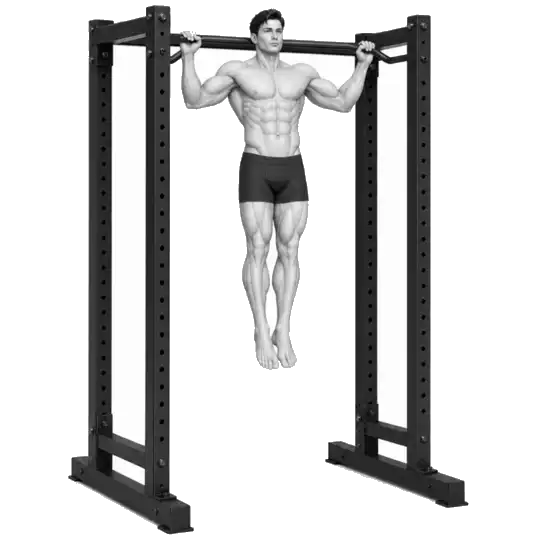
Do I have to lower the bar to the back of my neck like in the video?
no. This video shows a behind-the-neck variation, but touching the bar to the neck is not a required repetition criterion. Keep your neck neutral and raise your shoulders only as far as is comfortable. If uncomfortable, pull the bar in front of your face and upper chest.
STEP BY STEP
6 Steps for One Complete Rep
- 1
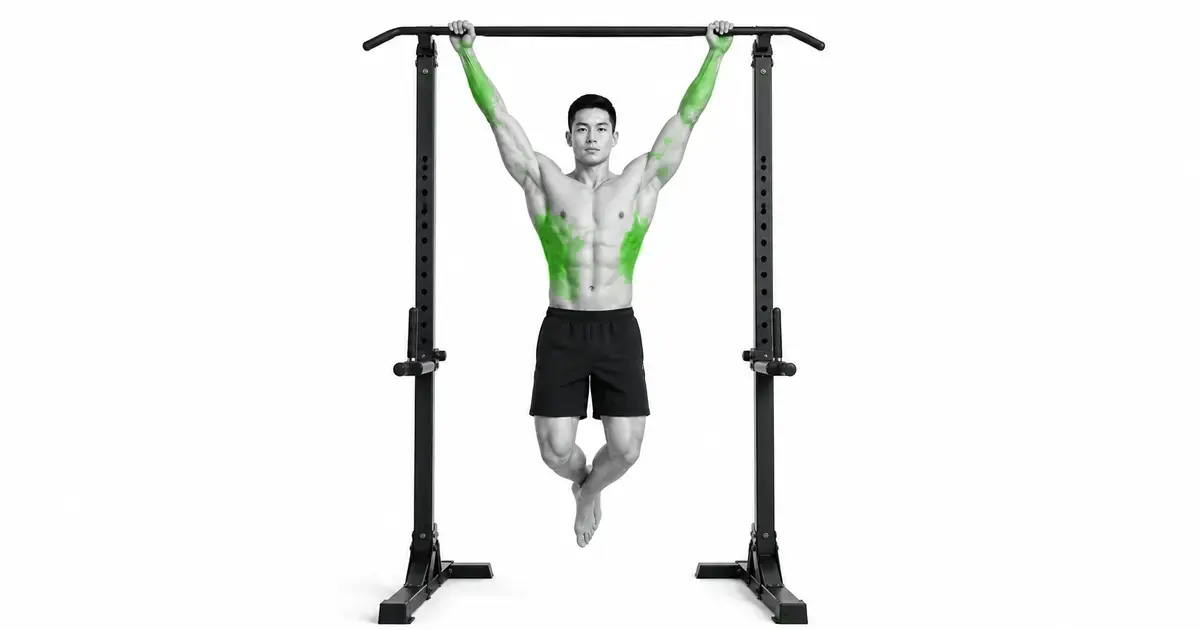
Check the iron bar and surrounding space
Check the fixation status and allowable load of the iron bar and power rack, and remove the bench and disk below. Climb up to the high bar with steady footing and make sure you have room to safely put your feet down when you lose strength.
- 2
Start at about 1.3–1.5 times the width of your shoulders.
Grab your thumb with an overgrip with your palm facing forward. ‘As wide as possible’ is not the standard. When hanging with your elbows almost straight, choose a width that does not bend your wrists too much and does not pinch the front or top of your shoulders.
- 3
Create a controlled bottom by stacking the ribs and pelvis.
Keep your legs still and lightly apply pressure to your stomach and buttocks. Don't force your shoulders all the way down from your ears; give your shoulder blades room to move upward, but keep your grip and torso tense so they don't hang suddenly at the joints.
- 4
Raise your body by sending your elbows down
Exhale and pull your elbows down and to your sides. If you do the behind-the-neck route in the video, don't duck your head first to avoid the bar, but rather move your entire torso in front of the bar within a pain-free shoulder movement.
- 5
Position yourself at the top with your neck neutral
Don't aim for the bar to touch the back of your neck. Stop as far as you can control, just before extending your neck forward or pulling your shoulders toward your ears. If you feel uncomfortable, immediately change to pulling the bar toward the front of your face/upper chest or tighten your grip.
- 6
Go down the same path for 2–3 seconds
Slowly straighten your elbows and control your descent. Complete the repetition before your body falls or your legs shake, then regain your balance at the bottom and begin the next repetition.
VIDEO VARIATION
The movement in the video is a difficult variation where the bar goes behind the neck.
The name wide pull-up usually refers to an overgrip that is wider than the shoulders, but it does not specify a single upper path. The demonstrated movement is a behind-the-neck variation that starts at the front and, as you rise, your torso moves in front of the bar and the bar rests behind your head. A typical front wide pull-up brings the bar in front of your face toward your upper chest, so you should not think of the two as the same movement.
The behind-the-neck route requires shoulder external rotation and shoulder movement with the arms wide apart to the sides. Pushing the head forward to create space does not address shoulder range of motion, but rather compensates with the neck. If you have pain when you raise your arms overhead or your shoulders are uncomfortable even at an empty hang, don't try this variation and choose the front path or medium-width pull-ups.
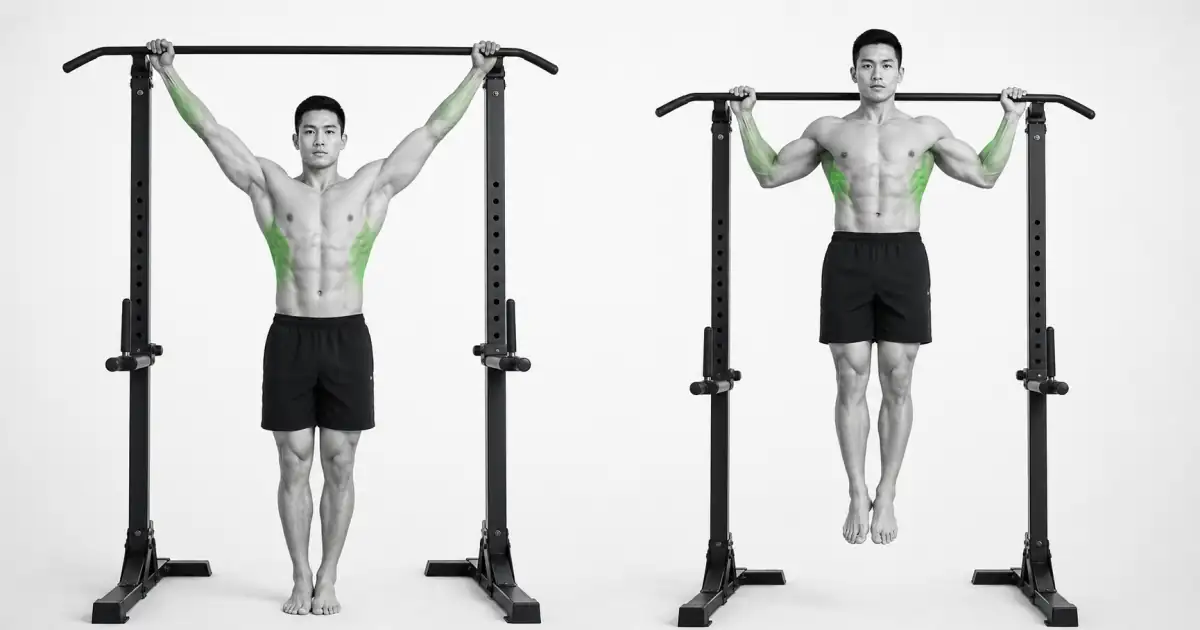
Key point: Points to check in the video: The bar should go behind the neck, but the neck should not bend forward to avoid the bar.
GRIP & MUSCLES
Holding it wider does not automatically increase lat stimulation.
With pull-ups, regardless of grip, the lats, elbow flexors, trapezius muscles, and forearms pull up the weight together. In an electromyography study comparing over, under, neutral, and rope grips, the muscle activity of the shoulder, arm, and forearm for all repetitions was generally similar, and the overgrip showed higher central trapezius muscle activity than the neutral grip. Electromyography is electrical activity under specific conditions and does not directly predict long-term muscle growth.
In the lat pulldown study, overgrip increased lat activity compared to undergrip, but no difference in lat muscle was seen between shoulder-width and wide grips. While you cannot directly transfer pulldown results to bodyweight pull-ups, this does not support the simple claim that a wider grip builds a wider back. Choose the narrowest wide grip that keeps your shoulders comfortable and lets you control the full range of motion.
SHOULDER PATH
Leaves space for the shoulder blades to move and prevents neck and back compensation
At the bottom of the arm raising above the head, the shoulder blades should also be able to rotate upward and rise above the ribs. Do not keep your shoulders all the way down or, conversely, relax them completely and suddenly put weight on your joints. Natural movement of the shoulder blades and control of the grip and torso can be maintained at the same time.
If you kick your legs or arch your back when ascending, you will fill the range with inertia instead of pulling force. In the behind-the-neck variation, it is easy to compensate by bending the neck forward. Shoot from the side or back with each repetition to make sure the relative positions of your ears, ribs, and pelvis don't change significantly, and if they do, increase your assistance or return to the front path.
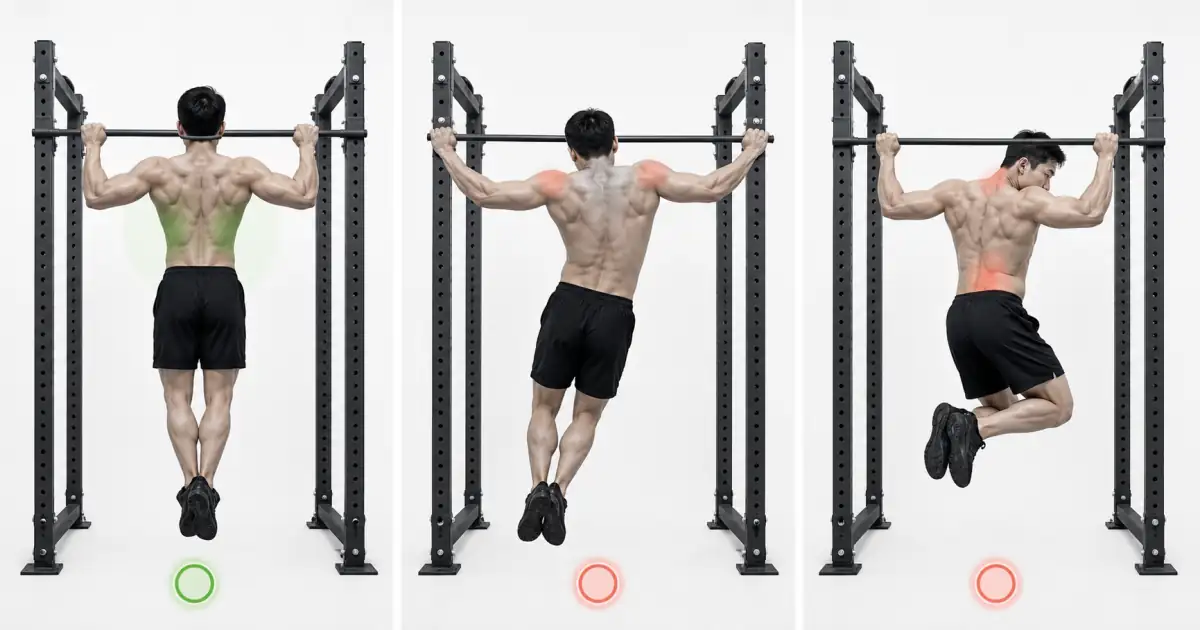
TROUBLESHOOTING
Fix the cause of a mistake, not just its appearance
Excessive extension of hands to the end of the bar
- What you see
- The elbows are almost stretched out to the side, the range of motion is shortened, and the front and top of the shoulders are pinched.
- Likely cause
- I ignored personal shoulder width and mobility because I thought the wider the area, the greater the stimulation of the lats.
- How to correct it
- Narrow it to about 1.3–1.5 times the width of your shoulders and make sure you can hang and descend without pain. If this is still uncomfortable, use a medium width.
Move your head forward to avoid the bar.
- What you see
- At the top, the chin moves sharply toward the chest and the back of the neck folds, leaving only the bar behind the neck.
- Likely cause
- The behind-the-neck range, which is difficult to create from the shoulder, was filled with neck movement.
- How to correct it
- Stop at a point where you can keep your neck neutral. It may be more appropriate to switch to the front path, where you pull the bar toward the front of your face and upper chest.
Raise your shoulders toward your ears
- What you see
- At the beginning and top of the pull, the upper part of the trapezius muscle rises and one shoulder rises first.
- Likely cause
- You are currently overweight or have lost control of your shoulder and elbow movements.
- How to correct it
- Increase the band or machine assistance and send your left and right elbows down at the same speed. Only repetitions that maintain symmetry and no pain are counted.
Go up by kicking your legs and bending your back
- What you see
- The knees and feet shake first, the ribs are lifted, and the body draws a large arc.
- Likely cause
- Strict pulling strength was lacking or repetitions were prioritized.
- How to correct it
- Finish the set and increase your assistance. Lower the difficulty level to a level where you can lower your ribs and pelvis for 2–3 seconds.
Press your neck against the bar at the top
- What you see
- With each repetition, the bar presses against the back of your neck or your head turns to one side.
- Likely cause
- Contact with the bar was taken as the criterion for complete repetition.
- How to correct it
- Be guided by controlled elbow bend and comfortable shoulder range, not bar contact. Full training benefits can be achieved even before contact.
Shoulder pulls sharply as you let go
- What you see
- Immediately after the top, the body falls and the bar and body swing at the bottom.
- Likely cause
- I only thought of the ascending section as repetition, or my grip and pulling muscles were already tired.
- How to correct it
- Finish the set before the 2–3 second descent collapses. Negatives are practiced as a separate set after making the upper part with a stable footing.
REGRESSION & PROGRESSION
Match the difficulty before adding load
Overgrip lat pulldown
With an adjustable load, pull the bar in front of your face and toward your upper chest, learning the wrist and elbow path.
Band/machine assisted front pull-ups
From an overgrip slightly wider than your shoulders, keep your neck neutral and make 6–10 reps and controlled descent.
Strict front wide pull-up
Pull the bar in front of your face and upper chest and repeat the same lower and upper movements without kicking your legs.
Partial range behind-the-neck pull-up
Only if you already perform front pull-ups reliably and have pain-free overhead mobility, practice up to a neutral neck range with generous assistance.
Behind-the-neck wide pull-up
Only skilled people who need it for personal purposes will proceed without assistance. Prioritize symmetrical shoulder and neck neutrality over bar contact or number of reps.
BEGINNER PROGRAM
A practical starting framework
The basic program is based on the more common front wide pull-up. Place on the front part of your back once or twice a week, leaving at least 48 hours between sessions. The behind-the-neck transformation in the video is a separate mobility/technique option and is not mandatory as a beginner's basic progression level.
number
4–8 times
Use band/machine assistance if necessary
set
3–4 sets
2–3 minutes recovery between sets
speed
1–2 second rise / 2–3 second fall
Maintain neck neutrality and left-right symmetry
- The first set uses sufficient assistance and a front path to check wrist, elbow, and shoulder response.
- Once a neutral neck, quiet legs, same bottom and top, and 2–3 second descent are maintained for all sets, add one repetition to the next session.
- If the path behind the neck causes the shoulders to pinch or the neck to stick out, stop the variation. Narrowing your grip or switching to a front path is not a retreat but an appropriate technique choice.
Frequently asked questions
How wide should your hands be for wide pull-ups?
Use approximately 1.3–1.5 times the width of your shoulders as a starting point, but pain-free suspension and full-range control are more important than numbers. If your wrists are bent or your shoulders are pinched and your descent is short, narrow it down a bit.
If I widen my grip, will my lats grow more?
The current study alone does not allow us to be so sure. In the pull-down study, lat muscle activity was higher for the overgrip than for the undergrip, but there was no difference between the wide grip and the shoulder-width grip, and in the pull-up grip study, overall muscle activity was generally similar. Long-term muscle growth is influenced by both consistent training volume and progressive overload.
What should I do first if I can’t do even one?
Start with overgrip lat pulldowns and band/machine assisted front pullups. Once you have maintained a neutral neck, quiet legs, and 6–10 second descents for 2–3 reps, gradually reduce your assistance.
Are behind-the-neck pull-ups absolutely dangerous?
There is no reason to conclude that injury occurs immediately in all practitioners. However, small-scale kinematics studies have observed patterns associated with collision risk for wide and reverse techniques, with the behind-the-neck route requiring greater shoulder mobility. If you don't have a purpose, it makes sense to give priority to the more comfortable front path.
Is it always wrong if your shoulders rise towards your ears?
When the arms are raised above the head, the shoulder blades naturally rotate upward and rise somewhat. The problem is when one side shrugs first without control or the neck shortens with pain. Rather than forcing your shoulder blades down, find a symmetrical, comfortable movement.
Evidence and references
- 1. Prinold·Bull — Shoulder movement and shoulder kinematics by pull-up technique
- 2. Dickie et al. — Comparison of muscle activity between over, under, neutral, and rope grip pull-ups
- 3. Youdas et al. — Comparison of muscle activity and elbow movement of pull-ups and chin-ups
- 4. Lusk et al. — Grip width, forearm direction, and muscle activity in lat pulldowns